
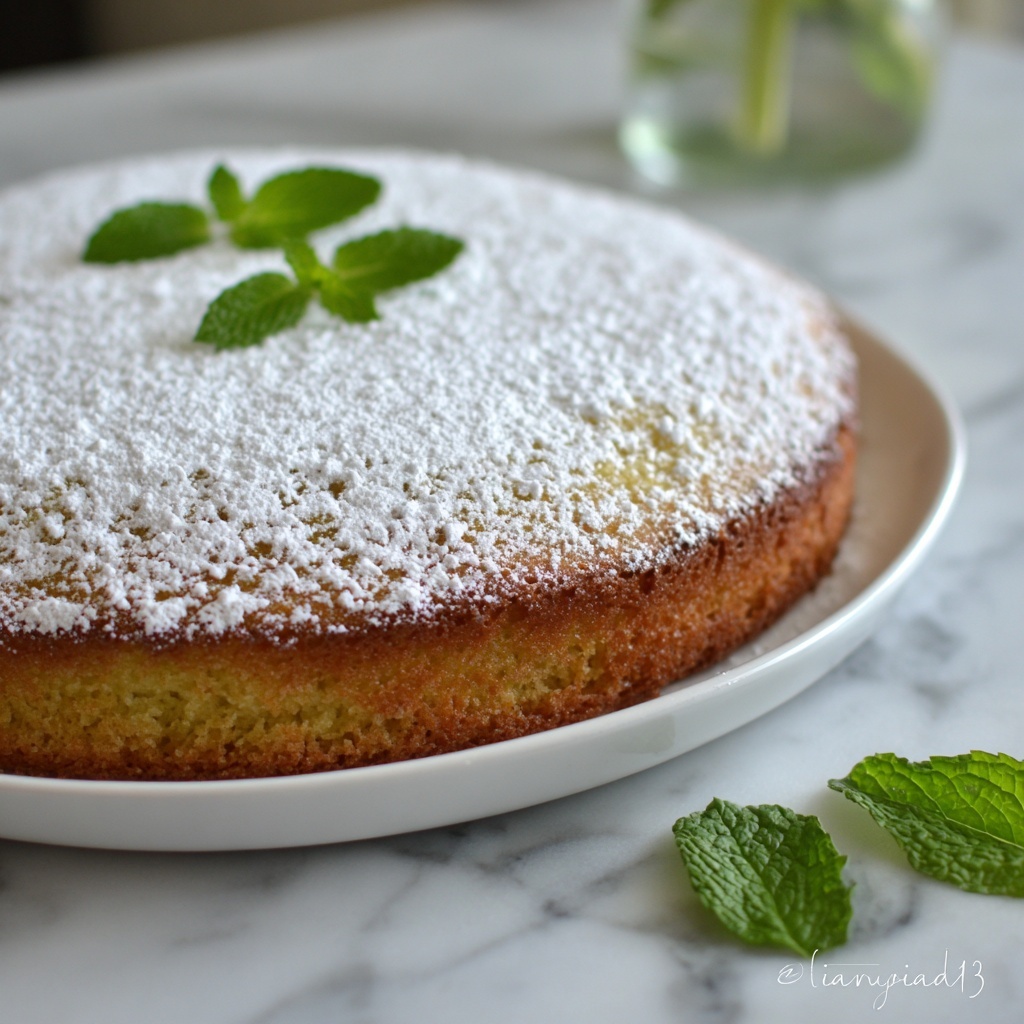
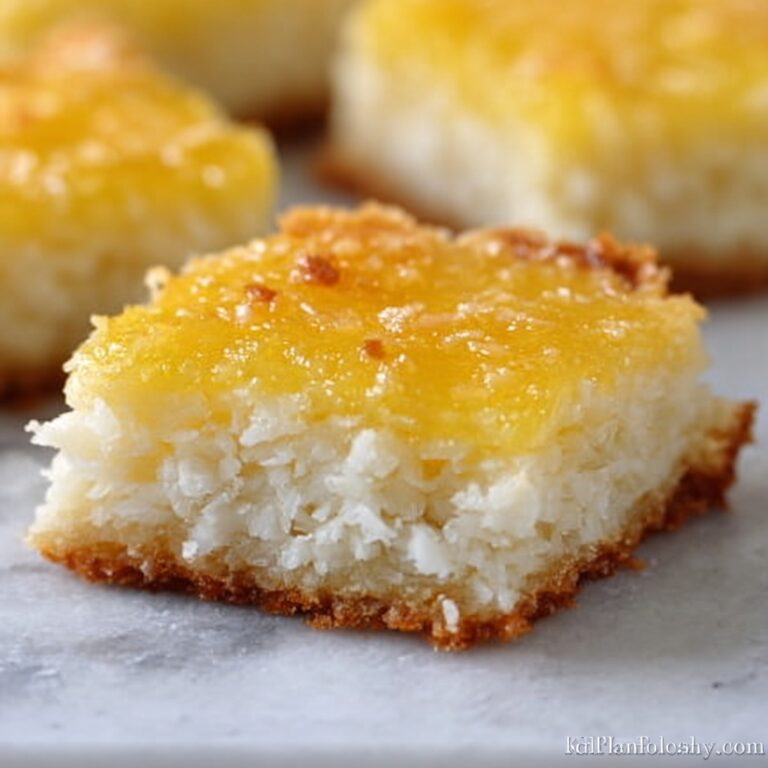
If you’ve ever dreamed of a dessert that feels like biting into a fluffy cloud with just a hint of creamy sweetness, then this Authentic Japanese Cotton Cheesecake: Fluffy & Light Recipe is going to become your new obsession. Unlike traditional cheesecakes that can be dense and heavy, this Japanese-style delight is renowned for its ethereal texture and subtle tang, making it an irresistibly delicate treat that melts in your mouth. Whether you’re an experienced baker or simply want to impress your friends with something extraordinary, this recipe promises a beautifully soft and airy cheesecake that’s as fun to make as it is to eat.
Ingredients You’ll Need
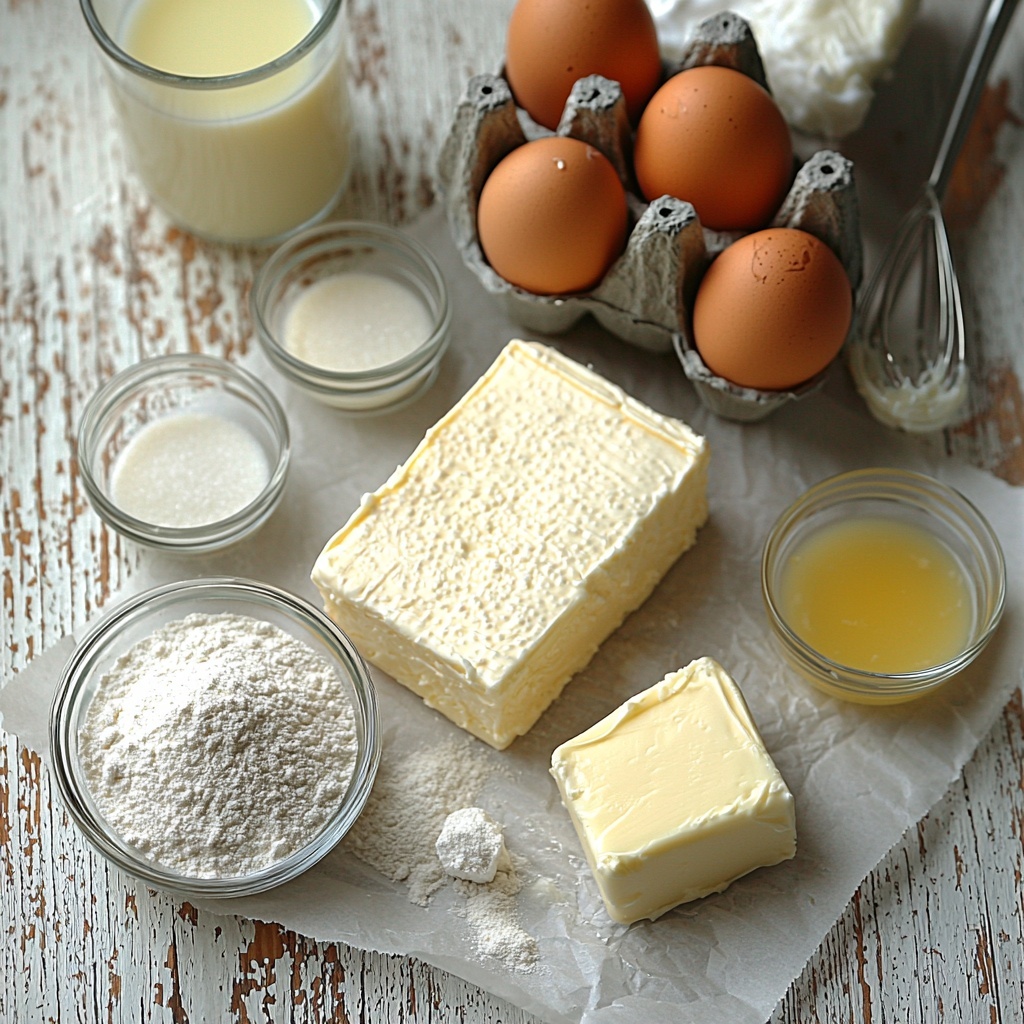
What’s truly special about the Authentic Japanese Cotton Cheesecake: Fluffy & Light Recipe is how simple ingredients come together to create such a heavenly dessert. Each element plays an important role, from the cream cheese that forms the rich base to the egg whites that give it that signature fluffiness and lift. Having these essentials perfectly balanced guarantees a smooth, melt-in-your-mouth texture.
- 8 oz full-fat cream cheese: Provides the rich, velvety foundation; make sure it’s at room temperature for easy blending.
- 4 large eggs, separated: Yolks add creaminess while whites are whipped for that trademark lightness.
- 1/2 cup whole milk: Adds moisture and helps loosen the batter for softness.
- 1/4 cup unsalted butter: Either at room temperature or melted, it enriches the flavor and texture.
- 1 cup cake flour: A finer, softer flour that maintains the cheesecake’s delicate crumb.
- 3/4 cup granulated sugar, divided: Balances sweetness and helps stabilize the meringue.
- 1 tablespoon lemon juice or cream of tartar: Stabilizes the egg whites for perfectly soft peaks.
How to Make Authentic Japanese Cotton Cheesecake: Fluffy & Light Recipe
Step 1: Prepare Your Pan
Start by lining the bottom of an 8-inch round springform pan with parchment paper and greasing the sides thoroughly. Then, wrap the outside of the pan with two layers of heavy-duty aluminum foil to prevent water from seeping in during the baking water bath. This prep ensures a smooth release and perfect texture.
Step 2: Preheat Oven & Prepare Water Bath
Preheat your oven to 325°F (160°C). At the same time, fill a larger roasting pan with about an inch of hot water. This water bath will gently cook the cheesecake, making it incredibly moist and preventing cracks.
Step 3: Prepare the Cream Cheese Batter
In a heatproof bowl placed over simmering water, combine your cream cheese, whole milk, and butter. Stir continuously until the mixture is smooth and melted. This gentle warming helps prevent lumps and creates a lovely silky base for the batter. Remove from heat and allow it to cool just slightly to avoid scrambling the eggs later.
Step 4: Add Egg Yolks and Dry Ingredients
Whisk in the egg yolks one at a time to incorporate them fully. Then sift in the cake flour along with a small portion of sugar. Gently fold everything together, being careful not to overmix – you want a tender but leveled batter.
Step 5: Make the Meringue
In a clean, grease-free bowl, beat the egg whites until foamy. Add the lemon juice (or cream of tartar) and slowly incorporate the remaining sugar while continuing to beat. Aim for soft peaks that hold their shape but still move slightly with the bowl’s motion. This step is critical for a light, airy cheesecake.
Step 6: Fold the Meringue into the Batter
Gently fold one-third of the meringue into the cream cheese batter to lighten it, then carefully fold in the remaining meringue in two additions. Use a spatula and take your time – this fold rather than vigorous mixing preserves the airiness essential to the final texture.
Step 7: Pour and Bake
Pour the batter into your prepared pan, tapping lightly on the counter to release any trapped air bubbles. Place the pan inside the water bath and bake at 325°F for 30 minutes. This initial baking helps the cheesecake rise and begin to set.
Step 8: Bake Slowly
Reduce the oven temperature to 285°F (140°C) and continue baking for another 60 to 70 minutes. The top should turn a gentle golden brown while the center retains a slight jiggle, indicating perfect doneness without drying out.
Step 9: Cooling Process
Turn off the oven and crack the door open slightly, leaving the cheesecake inside for at least an hour. This gradual cooling prevents sudden temperature changes that can cause cracks or sinking. Afterward, transfer the cake to a wire rack to cool completely at room temperature.
Step 10: Chill
For the best texture and flavor, cover the cooled cheesecake with plastic wrap and refrigerate for at least 4 hours or overnight. Chilling allows all the flavors to meld, and it firms up just enough for perfect slices.
How to Serve Authentic Japanese Cotton Cheesecake: Fluffy & Light Recipe
Garnishes
When it comes to garnishing, simplicity is often best. A light dusting of powdered sugar adds an elegant touch without overpowering the cheesecake’s delicate flavor. Fresh berries, like raspberries or strawberries, bring a bright contrast, while a drizzle of honey or a few edible flowers can enhance its airy charm.
Side Dishes
This cheesecake pairs wonderfully with a cup of green tea or a fruity iced tea to complement its subtle sweetness. For a fuller dessert experience, serve alongside light fruit salads or refreshing sorbets that won’t compete with the cheesecake’s unique texture.
Creative Ways to Present
Want to wow your guests? Slice the cheesecake into neat, tall wedges and serve on clear glass plates to showcase its fluffy layers. Layer with fruit compotes or serve in individual clear jars topped with berry coulis for a modern twist. For a celebratory vibe, add edible gold leaf on top for a touch of luxury.
Make Ahead and Storage
Storing Leftovers
Once baked and chilled, leftover Authentic Japanese Cotton Cheesecake: Fluffy & Light Recipe can be stored in an airtight container in the refrigerator for up to 4 days. It maintains its texture and flavor well, making it great for prepping ahead for gatherings or enjoying a few days of sweet indulgence.
Freezing
If you want to freeze leftover slices, wrap them tightly in plastic wrap and foil to protect from freezer burn. They can be kept frozen for up to one month. When ready to eat, thaw overnight in the refrigerator for best results, preserving the cheesecake’s signature fluffy softness.
Reheating
Because this cheesecake is prized for its light texture, reheating is best done gently. Warm slices in a low oven (about 275°F) for 10-15 minutes or serve chilled, depending on your preference. Avoid microwaving, which can make the cake rubbery and dense.
FAQs
What makes Japanese cotton cheesecake different from regular cheesecake?
The key difference lies in the texture and ingredients. Japanese cotton cheesecake uses whipped egg whites folded into a cream cheese mixture, creating a light, airy texture unlike the dense and rich traditional cheesecakes.
Can I use all-purpose flour instead of cake flour?
While all-purpose flour can work in a pinch, cake flour is preferred because it has lower protein content, resulting in a softer, more delicate crumb that defines the Authentic Japanese Cotton Cheesecake: Fluffy & Light Recipe.
Why is the cheesecake baked in a water bath?
The water bath provides gentle, even heat to prevent cracking and allows the cheesecake to remain moist and tender, which is essential for achieving that light, fluffy texture.
How do I know when the cheesecake is done?
The edges should be set and golden brown, but the center should still jiggle slightly when you gently shake the pan. This indicates it’s perfectly baked and will firm up as it cools.
Can I make this cheesecake dairy-free or vegan?
This traditional recipe relies on cream cheese, butter, and eggs for its unique texture, so making a dairy-free or vegan version would require significant substitutions that may alter the signature fluffiness. For true authenticity, it’s best to stick with the original ingredients.
Final Thoughts
Now that you’ve got the full scoop on creating the Authentic Japanese Cotton Cheesecake: Fluffy & Light Recipe, I hope you’re as excited as I am to give it a try. It’s a rewarding baking project that yields a stunningly light, delicate dessert sure to impress anyone lucky enough to try a slice. Once you experience that melt-in-your-mouth softness, you’ll understand why this cake has captured the hearts of dessert lovers worldwide. Happy baking!
Print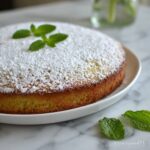
Authentic Japanese Cotton Cheesecake: Fluffy & Light Recipe
- Prep Time: 30 minutes
- Cook Time: 1 hour 40 minutes
- Total Time: 2 hours 10 minutes (excluding chilling time)
- Yield: 8 servings
- Category: Dessert
- Method: Baking
- Cuisine: Japanese
Description
This authentic Japanese cotton cheesecake is a delicate and fluffy dessert known for its light, airy texture that melts in your mouth. Made with cream cheese, eggs, and a gentle baking technique using a water bath, this cake balances sweetness and subtle tang while boasting a golden brown top and soft, jiggly center.
Ingredients
Cream Cheese Mixture
- 8 oz full-fat cream cheese, at room temperature
- 1/2 cup whole milk
- 1/4 cup unsalted butter, at room temperature or gently melted
Eggs and Dry Ingredients
- 4 large eggs, separated into yolks and whites
- 1 cup cake flour
- 3/4 cup granulated sugar, divided
- 1 tablespoon lemon juice or cream of tartar
Instructions
- Prepare Your Pan: Line the bottom of an 8-inch round springform pan with parchment paper and grease the sides. Wrap the outside of the pan securely with two layers of heavy-duty aluminum foil to prevent water from seeping in during the water bath.
- Preheat Oven & Water Bath: Preheat your oven to 325°F (160°C) and fill a larger roasting pan with about an inch of hot water to create a gentle steam environment for even baking.
- Prepare the Cream Cheese Batter: In a large heatproof bowl, combine the cream cheese, milk, and butter. Place the bowl over a pot of simmering water (double boiler) and stir continuously until the mixture is smooth and melted. Remove from heat and allow to cool slightly.
- Add Egg Yolks and Dry Ingredients: Whisk the egg yolks into the cooled cream cheese mixture one at a time. Then sift the cake flour and a portion of the sugar into the mixture, whisking gently until just combined without overmixing.
- Make the Meringue: In a clean, dry bowl, beat the egg whites until they become foamy. Add the lemon juice or cream of tartar, then gradually add the remaining sugar while continuing to beat until soft peaks form, providing structure and lightness to the cake.
- Fold the Meringue into the Batter: Gently fold one-third of the meringue into the cream cheese mixture to lighten it. Then carefully fold in the remaining meringue in two additions until the batter is homogeneous and no white streaks remain, preserving the air in the mixture.
- Pour and Bake: Pour the batter into the prepared springform pan and gently tap the pan to release any large air bubbles. Place the springform pan into the water-filled roasting pan and bake for 30 minutes.
- Bake Slowly: Reduce the oven temperature to 285°F (140°C) and continue baking for another 60-70 minutes until the top is golden brown and the center still has a slight jiggle, indicating the perfect soft texture inside.
- Cooling Process: Turn off the oven and prop the door open slightly to prevent cracking. Let the cheesecake cool inside the oven for at least one hour to settle gradually, then remove it and cool completely on a wire rack.
- Chill: After cooling, cover the cheesecake with plastic wrap and refrigerate for at least 4 hours or overnight to set fully, enhancing the flavor and texture before serving.
Notes
- Ensure the cream cheese is at room temperature for smooth blending.
- Use cake flour for a tender crumb; all-purpose flour can make the cake dense.
- Wrapping the pan in foil is essential to prevent water leakage during the water bath baking.
- Folding the meringue carefully preserves the airiness; avoid overmixing.
- Baking at a lower temperature after the initial baking prevents cracking and ensures a delicate texture.
- Chilling overnight improves the cake’s flavor and makes slicing easier.

