
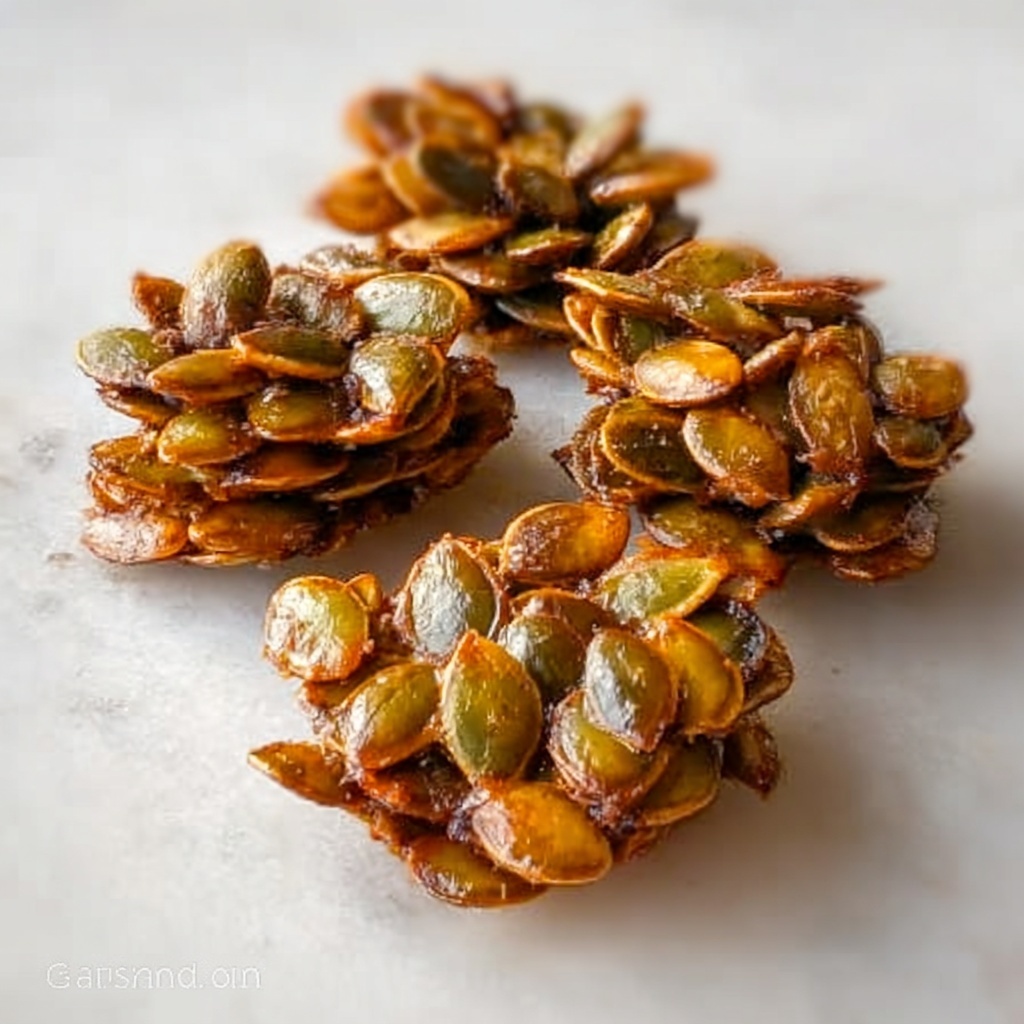
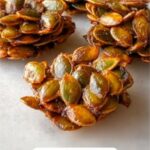
If you are on the hunt for a snack that perfectly balances crunch, sweetness, and a touch of warmth, look no further than this Vanilla Pumpkin Seed Clusters Recipe. These delightful little clusters bring together raw pumpkin seeds coated in a luscious blend of maple syrup, coconut sugar, and pure vanilla extract, roasted to golden perfection. Whether you want a wholesome snack or a crunchy topping, they deliver on both flavor and texture with ease—and trust me, once you try them, they’ll become a go-to favorite in your kitchen.

Ingredients You’ll Need
These simple, wholesome ingredients come together effortlessly, each playing a vital role in building the delicious flavor and irresistible crunch of this recipe. From the nutty pumpkin seeds to the warming vanilla essence, every component adds its unique charm.
- ½ cup (about 64g) raw, unsalted pumpkin seeds: The hearty base providing a satisfying crunch and rich, nutty flavor.
- 2 tsp (10 ml) maple syrup: Adds natural sweetness and helps bind the clusters together when baking.
- 2 tsp (8 g) coconut sugar: Offers a subtle caramel note and deepens the flavor complexity.
- 1 tsp (5 ml) pure vanilla extract: Brings a fragrant, warm essence that elevates the entire snack.
How to Make Vanilla Pumpkin Seed Clusters Recipe
Step 1: Preheat Your Oven
Start by setting your oven to 300°F (150°C). This low and steady temperature is just right for roasting the pumpkin seed clusters slowly, allowing them to get perfectly crunchy without risking any burnt edges. Precise heat control here is key to achieving that ideal texture we’re aiming for.
Step 2: Prepare the Syrup Mixture
In a medium bowl, combine the maple syrup, coconut sugar, and the pure vanilla extract. Stir these together until you have a thick, aromatic paste. Next, add a small splash of boiled water to thin it slightly into a runny syrup. This step is crucial because a smooth syrup ensures each seed can be coated evenly, creating wonderfully cohesive clusters after baking.
Step 3: Coat the Pumpkin Seeds
Once your syrup is ready, add the raw pumpkin seeds into the bowl. Stir everything thoroughly so each seed is generously covered with the sweet vanilla-infused syrup. This even coating will help the seeds stick together as they roast, forming those satisfying bite-sized clusters we love.
Step 4: Form the Clusters on the Baking Sheet
Line a baking sheet with parchment paper or a silicone baking mat to prevent sticking. Using a teaspoon, drop heaping spoonfuls of the coated pumpkin seeds onto the sheet, making sure to leave some space between each mound. This prevents the clusters from merging into one large sheet, allowing each to bake into distinct, crunchy nuggets.
Step 5: Bake to Golden Perfection
Place the clusters in the oven and bake for 15 to 20 minutes. Keep an eye on them near the end to catch the moment they turn lightly golden brown. Every oven heats a little differently, so adjusting the time accordingly will help you avoid burning and keep the clusters perfectly crunchy.
Step 6: Shape and Cool the Clusters
Remove the baking sheet from the oven and let the clusters cool for a few minutes. While still warm and pliable, press the clusters firmly to encourage them to hold their shape as they finish cooling and drying. This little step means your clusters won’t crumble apart and will stay together beautifully when snacking.
Step 7: Ready to Enjoy
After the clusters have fully cooled and dried, they are ready to be enjoyed as a standalone snack. They also make an incredible crunchy topping sprinkled over cereal, yogurt, or even desserts to add texture and a burst of warm vanilla flavor.
How to Serve Vanilla Pumpkin Seed Clusters Recipe
Garnishes
Enhance your Vanilla Pumpkin Seed Clusters Recipe experience by pairing the clusters with a dollop of Greek yogurt and a drizzle of honey. Sprinkling some cinnamon or nutmeg on top can also add a cozy spice touch that harmonizes beautifully with the vanilla notes.
Side Dishes
These clusters shine as a snack on their own but also pair wonderfully with fresh fruit like crisp apples or ripe pears. They add a delightful textural contrast alongside creamy dips or soft cheese platters, perfect for casual get-togethers or afternoon tea.
Creative Ways to Present
Try serving the Vanilla Pumpkin Seed Clusters Recipe in small glass jars as charming grab-and-go gifts or party favors. For a festive touch, layer them in clear bowls with alternating layers of yogurt and fruit for a crunchy parfait or sprinkle over homemade ice cream for an unexpected crunch.
Make Ahead and Storage
Storing Leftovers
Keep your delicious pumpkin seed clusters fresh by storing them in an airtight container at room temperature. They will maintain their perfect crunch and flavor for 3 to 4 days, making them a convenient snack to enjoy throughout the week.
Freezing
If you want to extend their shelf life, feel free to freeze the clusters. Place them in a sealed freezer bag or container, separating layers with parchment paper to prevent sticking. When stored this way, they can last for up to one month without losing their crunch or flavor.
Reheating
To restore some of the freshly baked crispness, reheat the clusters in a 300°F (150°C) oven for 5 to 7 minutes. Keep a close watch to avoid burning. This quick refresh will revive their delightful crunch and aroma, as if they were just made.
FAQs
Can I use roasted pumpkin seeds instead of raw?
Raw pumpkin seeds are best for this recipe because they absorb the syrup mixture better and bake into crisp clusters. Using pre-roasted seeds might result in uneven coating or overly hard clusters.
Is coconut sugar necessary, or can I substitute it?
Coconut sugar adds a subtle caramel flavor that complements the vanilla and pumpkin seeds nicely. However, you can substitute it with brown sugar or raw sugar if needed, but the flavor profile may change slightly.
How do I prevent the clusters from sticking to the baking sheet?
Using parchment paper or a silicone baking mat is essential to prevent sticking. Avoid greasing the sheet, which can cause the clusters to melt into a flat sheet instead of holding their shape.
Can I make these clusters vegan and allergy-friendly?
This recipe is naturally vegan and gluten-free. Just ensure the vanilla extract you use does not contain alcohol or additives you want to avoid. It’s a wholesome snack suitable for many dietary preferences.
What’s the best way to enjoy these clusters?
These clusters are perfect as a nutritious snack by themselves, but don’t hesitate to add them to your breakfast bowls, salads, or even desserts to add a sweet crunch that makes every bite exciting.
Final Thoughts
I hope this Vanilla Pumpkin Seed Clusters Recipe inspires you to whip up a batch that soon becomes a beloved staple in your snack rotation. The combination of simple ingredients and straightforward steps delivers something truly special—deliciously crunchy, lightly sweet, and so satisfying. So, grab those pumpkin seeds, and let the magic of roasting and vanilla infusion work its wonders. You’ll be gifting yourself a snack that’s as delightful to make as it is to eat!
Print
Vanilla Pumpkin Seed Clusters Recipe
- Prep Time: 5 minutes
- Cook Time: 15-20 minutes
- Total Time: 20-25 minutes
- Yield: 30 small clusters
- Category: Snack
- Method: Baking
- Cuisine: American
- Diet: Vegetarian
Description
These Vanilla Pumpkin Seed Clusters are a delightful and crunchy snack, perfectly sweetened with maple syrup and coconut sugar, and infused with pure vanilla extract. Roasted to golden perfection, these clusters make an excellent healthy treat or a crunchy topping for your breakfast bowls.
Ingredients
Ingredients
- ½ cup (about 64g) raw, unsalted pumpkin seeds
- 2 tsp (10 ml) maple syrup
- 2 tsp (8 g) coconut sugar
- 1 tsp (5 ml) pure vanilla extract
- A small splash of boiled water (to thin syrup)
Instructions
- Preheat Oven: Preheat your oven to 300°F (150°C) to create an ideal roasting environment that crisps the pumpkin seed clusters without burning them.
- Prepare Syrup Mixture: In a medium bowl, thoroughly mix the maple syrup, coconut sugar, and vanilla extract until they form a thick paste. Gradually add a small splash of boiled water to thin it into a runny syrup to help coat the pumpkin seeds evenly.
- Coat Pumpkin Seeds: Add the raw pumpkin seeds to the syrup mixture and stir well to ensure every seed is evenly coated, which is essential for the clusters to stick together during baking.
- Form Clusters: Using a teaspoon, drop heaping spoonfuls of the coated seeds onto a baking sheet lined with parchment paper or a silicone mat. Space the mounds apart so they do not merge while baking, preserving individual cluster shapes.
- Bake Clusters: Bake in the preheated oven for 15 to 20 minutes. Watch carefully toward the end to catch the seeds turning a light golden brown without burning. Adjust time as needed, since oven temperatures may vary.
- Shape Clusters: Remove from oven and allow clusters to cool slightly. While still warm, press them firmly to help hold their shape as they cool and dry completely.
- Serve: Once fully cooled, enjoy these clusters as a standalone healthy snack or sprinkle them over cereal or yogurt for a crunchy flavor boost.
Notes
- Ensure the syrup is thin enough to coat the seeds evenly but not too runny to prevent spreading on the baking sheet.
- Do not overcrowd the baking sheet to maintain cluster shape and promote even baking.
- Store cooled clusters in an airtight container to keep them fresh and crunchy.
- Use parchment paper or silicone mats to prevent sticking and ease cleanup.
- Adjust baking time slightly based on your oven’s heat distribution for best results.
