
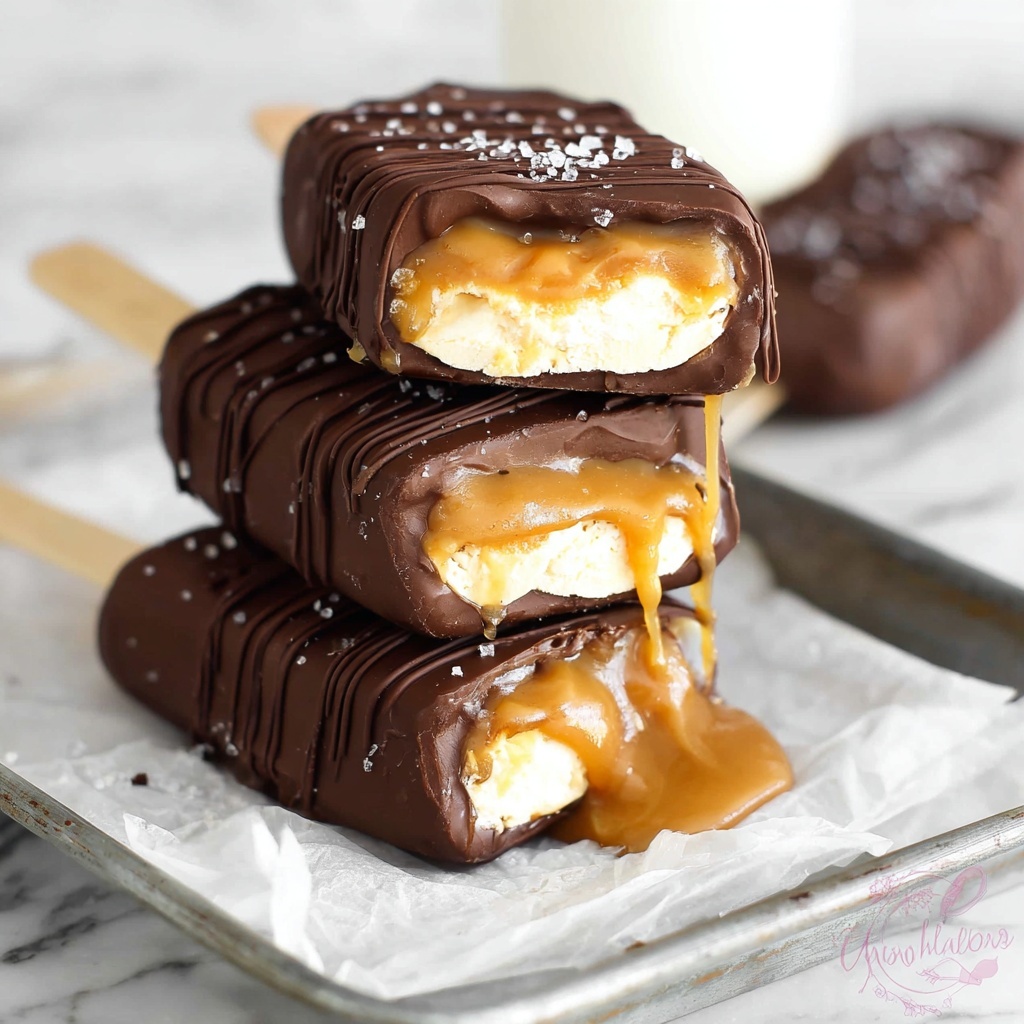
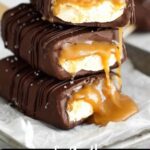
There is nothing quite like the perfect combination of creamy, nutty, and chocolatey in a frozen treat, which is exactly why this Peanut Butter Ice Cream Bars Recipe has become one of my all-time favorites. It’s a dreamy blend of velvety coconut milk ice cream infused with smooth peanut butter, layered with luscious chocolate coating, and finished with a sprinkle of sea salt to wake up each bite. Whether it’s a hot summer day or you just want to indulge in something delightfully cool, these bars are a total game changer that will have you craving more with every bite.
Ingredients You’ll Need
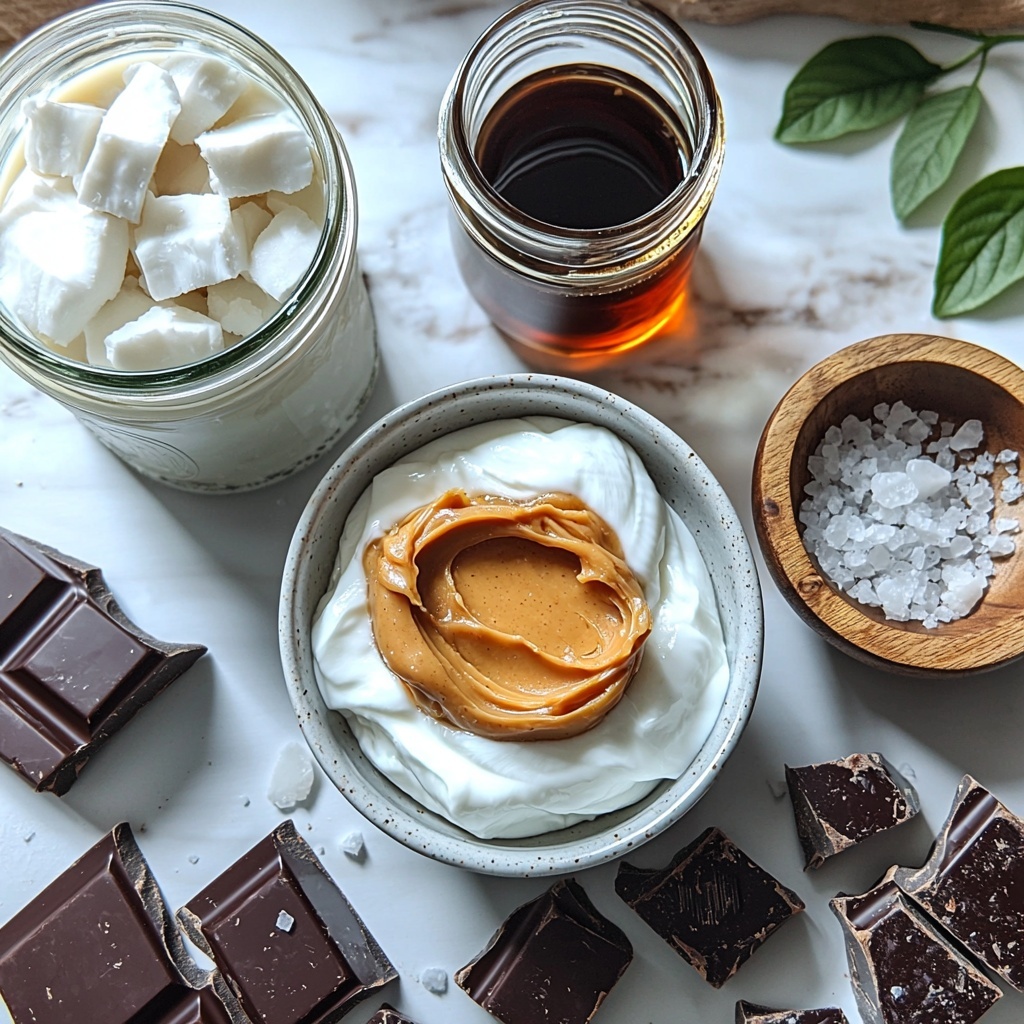
What I love most about this Peanut Butter Ice Cream Bars Recipe is how straightforward and accessible the ingredients are. Each one plays an essential role—from the creamy coconut milk that gives the base a silky texture, to the rich peanut butter powering the flavor, and the pure maple syrup adding just the right touch of natural sweetness.
- 180 g chilled canned full-fat coconut milk: This provides a rich, creamy base that’s dairy-free and adds wonderful body to the ice cream.
- 100 g smooth peanut butter: Gives the ice cream that signature creamy peanut flavor in every spoonful.
- 60 g vegan yogurt: Adds a subtle tang and helps create a smooth and soft texture.
- 60 ml pure maple syrup: A natural sweetener that balances the peanut butter’s savory notes beautifully.
- 100 g smooth peanut butter (for coating): Melted to perfectly coat the frozen bars, creating a delightful peanut butter shell.
- 140 g dark chocolate: Melts into a glossy, rich chocolate coating that crisps up wonderfully once frozen.
- Sea salt (to garnish): A touch of salt enhances all the flavors and adds contrast to the sweet and nutty layers.
How to Make Peanut Butter Ice Cream Bars Recipe
Step 1: Prepare Your Ice Cream Molds
Start by placing your ice cream molds on a sturdy tray that fits comfortably into your freezer. This setup keeps everything stable for the filling and freezing stages, ensuring smooth, even bars that pop right out when ready.
Step 2: Blend the Ice Cream Base
Into a high-speed blender, add the chilled coconut milk, vegan yogurt, maple syrup, and 100 grams of smooth peanut butter. Blend everything until silky smooth and creamy, scraping down the sides as needed to make sure no chunks are left unblended. This step is where the magic starts — the base needs to be perfectly smooth for that luscious ice cream texture.
Step 3: Fill the Molds
Transfer the silky mixture into a piping bag for neatness or spoon it in carefully if you prefer. Fill each mold almost to the top, and then insert a wooden lolly stick in the center of each one. This is your handle for enjoying the bars later, so make sure it stays upright and well-centered before freezing.
Step 4: Freeze Until Firm
Pop the tray into the freezer and let the ice cream set for at least 4 to 6 hours, or until completely solid. Patience is key here — rushing the freeze can cause uneven texture or make it tricky to coat later.
Step 5: Melt the Peanut Butter for Coating
Gently melt the 100 grams of smooth peanut butter over a double boiler until it reaches a runny, dip-friendly consistency. Pour this melted peanut butter into a tall glass for easy dipping.
Step 6: Dip in Peanut Butter
Remove the ice cream bars from their molds and dip each one quickly into the melted peanut butter. Return them to the tray lined with parchment paper, and freeze for another 10 minutes to let the coating firm up nicely.
Step 7: Melt the Chocolate for Final Coating
Next, melt your dark chocolate using the double boiler method until smooth and shiny. Pour it into a tall glass, just like with the peanut butter, to make dipping easy and quick.
Step 8: Dip in Chocolate and Garnish
Dip each peanut butter-coated bar into the melted dark chocolate, then lay them back on the tray. Let the chocolate firm by freezing for another 10 minutes. Before serving, drizzle any leftover chocolate on top and sprinkle a pinch of sea salt to elevate the flavor complexity—all those layers of sweet, salty, chocolatey, and nutty goodness coming together perfectly!
How to Serve Peanut Butter Ice Cream Bars Recipe
Garnishes
A simple sprinkle of flaky sea salt or even some crushed roasted peanuts adds an irresistible crunch and bursts of flavor on top of these bars. You can also drizzle some extra melted dark chocolate or peanut butter for a sophisticated finish that makes these bars look just as good as they taste.
Side Dishes
These bars are fantastic on their own but can also be paired with fresh berries, a drizzle of caramel sauce, or even a scoop of vanilla bean ice cream if you want to play with textures and temperatures. Light, fresh fruits add a refreshing balance to the richness of the peanut butter and chocolate.
Creative Ways to Present
Try layering these bars stacked on a rustic wooden board garnished with edible flowers or nuts for a stunning dessert platter. You can also portion smaller bars into mini cups as a party treat or create personalized bars with fun toppings like sprinkles or mini chocolate chips for a playful twist.
Make Ahead and Storage
Storing Leftovers
Your Peanut Butter Ice Cream Bars Recipe bars keep beautifully in the freezer when stored properly. Use an airtight container with sheets of parchment paper between each bar to prevent sticking and preserve texture and flavor for up to 3 months.
Freezing
If you’re planning ahead, freeze the bars fully after dipping and garnishing, placing them on a parchment-lined tray before transferring to your container. This ensures they freeze individually and maintain their shape without sticking together.
Reheating
Since these are ice cream bars, reheating is not recommended! Instead, simply let them sit at room temperature for 5 minutes before serving to allow just a slight softening, bringing out the perfect bite every time.
FAQs
Can I use crunchy peanut butter for this recipe?
You can, but smooth peanut butter works best for achieving that silky ice cream texture and smooth coating. Crunchy peanut butter might cause the ice cream mixture or coating to be uneven or gritty.
Is this recipe dairy-free?
Absolutely! The recipe uses coconut milk and vegan yogurt, making it a fantastic dairy-free and vegan-friendly dessert option.
How long does it take to make these bars?
The active prep time is about 20 minutes, but the freezing process takes 4 to 6 hours plus extra time for the coatings to set, so plan ahead for the best results.
Can I substitute the maple syrup with another sweetener?
Yes! You can swap maple syrup for agave nectar, honey (if not strictly vegan), or a simple syrup, but maple syrup offers a unique depth of flavor that complements the peanut butter beautifully.
What if I don’t have ice cream molds?
You can improvise by using small silicone muffin cups or mini loaf pans lined with parchment paper, just make sure to insert sticks and freeze well before coating.
Final Thoughts
This Peanut Butter Ice Cream Bars Recipe truly feels like a little frozen slice of heaven. It’s simple to make with ingredients you likely already have, and the delightful combination of coconut cream, peanut butter, and chocolate will win over anyone lucky enough to try it. Give yourself the gift of this homemade treat—you deserve it, and I promise these bars will soon become your new go-to dessert!
Print
Peanut Butter Ice Cream Bars Recipe
- Prep Time: 20 minutes
- Cook Time: 10 minutes
- Total Time: 6 hours 30 minutes
- Yield: 4 bars
- Category: Dessert
- Method: Freezing with Double Boiler Melting
- Cuisine: American
- Diet: Vegan
Description
Delight in these creamy, homemade Peanut Butter Ice Cream Bars, crafted with rich coconut milk, smooth peanut butter, and vegan yogurt, coated in luscious dark chocolate and a sprinkle of sea salt for an irresistible frozen treat perfect for warm days or anytime you crave a delightful dessert.
Ingredients
Ice Cream
- 180 g chilled canned full-fat coconut milk
- 100 g smooth peanut butter
- 60 g vegan yogurt
- 60 ml pure maple syrup
Coating
- 100 g smooth peanut butter
- 140 g dark chocolate
- Sea salt, to garnish
Instructions
- Prepare Ice Cream Molds: Place the ice cream molds on a tray that fits into your freezer to ensure stability when filling and freezing.
- Make Ice Cream Mixture: Add coconut milk, 100 g peanut butter, vegan yogurt, and maple syrup into a high-speed blender. Blitz until smooth and creamy, scraping down the sides as needed for even blending.
- Fill Molds: Transfer the creamy mixture into a piping bag and pipe it into the molds. Alternatively, spoon the mixture into molds carefully. Insert a wooden lolly stick into each ice cream to serve as a handle.
- Freeze Ice Cream: Place the filled molds into the freezer for 4 to 6 hours, until the ice cream is completely set and firm.
- Remove Ice Cream Bars: Carefully unmold the ice cream bars and place them back on a tray lined with parchment paper in the freezer until ready for coating.
- Melt Peanut Butter Coating: In a heat-resistant bowl, melt the remaining 100 g of smooth peanut butter over a double boiler until runny. Transfer melted peanut butter to a tall glass for easy dipping.
- Coat with Peanut Butter: Dip each frozen ice cream bar into the melted peanut butter, then set them back on the tray and freeze for 10 minutes to set the coating.
- Melt Chocolate Coating: Melt the dark chocolate in a heat-resistant bowl over a double boiler until smooth and glossy. Transfer to a tall glass for dipping.
- Coat with Chocolate: Dip each peanut butter coated ice cream bar into the melted chocolate. Place bars back on the tray and freeze for 10 minutes until the chocolate is set. Drizzle any remaining chocolate over the bars and sprinkle with sea salt for extra flavor.
- Storage and Serving: Serve the bars immediately or store them in an airtight container separated by parchment paper sheets in the freezer for up to 3 months.
Notes
- For best results, use full-fat canned coconut milk chilled overnight to achieve a creamy texture.
- You can substitute maple syrup with agave syrup or honey if not strictly vegan.
- Ensure peanut butter is smooth and runny for coating; if thick, gently warm it until pourable.
- Use a high-speed blender to fully emulsify the ice cream base for smoothness.
- Mold size and shape can be adjusted based on preference, just ensure lolly sticks fit comfortably.
- The double boiler melting method prevents burning the peanut butter and chocolate, ensuring a silky coating.
- Adding sea salt on top balances the sweetness and enhances the peanut butter and chocolate flavors.