

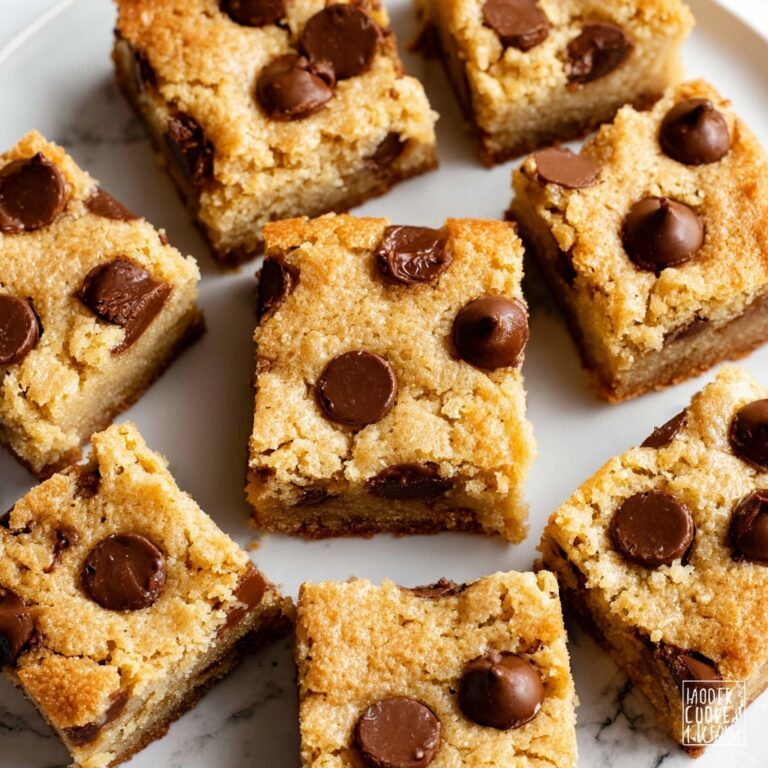
If you have a soft spot for brownies and cookies alike, you’re going to fall head over heels for this Meltaway Brownie Cookies Recipe. These delightful treats combine the fudgy, rich characteristics of a classic brownie with the chewy, portable ease of a cookie. Perfectly tender with a luscious chocolate flavor and a hint of sweetness, these cookies truly live up to their name—they practically melt in your mouth from the very first bite. Whether you’re baking for a special occasion or just craving a decadent snack, this recipe delivers simplicity and scrumptiousness all in one.
Ingredients You’ll Need
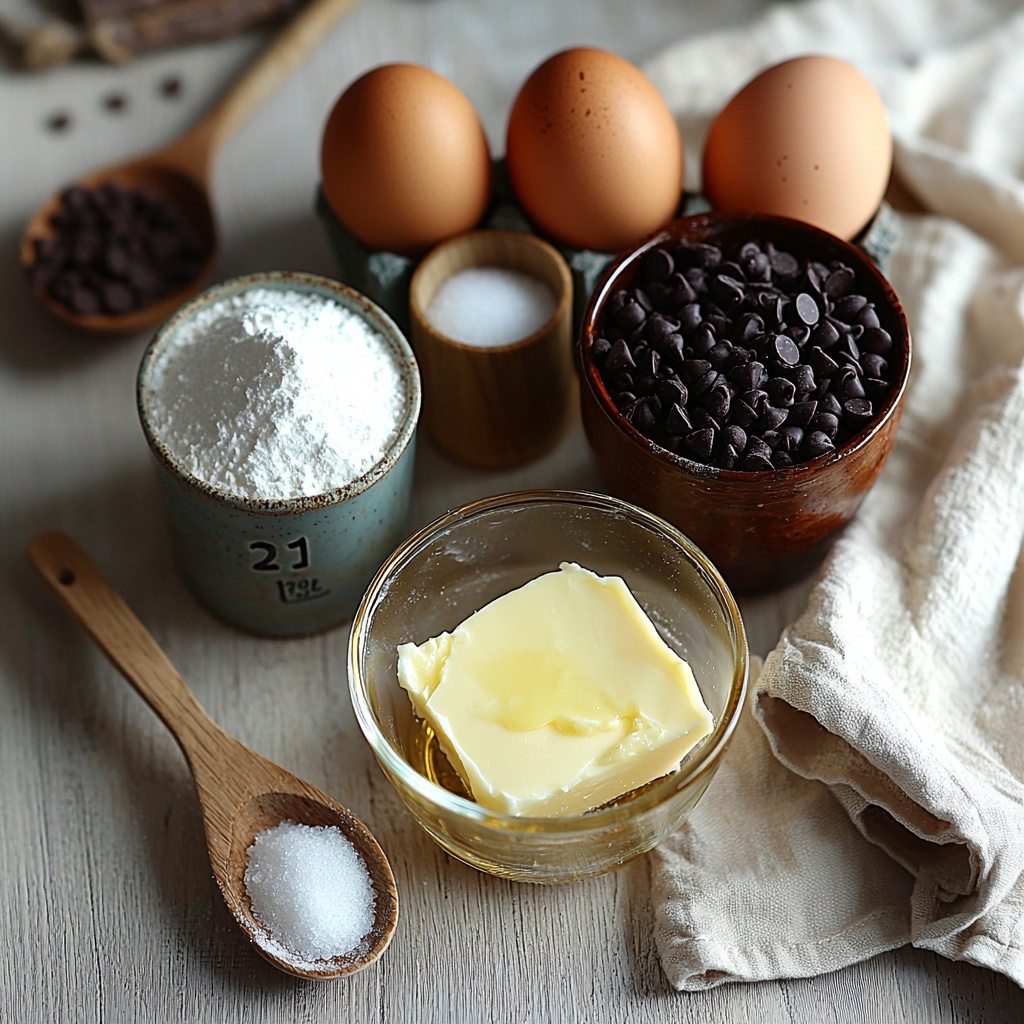
All the ingredients for this Meltaway Brownie Cookies Recipe are simple staples that you might already have in your pantry, yet each has a thoughtfully important role. From the melted butter that provides richness to the cocoa powder that brings deep chocolate intensity, every component works together to create that perfect meltaway texture and mouthwatering taste.
- ½ cup unsalted butter, melted: Adds smooth richness and keeps the cookies tender.
- 1 cup granulated sugar: Balances the bitterness of cocoa while contributing to the chewy texture.
- 2 large eggs: Bind the ingredients and give the cookies structure.
- 1 teaspoon vanilla extract: Elevates the chocolate flavor with a warm, aromatic note.
- ⅓ cup cocoa powder: Delivers the intense chocolate essence that defines these cookies.
- 1 teaspoon baking powder: Ensures a slight lift, keeping cookies soft but not cakey.
- ¼ teaspoon salt: Enhances all the flavors and balances sweetness perfectly.
- 1 cup all-purpose flour: Provides the necessary body and chew to the cookie.
- 1 cup semi-sweet chocolate chips: Adds melty pockets of gooey chocolate throughout.
- Powdered sugar (optional, for dusting): A pretty finishing touch that adds a little sweetness and visual appeal.
How to Make Meltaway Brownie Cookies Recipe
Step 1: Prepare the Dough
Start by preheating your oven to 350°F (175°C) and lining two baking sheets with parchment paper—this ensures your cookies won’t stick and clean-up is a breeze. In a large bowl, whisk together the melted unsalted butter and granulated sugar until the mixture is smooth and glossy. Then add the eggs and vanilla extract, whisking again until everything is fully combined. Next, sift in the cocoa powder, baking powder, and salt to avoid lumps and evenly distribute the leavening agent. Stir the wet and dry ingredients gently until smooth. Gradually fold in the flour, being careful not to overmix to keep the cookies tender, and finally add the chocolate chips for bursts of gooey chocolate in every bite.
Step 2: Shape the Cookies
Using a tablespoon or cookie scoop, drop rounded dough balls onto your prepared baking sheets, spacing them about 2 inches apart. This spacing allows the cookies to spread slightly without merging into each other, helping them bake evenly and maintain their appealing shape.
Step 3: Bake the Cookies
Bake in your preheated oven for 10 to 12 minutes. You’ll want to look for set edges while the centers remain a bit soft and slightly underbaked—this is key for that melt-in-your-mouth brownie texture. After baking, let the cookies cool on the baking sheets for around 5 minutes before transferring them to a wire rack. This rest time helps them firm up just enough while retaining their signature fudgy softness.
Step 4: Serve and Enjoy
If you like, dust your warm cookies with powdered sugar for a pretty, restaurant-style finish. Serve these delights with a cold glass of milk or your favorite cup of coffee, and prepare for some serious cookie bliss!
How to Serve Meltaway Brownie Cookies Recipe
Garnishes
While these cookies are fantastic on their own, a dusting of powdered sugar adds just the right amount of sweet contrast and a snow-like aesthetic that’s perfect for festive occasions. You could also drizzle melted white or dark chocolate on top for an extra touch of indulgence and visual appeal.
Side Dishes
For a truly satisfying dessert experience, pair your Meltaway Brownie Cookies with a scoop of vanilla ice cream or a dollop of whipped cream. Fresh berries, like raspberries or strawberries, complement the deep chocolate flavor, adding a burst of brightness and color that makes the whole presentation pop.
Creative Ways to Present
Try stacking the cookies to form a mini tower on a rustic wooden board for sharing. Or arrange them inside a decorative tin layered with parchment paper to give as heartfelt gifts to friends and family. You can even sandwich some cookie halves with peanut butter or marshmallow fluff for a delightful twist!
Make Ahead and Storage
Storing Leftovers
If you have any leftovers from your baking session, keep them in an airtight container at room temperature for up to 3 days. This will maintain their tender texture and chocolatey good taste without drying out.
Freezing
These cookies also freeze beautifully. Place them in a single layer on a baking sheet and freeze until solid, then transfer to a freezer-safe bag or container. They’ll keep well for up to 2 months. Whenever a chocolate craving strikes, just thaw a few at room temperature or warm them slightly for that fresh-baked feel.
Reheating
To bring back that warm, meltaway magic, pop the cookies in the microwave for about 10 to 15 seconds or warm them gently in a preheated oven at 300°F for 5 minutes. The chocolate chips will soften and the cookie edges will regain their tender texture—pure bliss!
FAQs
Can I use salted butter instead of unsalted?
Yes, you can use salted butter if that’s what you have on hand. Just reduce or omit the added salt in the recipe to avoid over-salting the cookies.
What type of cocoa powder is best?
Natural unsweetened cocoa powder works best for this recipe as it provides a bright, rich chocolate flavor. Avoid Dutch-processed cocoa if you want the exact texture and rise as intended.
Can I substitute the all-purpose flour with gluten-free flour?
You can try a gluten-free flour blend, but results may vary slightly in texture. Make sure to use a 1:1 gluten-free baking flour for best results.
Why do the cookies need to look slightly underbaked in the center?
That slight underbake is crucial to keeping the cookies fudgy and soft inside, mimicking the inviting texture of a brownie rather than a crisp cookie.
How do I prevent these cookies from spreading too much while baking?
Chilling the dough for 15-30 minutes before baking can help reduce spread. Also, make sure your butter is properly melted but not overheated, and use the precise amount of flour.
Final Thoughts
There is something undeniably comforting and indulgent about these Meltaway Brownie Cookies Recipe treats. They’re easy to make, irresistibly soft, and flavored with a deep chocolate richness that satisfies every sweet tooth. Whether you’re sharing them with loved ones or keeping them as your delicious secret, these cookies are sure to become a beloved favorite in your baking repertoire. Trust me, once you try them, you’ll want to bake them again and again!
Print
Meltaway Brownie Cookies Recipe
- Prep Time: 10 minutes
- Cook Time: 12 minutes
- Total Time: 22 minutes
- Yield: 24 cookies
- Category: Dessert
- Method: Baking
- Cuisine: American
Description
These Meltaway Brownie Cookies combine the rich, fudgy flavor of classic brownies with the perfect soft and chewy cookie texture. Easy to make with simple pantry ingredients, these cookies have a deep chocolate taste accented by melty semi-sweet chocolate chips and a dusting of powdered sugar for an elegant finish. Perfect for a quick dessert or an anytime chocolate treat.
Ingredients
Cookie Dough
- ½ cup unsalted butter, melted
- 1 cup granulated sugar
- 2 large eggs
- 1 teaspoon vanilla extract
- ⅓ cup cocoa powder
- 1 teaspoon baking powder
- ¼ teaspoon salt
- 1 cup all-purpose flour
- 1 cup semi-sweet chocolate chips
Optional Topping
- Powdered sugar, for dusting
Instructions
- Prepare the Dough: Preheat your oven to 350°F (175°C) and line two baking sheets with parchment paper to prevent sticking. In a large bowl, whisk the melted butter and granulated sugar together until the mixture is smooth and creamy. Add the eggs and vanilla extract, whisking thoroughly until fully incorporated. Sift in the cocoa powder, baking powder, and salt to avoid lumps, and mix until you have a smooth batter. Gradually fold in the all-purpose flour to gently combine, then stir in the semi-sweet chocolate chips evenly throughout the dough.
- Shape the Cookies: Using a tablespoon or a cookie scoop, drop rounded balls of dough onto the prepared baking sheets. Make sure to space each dough ball about 2 inches apart to allow room for spreading during baking.
- Bake the Cookies: Place the baking sheets in the preheated oven and bake the cookies for 10 to 12 minutes. The edges should be set while the centers remain slightly underbaked to achieve the perfect soft and chewy texture. Once done, let the cookies cool on the baking sheets for about 5 minutes to firm up before transferring them to a wire rack to cool completely.
- Serve: Optionally dust the cooled cookies with powdered sugar for a delicate, sweet finishing touch. Serve alongside a glass of milk or your favorite beverage and enjoy the rich, melt-in-your-mouth chocolate experience.
Notes
- For fudgier cookies, slightly underbake and allow residual heat to finish cooking the centers.
- You can substitute semi-sweet chocolate chips with dark or milk chocolate chips according to your preference.
- Store cookies in an airtight container at room temperature for up to 5 days.
- For a gluten-free version, use a 1-to-1 gluten-free flour blend instead of all-purpose flour.
- Dusting with powdered sugar is optional but adds a lovely aesthetic and touch of sweetness.


