
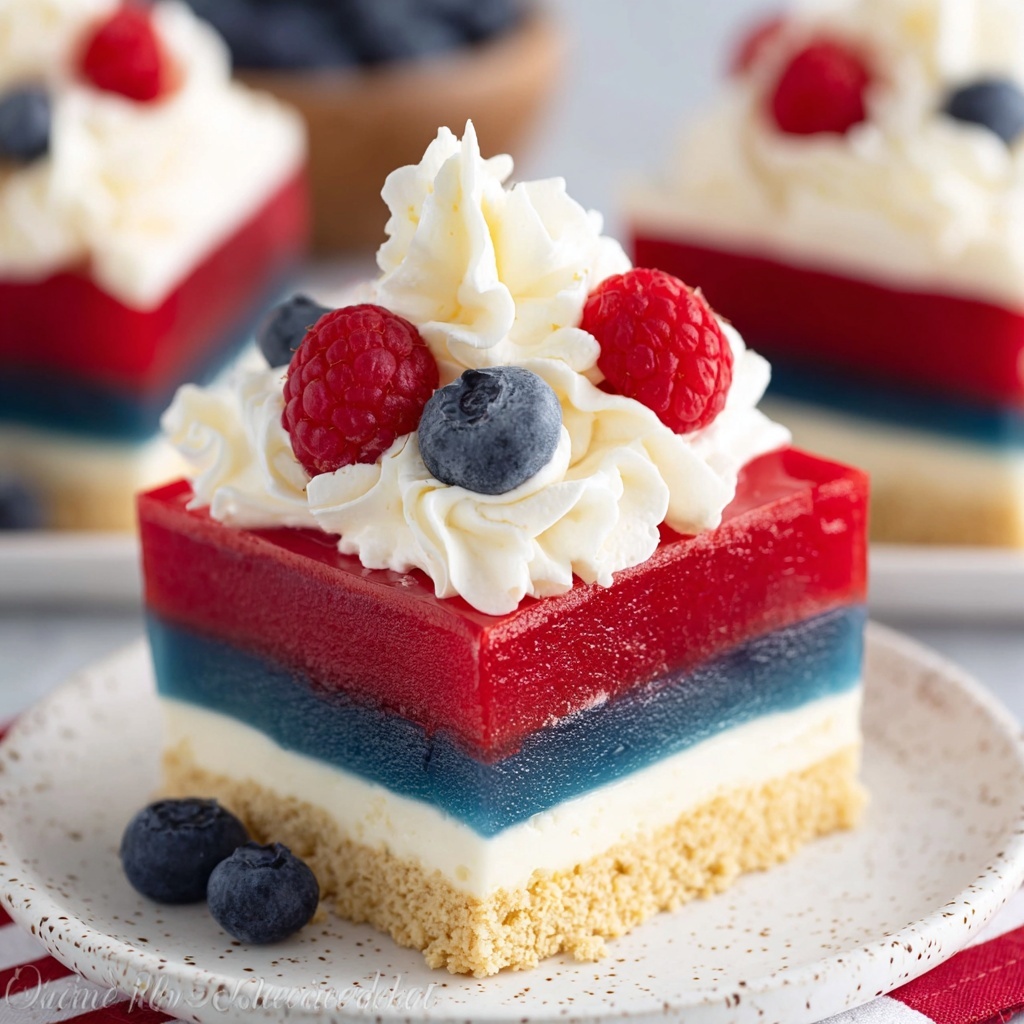
If you’re looking for a festive and utterly delightful dessert to brighten up any gathering, the Red, White, and Blue Mini Cheesecakes Recipe is an absolute must-try. These bite-sized beauties pack creamy, tangy, and sweet flavors into each tiny cheesecake, layered with patriotic colors that are perfect for celebrations like the Fourth of July or any time you want a cheerful treat. The combination of smooth cream cheese filling, buttery vanilla wafer crust, and fluffy whipped cream topping adorned with sprinkles makes these mini cheesecakes feel special and irresistible all at once.
Ingredients You’ll Need
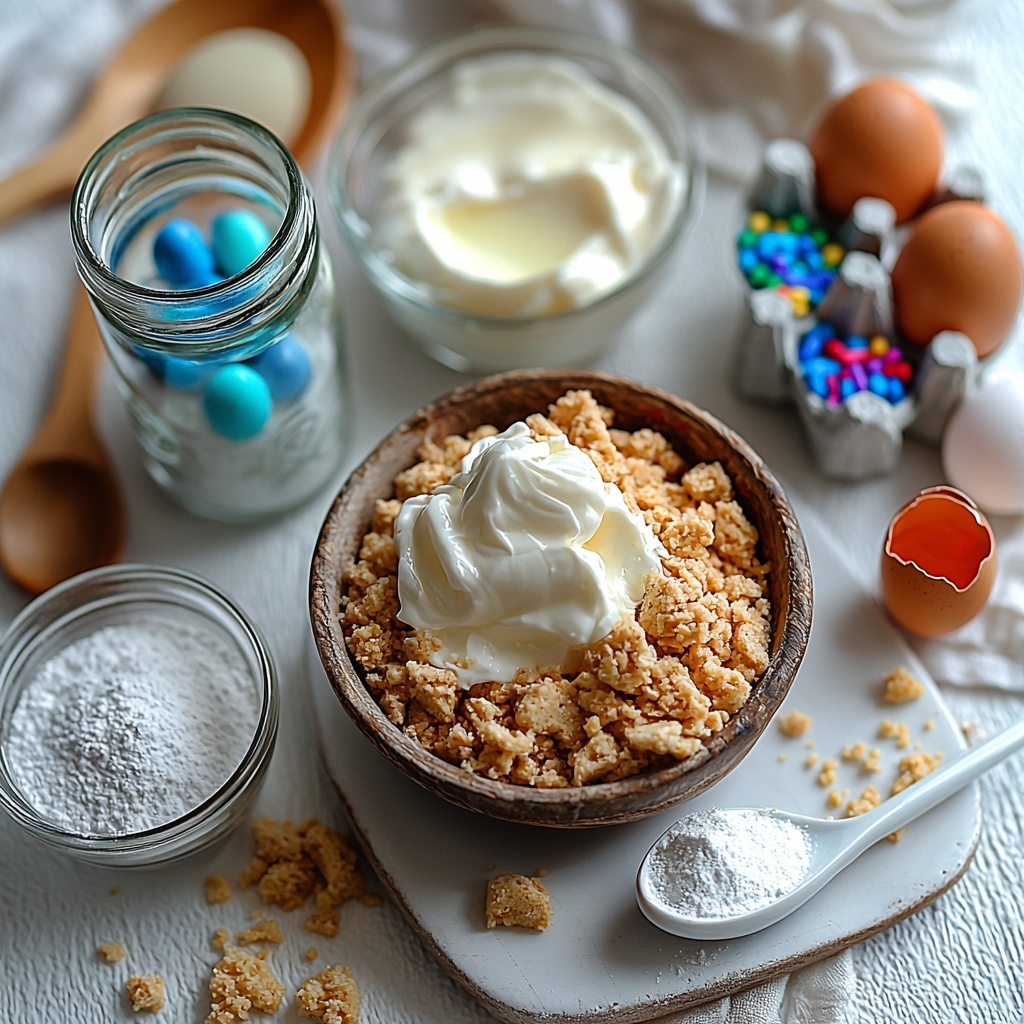
The magic of this Red, White, and Blue Mini Cheesecakes Recipe comes from a handful of simple but essential ingredients, each playing a crucial role in building flavor, texture, and that vibrant look. Every item on this list has a purpose, from adding sweetness and richness to creating a luscious, smooth finish.
- Vanilla wafer cookie crumbs: Provides a subtly sweet and crunchy base for the cheesecake crust, giving it the perfect foundation.
- Sugar: Two kinds are used—granulated sugar for sweetness in the crust and filling, and powdered sugar for the whipped topping, ensuring balanced sweetness throughout.
- Butter, melted: Binds the cookie crumbs to form a crisp, buttery crust with just the right amount of richness.
- Cream cheese, room temperature: The star of the filling, offering a smooth and creamy texture and slightly tangy flavor.
- Flour: Helps to stabilize the filling and create the right density without heaviness.
- Sour cream: Adds moisture and a touch of tang that brightens the cheesecake flavor beautifully.
- Vanilla extract: Brings warmth and depth to the filling and whipped cream topping.
- Eggs: Essential for structure and a silky, custard-like texture in the filling.
- Blue and Red gel icing color: These concentrated colors let you craft the distinct red, white, and blue layers that make this dessert so visually striking.
- Heavy whipping cream, cold: Whipped into peaks for the luscious, cloud-like topping that finishes each cheesecake.
- Sprinkles: Adds festive crunch and extra charm, making the mini cheesecakes even more fun to eat.
How to Make Red, White, and Blue Mini Cheesecakes Recipe
Step 1: Prepare the Crust
Start by preheating your oven to 325°F (163°C) and lining a cupcake pan with liners to make cleanup and serving a breeze. Combine the vanilla wafer crumbs, sugar, and melted butter in a bowl, mixing until the crumbs are evenly coated. Press this mixture firmly into the bottom of each liner to create a sturdy crust that will hold all that creamy filling.
Step 2: Bake and Cool the Crust
Bake the crusts for about 5 minutes. This quick baking step helps set the crust, so it stays crisp and doesn’t get soggy once the filling is added. Afterward, remove the pan and let the crusts cool completely. Meanwhile, lower the oven temperature to 300°F (149°C) to prepare for baking the cheesecake layers gently.
Step 3: Make the Cheesecake Filling
Beat the softened cream cheese, sugar, and flour together until completely smooth to avoid any lumps in your filling. Add the sour cream and vanilla extract, mixing until just combined. Then beat in the eggs one at a time, ensuring each is fully incorporated before adding the next. This careful mixing results in a creamy texture that’s rich but light.
Step 4: Divide and Color the Batter
Pour the batter evenly into three bowls. Leave one portion plain to represent the white layer. Add red gel icing color to the second bowl and blue gel icing color to the third, stirring each just until the color is vibrant and evenly distributed but without overmixing.
Step 5: Layer the Batters
Now the fun part: layering each colored batter into your cupcake liners. Start with one color, followed by the next, and finish with the third, creating a beautiful trio of red, white, and blue layers that will proudly hold their shape after baking.
Step 6: Bake and Cool the Mini Cheesecakes
Bake the layered mini cheesecakes for 18 to 20 minutes at the reduced heat, allowing them to set gently without cracking. Once baked, take them out of the oven and let them cool completely at room temperature before moving on to the topping stage.
Step 7: Whip and Pipe the Topping
Whip the cold heavy cream, powdered sugar, and vanilla extract together until stiff peaks form—this creates a delightfully fluffy topping that complements the dense cheesecake perfectly. Use a piping bag or a spoon to generously add the whipped cream onto each cooled mini cheesecake and finish with a sprinkle of fun, festive sprinkles.
How to Serve Red, White, and Blue Mini Cheesecakes Recipe
Garnishes
For an extra touch of charm and texture, feel free to garnish these mini cheesecakes with fresh berries such as blueberries and sliced strawberries, which will enhance the color theme and add natural freshness. A light dusting of powdered sugar or a few edible glitter flakes will also make them sparkle on your dessert table.
Side Dishes
These mini cheesecakes are rich and creamy, so they pair beautifully with something light and refreshing like a crisp fruit salad or a citrus sorbet. A cup of freshly brewed coffee or a chilled glass of lemonade can also balance out the richness of the cheesecakes wonderfully.
Creative Ways to Present
Try serving these cheesecakes on a bright platter layered with patriotic-themed napkins or a rustic wooden board surrounded by fresh berries. For parties, individual clear mini dessert cups or mason jars add a charming, portable touch. You can also arrange them on skewers for a playful cheesecake kabob experience that guests will adore.
Make Ahead and Storage
Storing Leftovers
Leftover Red, White, and Blue Mini Cheesecakes keep beautifully when covered tightly with plastic wrap or stored in an airtight container in the refrigerator. They will maintain the best flavor and texture for up to 3 days, making them perfect for prepping ahead of time or saving some for later indulgence.
Freezing
If you want to enjoy these mini cheesecakes later on, they freeze quite well. Place them on a baking sheet to freeze individually, then transfer to a freezer-safe container or bag. Frozen mini cheesecakes can stay fresh for up to 1 month. Just thaw them overnight in the refrigerator before serving to preserve their creamy texture.
Reheating
Because cheesecake is best served cold, reheating isn’t usually recommended for this Red, White, and Blue Mini Cheesecakes Recipe. However, if you prefer, you can let them sit at room temperature for about 15 minutes before serving to soften the filling slightly. Avoid microwaving as it can cause the texture to become grainy or rubbery.
FAQs
Can I use a different type of cookie for the crust?
Absolutely! While vanilla wafer crumbs give a nice mild sweetness and texture, you can experiment with graham cracker crumbs, shortbread crumbs, or even digestive biscuits depending on your flavor preference.
How do I prevent the cheesecake from cracking?
Mix the batter gently to avoid incorporating too much air, and bake the cheesecakes at a low temperature. Also, make sure not to overbake; they should still have a slight jiggle in the center when you take them out.
Can I make these cheesecakes dairy-free?
Yes, by substituting cream cheese, sour cream, and heavy cream with plant-based alternatives like vegan cream cheese and coconut cream, you can make a dairy-free version. The texture might vary slightly but still delicious.
Is it necessary to use gel food coloring?
Gel food coloring is best because it provides vibrant colors without thinning the batter, but you can use liquid coloring sparingly if that’s what you have on hand. Just be mindful not to add too much liquid, which could affect the texture.
Can I prepare the cheesecakes a day ahead?
Definitely! Making the Red, White, and Blue Mini Cheesecakes Recipe a day ahead allows the flavors to develop fully. Just keep them refrigerated and add the whipped cream topping right before serving for the freshest look and taste.
Final Thoughts
This Red, White, and Blue Mini Cheesecakes Recipe is one of those delightful treats that combines eye-catching presentation with downright irresistible flavor. If you want to impress friends and family with a dessert that’s both festive and creamy perfection in a bite-sized form, these mini cheesecakes are an outstanding choice. Trust me, once you make them, they’ll become a favorite go-to dessert for every celebration.
Print
Red, White, and Blue Mini Cheesecakes Recipe
- Prep Time: 15 minutes
- Cook Time: 25 minutes
- Total Time: 40 minutes
- Yield: 12 mini cheesecakes
- Category: Dessert
- Method: Baking
- Cuisine: American
Description
These Red, White, and Blue Mini Cheesecakes are perfect for patriotic celebrations or any occasion where you want a festive and delicious treat. Featuring a crunchy vanilla wafer crust, smooth cream cheese filling tinted in vibrant red and blue colors, and topped with fluffy whipped cream and sprinkles, these bite-sized desserts combine rich flavors and eye-catching presentation in one lovely package.
Ingredients
Crust
- 1 cup vanilla wafer cookie crumbs
- 2 tbsp sugar
- 4 tbsp butter, melted
Cheesecake Filling
- 12 oz cream cheese, room temperature
- 1/2 cup sugar
- 3 tbsp flour
- 1/2 cup sour cream
- 1 1/2 tsp vanilla extract
- 2 eggs
- Blue gel icing color
- Red gel icing color
Whipped Cream Topping
- 1/2 cup heavy whipping cream, cold
- 5 tbsp powdered sugar
- 1/2 tsp vanilla extract
- Sprinkles
Instructions
- Preheat and Prepare Pan: Preheat your oven to 325°F (163°C) and line a cupcake pan with cupcake liners to make removing the mini cheesecakes easy after baking.
- Make the Crust: In a bowl, combine the vanilla wafer cookie crumbs, sugar, and melted butter. Mix thoroughly, then press the mixture firmly into the bottoms of the cupcake liners to form the crust.
- Bake Crust: Bake the crusts in the preheated oven for 5 minutes. After baking, remove from the oven and allow to cool. Then reduce the oven temperature to 300°F (149°C) to prepare for baking the cheesecake filling.
- Prepare Cheesecake Batter: In a large bowl, beat the cream cheese, sugar, and flour together until the mixture is smooth and creamy. Add the sour cream and vanilla extract and continue beating to combine. Beat in the eggs one at a time, making sure each one is fully incorporated before adding the next.
- Color the Batter: Divide the cheesecake batter evenly into three separate bowls. Add blue gel icing color to one bowl, red gel icing color to another, and leave the third bowl plain for the white portion.
- Layer the Cheesecakes: Spoon the different colored batters carefully into the cupcake liners layered over the crusts. You can create a layered or marbled effect by alternating the colors.
- Bake Cheesecakes: Bake the mini cheesecakes at the reduced temperature of 300°F (149°C) for 18-20 minutes, or until the edges are set and the centers slightly jiggle when gently shaken. Remove from oven and let them cool completely.
- Make Whipped Cream Topping: In a chilled bowl, whip the cold heavy whipping cream with powdered sugar and vanilla extract until stiff peaks form, creating a fluffy, sweet topping.
- Assemble and Decorate: Pipe or spoon the whipped cream atop each cooled mini cheesecake. Finish by decorating with colorful sprinkles for a festive touch.
Notes
- For best results, ensure cream cheese is at room temperature before mixing for a smoother batter.
- If you prefer, you can blend the batter colors to create a marbled effect instead of layering solid colors.
- These mini cheesecakes can be stored in the refrigerator for up to 3 days in an airtight container.
- Make sure to chill heavy cream before whipping to achieve stiff peaks easily.
- Use gel colors sparingly to avoid affecting the texture of the batter.

