
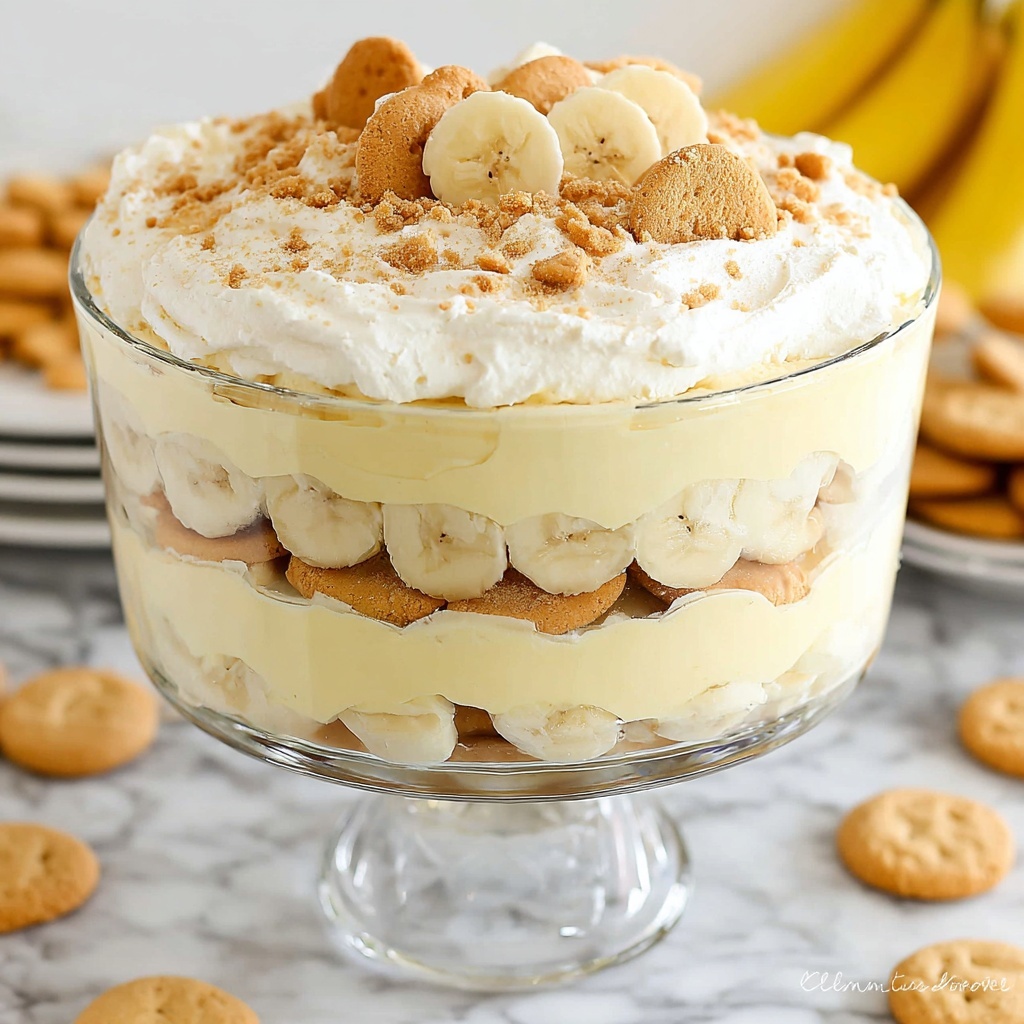
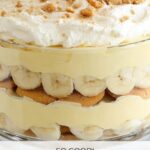
If you have a soft spot for comforting, nostalgic desserts, you are going to absolutely adore this Magnolia Bakery Banana Pudding Recipe. This iconic Southern treat boasts layers of creamy vanilla pudding, sweet bananas, and crunchy Nilla Wafers, all whipped together to create a perfectly balanced, dreamy dessert. The magic lies in the silky pudding mixture combined with freshly sliced bananas and the satisfying snap of wafers, making this recipe a true crowd-pleaser that’s both easy to make and impossible to resist. Trust me, once you try this, it’ll become your go-to dessert to share with family and friends!
Ingredients You’ll Need
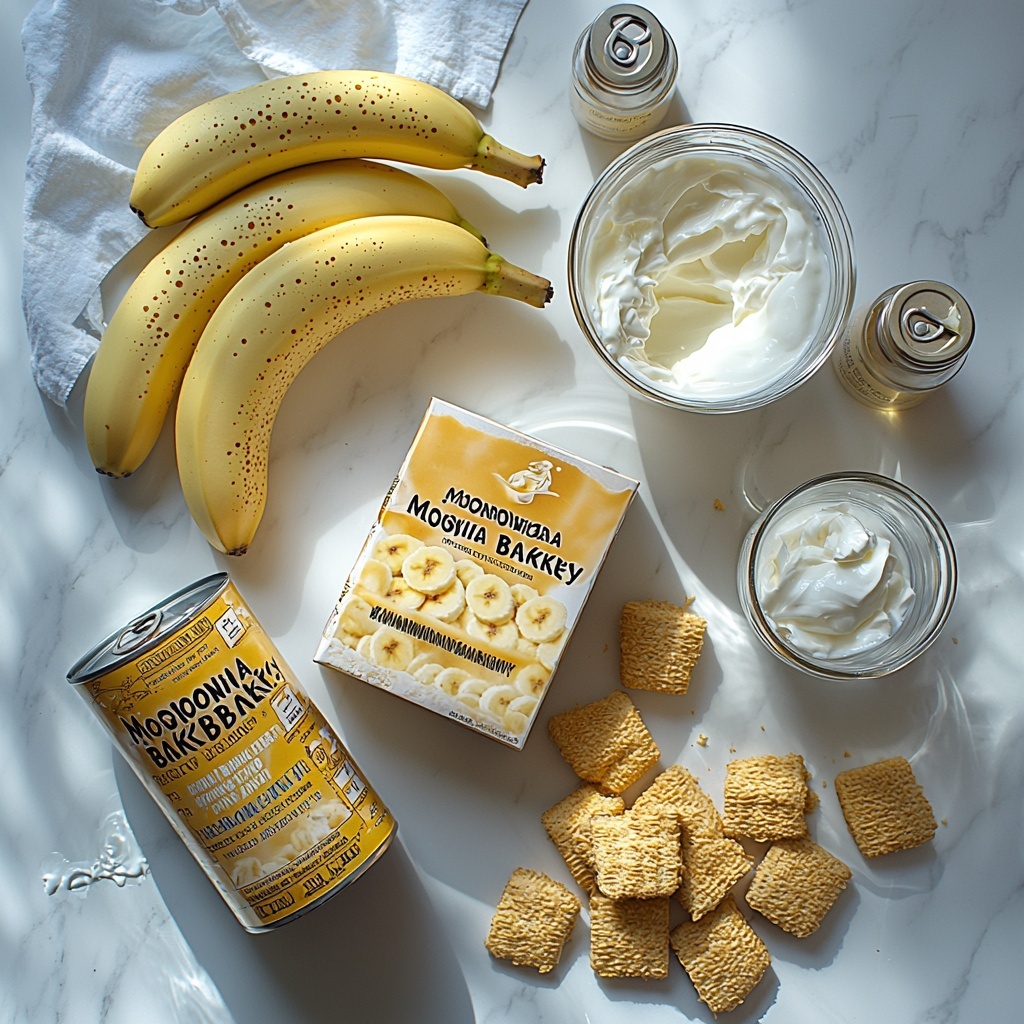
Gathering the right ingredients is the first step to making this classic dessert shine. Each component plays an essential role in the flavor, texture, and presentation, delivering that signature Magnolia Bakery taste you’ll fall in love with.
- Sweetened condensed milk: Adds a rich, creamy sweetness that forms the luscious base of the pudding.
- Cold milk: Keeps the pudding smooth and light, balancing the condensed milk’s sweetness.
- Cold water: Essential for activating the instant pudding mix for a perfect consistency.
- Instant vanilla pudding mix: Provides the classic vanilla flavor and thick texture that makes this pudding irresistible.
- Nilla Wafers: Brings the iconic crunchy layer that contrasts beautifully with the soft pudding and bananas.
- Heavy whipping cream: Whipped into peaks, it adds airiness and silkiness to the pudding mixture.
- Clear vanilla flavoring: Enhances the vanilla notes without altering the pudding’s creamy color.
- Bananas: Just ripe and sliced for fresh, naturally sweet layers throughout the dessert.
How to Make Magnolia Bakery Banana Pudding Recipe
Step 1: Combine Sweetened Condensed Milk, Cold Milk, and Water
Start by blending the sweetened condensed milk with the very cold milk and cold water using a hand mixer or stand mixer on low to medium speed. This combination creates the sweet and creamy foundation of your pudding, and mixing it gently ensures a smooth texture without lumps.
Step 2: Add the Instant Vanilla Pudding Mix
Next, pour in the instant vanilla pudding mix and whip everything on medium speed for about two minutes. You’ll notice the mixture beginning to thicken, signaling that it’s transforming into that velvety pudding that you love. Patience here pays off for the perfect texture.
Step 3: Chill the Pudding Base
Cover your pudding mixture and refrigerate it for at least four hours or overnight. This step is crucial because it allows the pudding to fully set and develop that creamy firmness that will hold your layers together beautifully when assembled.
Step 4: Whip the Heavy Cream with Vanilla Flavoring
While the pudding chills, whip the heavy cream with half a teaspoon of clear vanilla flavoring until stiff peaks form. This whipped cream will lighten the pudding’s richness and add an airy softness to every spoonful.
Step 5: Fold Whipped Cream into Pudding
Carefully fold the whipped cream into the chilled pudding mixture. Use gentle strokes to preserve the airiness of the whipped cream, blending until the mixture is uniform in color without streaks. The result is a fluffy, creamy custard bursting with vanilla flavor.
Step 6: Assemble the Layers
Choose a large serving bowl, trifle dish, or even individual mini trifle bowls for layering. Start by spreading one-third of the Nilla Wafers at the bottom (around 30 wafers). These wafers deliver that signature crunchy bite that complements the soft pudding and bananas perfectly.
Step 7: Add Banana Slices
On top of the wafer layer, spread one and a half cups of freshly sliced bananas. Using bananas that are just barely ripe will ensure they’re firm enough to hold their shape but sweet enough to meld with the other ingredients.
Step 8: Add a Third of the Pudding Mixture
Spread one-third of your creamy pudding over the bananas evenly. This delicate layering is what makes the Magnolia Bakery Banana Pudding Recipe so visually appealing and ensures every bite has all the delicious layers.
Step 9: Repeat Your Layers Twice More
Repeat the sequence—wafers, bananas, pudding—for a total of three layers. Layering builds that irresistible depth of flavor and texture this dessert is famous for.
Step 10: Crush Reserved Wafers and Garnish
Finally, crush the reserved 5-6 Nilla Wafers and sprinkle them generously over the top of your pudding. This finishing touch adds a delicate crunch and an inviting look that will make the dessert impossible to resist. Cover and refrigerate until ready to serve.
How to Serve Magnolia Bakery Banana Pudding Recipe
Garnishes
While the crushed wafers on top are the classic garnish, you can jazz it up with a few extra banana slices or a light dusting of cinnamon for visual appeal and an extra layer of flavor. Fresh mint leaves can add a pop of color and freshness, too.
Side Dishes
This pudding is a perfect end to just about any meal. Pair it with light dishes like grilled chicken or fresh salads, as its creamy sweetness provides a delightful contrast. It’s also great alongside a cup of strong coffee or iced tea for a relaxed afternoon treat.
Creative Ways to Present
Have fun serving the pudding in elegant glass parfait cups or mason jars for individual servings. You can also prepare it in a trifle bowl for a stunning centerpiece. For a playful twist, try layering it in clear jars with alternating cookie crumbs and banana slices for a portable, picnic-friendly dessert.
Make Ahead and Storage
Storing Leftovers
Leftover Magnolia Bakery Banana Pudding Recipe keeps well covered in the refrigerator for up to three days. The flavors actually meld beautifully, but be aware that the bananas might brown slightly over time, so it’s best enjoyed fresh when possible.
Freezing
This pudding is not ideal for freezing because the texture of the bananas and whipped cream changes when frozen and thawed. If you must freeze, do so before adding bananas and whipped cream, then prepare fresh ones when serving.
Reheating
Since this dessert is best served chilled, reheating isn’t recommended. Simply let it sit at room temperature for about 10 minutes before serving if it has been refrigerated, so it softens slightly and the flavors come through beautifully.
FAQs
Can I use a homemade vanilla pudding instead of instant pudding?
Absolutely! While the instant vanilla pudding simplifies the process, a homemade pudding can add a fresh homemade touch. Just be sure it sets firmly so the layers hold well.
What’s the best type of banana to use for this pudding?
The best bananas are just barely ripe with a few brown speckles. They strike the perfect balance between sweetness and firmness to maintain texture in the layers without becoming mushy.
Can I substitute Nilla Wafers with another cookie?
While Nilla Wafers are classic, you can experiment with other vanilla-flavored cookies or even graham crackers for a slightly different texture and flavor profile. Just keep in mind it will change the overall character of the dish.
How far in advance can I assemble this pudding?
You can assemble the pudding up to a day in advance. This allows the flavors to meld perfectly. Just cover it tightly and refrigerate until it’s time to serve.
Is this dessert suitable for kids?
Yes! Magnolia Bakery Banana Pudding Recipe is a huge favorite among kids because of its creamy sweetness and familiar flavors. It’s a great dessert to involve kids in making too!
Final Thoughts
This Magnolia Bakery Banana Pudding Recipe is a guaranteed way to brighten up any table with its creamy, dreamy layers of pure deliciousness. Whether you’re making it for a family gathering or just to satisfy your sweet tooth, it’s a recipe that’s simple to follow and a true crowd-pleaser. Go ahead and give it a try—you’ll be amazed at how something so effortlessly whipped together can taste so decadent and special!
Print
Magnolia Bakery Banana Pudding Recipe
- Prep Time: 15 minutes
- Cook Time: 0 minutes
- Total Time: 4 hours 15 minutes
- Yield: 16 servings
- Category: Dessert
- Method: No-Cook
- Cuisine: American, Southern
Description
Magnolia Bakery’s iconic Banana Pudding is a luscious and creamy layered dessert featuring smooth vanilla pudding, fresh bananas, and crunchy Nilla Wafers, topped with fluffy whipped cream. This classic Southern treat is easy to prepare and perfect for gatherings, offering a delightful combination of textures and flavors that is best served chilled.
Ingredients
Pudding Base
- 1 14-oz can sweetened condensed milk
- 1 cup very cold milk
- ½ cup very cold water
- 1 3.4 oz box instant vanilla pudding mix
Layer Ingredients
- 1 11-12 oz box Nilla Wafers (reserve 5–6 wafers and crumbs for topping)
- 5 bananas, just barely ripe, sliced
Whipped Cream
- 3 cups heavy whipping cream
- ½ teaspoon clear vanilla flavoring
Instructions
- Mix condensed milk and liquids: Using a hand-held or stand mixer, combine the sweetened condensed milk, cold water, and cold milk. Mix on low to medium speed for 1-2 minutes until well blended.
- Add pudding mix: Add the instant vanilla pudding mix to the liquid mixture and beat on medium speed for 2 minutes. The pudding should begin to thicken slightly at this point.
- Chill pudding: Cover the pudding mixture and refrigerate for 4 hours or overnight to ensure it is fully set and firm.
- Whip cream: In a clean bowl, combine the heavy whipping cream and clear vanilla flavoring. Beat with a hand-held or stand mixer until stiff peaks form.
- Fold whipped cream into pudding: Gently fold the whipped cream into the chilled pudding mixture carefully, until fully combined and uniform in color without streaks.
- Assemble layers: In a large serving bowl, trifle dish, or individual mini trifles, line the bottom with one-third of the Nilla Wafers (approximately 30 wafers).
- Add banana layer: Spread 1 ½ cups of sliced bananas evenly over the wafers.
- Add pudding layer: Spoon one-third of the pudding mixture over the bananas, spreading gently.
- Repeat layering: Repeat the layering process two more times to create three layers of wafers, bananas, and pudding.
- Prepare topping: Crush the reserved 5-6 Nilla Wafers and sprinkle the crumbs over the top layer of pudding. You may also use any leftover wafer crumbs from the box for garnish.
- Refrigerate before serving: Cover the assembled pudding and keep refrigerated until ready to serve to maintain freshness and optimal texture.
Notes
- For best results, use very cold milk and water when preparing the pudding base to help it set properly.
- Choosing bananas that are just barely ripe ensures they hold their shape and do not become mushy in the layers.
- The dessert tastes best after chilling for several hours or overnight to allow the flavors to meld and the pudding to fully set.
- You can prepare this dessert in individual serving dishes or one large trifle dish depending on your presentation preference.
- Leftover crushed Nilla Wafers add a delightful crunchy texture on top, enhancing the overall experience.