
“`html
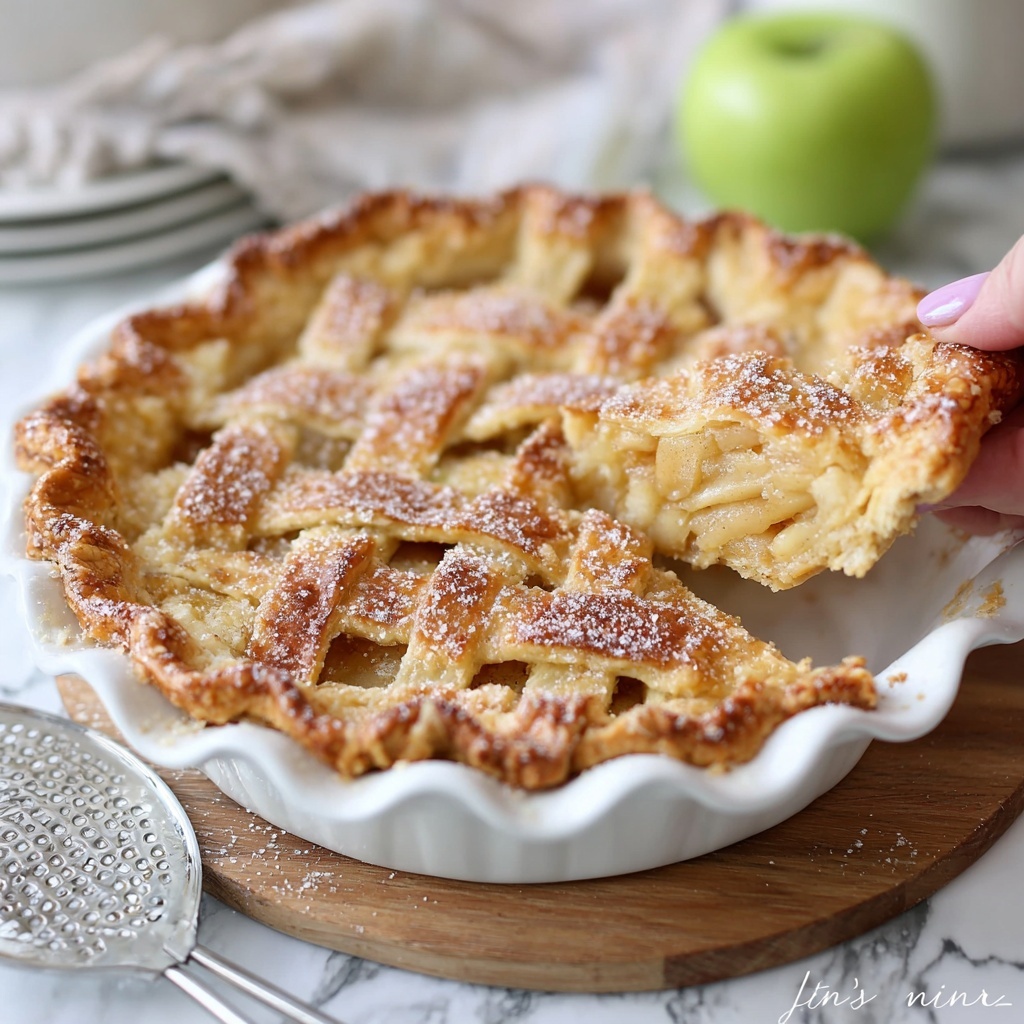
If you’re craving a timeless dessert that feels like a warm hug from the inside out, you simply cannot go wrong with this Classic Homemade Apple Pie Recipe. It’s one of those dishes that instantly brings a smile to your face with its perfect balance of sweet and tart apples, a buttery, flaky crust, and cozy notes of cinnamon and nutmeg. Whether you’re baking for a family gathering or just because, this apple pie is destined to become a cherished favorite, delivering comfort and joy in every glorious bite.
Ingredients You’ll Need
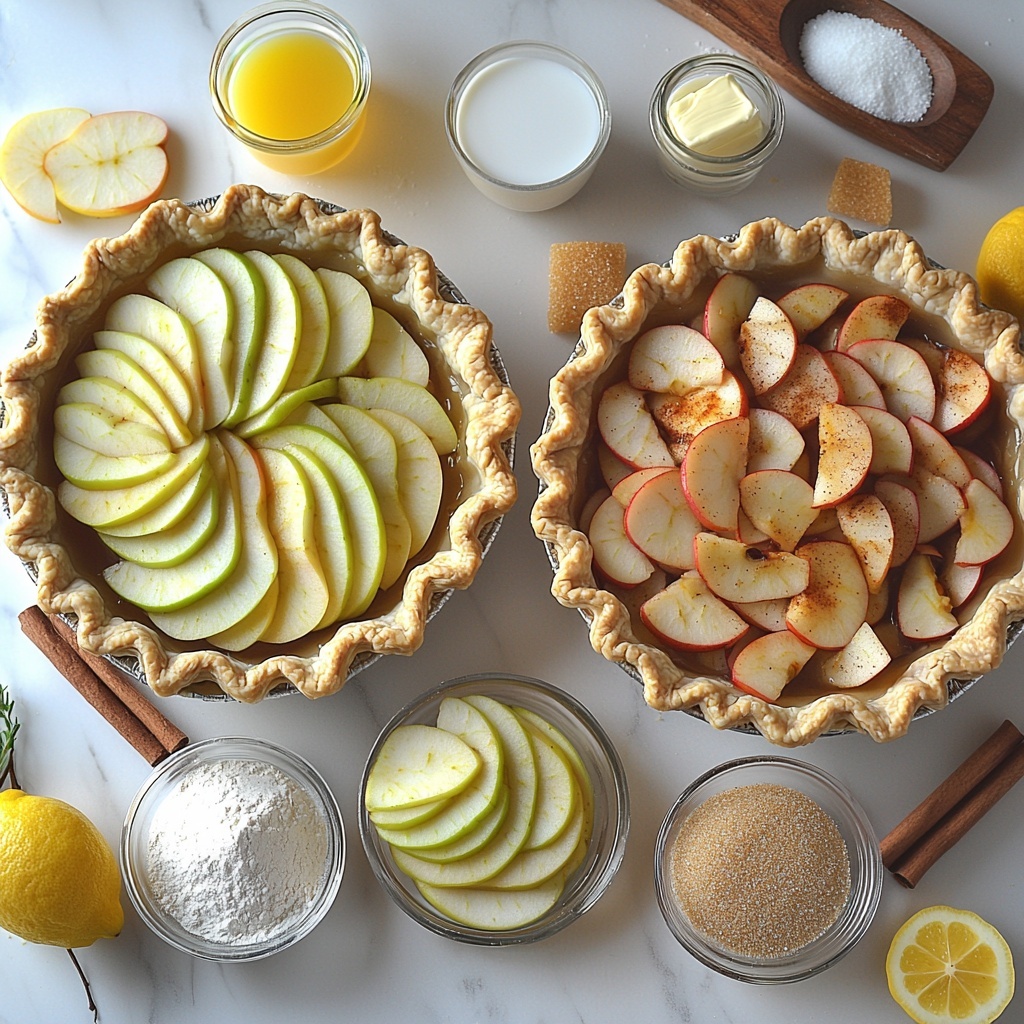
Creating a flawless apple pie doesn’t require a long list of complicated ingredients—just a few simple, quality elements that come together in harmony. Each component plays a vital role, from giving the filling its tender texture to adding that golden crunch on top.
- 1 double pie crust for a 9 inch pie: This is the buttery and flaky foundation that holds all the delicious apple goodness.
- 6 cups thinly sliced peeled apples (Granny Smith or Honeycrisp): A perfect combination of tart and sweet, these apples bring body, flavor, and texture.
- 3/4 cup granulated sugar: Adds sweetness that balances the tartness of the apples.
- 1/4 cup packed brown sugar: Brings a rich, caramel-like depth to the filling.
- 2 tablespoons all purpose flour: Helps thicken the filling so it’s luscious and not runny.
- 1 tablespoon cornstarch: Works alongside the flour to create the perfect filling consistency.
- 1 teaspoon ground cinnamon: Infuses the pie with warm, inviting spice.
- 1/4 teaspoon ground nutmeg: Adds a subtle hint of aromatic sweetness.
- 1/4 teaspoon salt: Enhances all the flavors, balancing sweetness and spice.
- 1 tablespoon lemon juice: Keeps the apples vibrant, preventing browning and adding a delicate tang.
- 1 teaspoon vanilla extract: Elevates the filling with a gentle, sweet fragrance.
- 2 tablespoons unsalted butter (cut into small pieces): Creates pockets of richness in the filling as it bakes.
- 1 tablespoon milk (for brushing): Helps the crust achieve a gorgeous golden color.
- 1 tablespoon coarse sugar (for topping): Adds a sparkling crunch and a touch of extra sweetness on the crust.
How to Make Classic Homemade Apple Pie Recipe
Step 1: Prepare Your Oven and Pie Crust
Begin by preheating your oven to 425°F. Roll out one of your pie crusts and gently fit it into a 9-inch pie dish, trimming any edges that hang over. This flaky crust will be the delicious vessel that holds your luscious apple filling — so treat it with care.
Step 2: Mix the Apple Filling
In a large bowl, toss together the sliced apples with granulated sugar, brown sugar, flour, cornstarch, cinnamon, nutmeg, salt, lemon juice, and vanilla extract. Make sure every apple slice is evenly coated with this fragrant mixture — this is the flavor heart of your Classic Homemade Apple Pie Recipe!
Step 3: Assemble the Pie
Pour the apple mixture into your prepared crust, spreading it out evenly. Dot the top with little pieces of butter, which will melt into the filling, adding richness and silkiness. Then, roll out the second crust and carefully place it over the apples. Trim the edges, seal well, and crimp to create that classic pie edge.
Step 4: Vent, Brush, and Sugar
Cut a few small slits in the top crust — this allows steam to escape while baking, preventing sogginess. Brush the surface lightly with milk, then sprinkle the coarse sugar evenly over the top to add beautiful sparkle and crunch.
Step 5: Bake to Golden Perfection
Bake your pie at 425°F for 20 minutes to jumpstart that flaky crust, then reduce the temperature to 375°F and continue baking for another 35 to 40 minutes. Keep an eye on the edges and cover them loosely with foil if they brown too quickly. When the crust turns golden brown and the filling bubbles up invitingly, your masterpiece is done!
Step 6: Cool and Set
Remove the pie from the oven and be patient — let it cool for at least 2 hours. This waiting time is key for the filling to set perfectly, so when you slice it, you get beautiful, clean wedges bursting with flavor.
How to Serve Classic Homemade Apple Pie Recipe
Garnishes
A scoop of creamy vanilla ice cream is the classic match made in heaven for this apple pie, melting slowly over its warm surface. Or, add a dollop of freshly whipped cream dusted with cinnamon for a light, fluffy contrast. Even a drizzle of caramel sauce can elevate this pie into a decadent dessert experience.
Side Dishes
Serve your Classic Homemade Apple Pie Recipe alongside a hot cup of coffee or a spiced chai tea for the ultimate cozy treat. For a brunch twist, a sharp cheddar cheese slice pairs wonderfully, adding a savory balance to the sweetness.
Creative Ways to Present
If you’re sharing your pie at a gathering, consider serving individual slices in petite dessert dishes topped with fresh apple slices, a sprinkle of nuts, or a drizzle of honey. It’s a charming way to showcase this dessert and impress your guests with your apple pie prowess.
Make Ahead and Storage
Storing Leftovers
After enjoying your pie, wrap the leftovers tightly with plastic wrap or store in an airtight container in the refrigerator. Your Classic Homemade Apple Pie Recipe will stay fresh and delicious for 3 to 4 days, making it easy to indulge again without baking from scratch.
Freezing
You can freeze your apple pie either before or after baking. Wrap the whole pie securely in plastic wrap and aluminum foil, then store it in the freezer for up to 2 months. When ready to enjoy, thaw overnight in the fridge before reheating.
Reheating
To warm up your leftover pie and revive that freshly baked taste, heat individual slices in a microwave for about 30 seconds or pop the whole pie in a 350°F oven for 15 to 20 minutes until the crust is crisp and the filling is warmed through.
FAQs
Can I use different types of apples in this Classic Homemade Apple Pie Recipe?
Absolutely! Mixing tart apples like Granny Smith with sweeter varieties such as Honeycrisp adds wonderful complexity and balances the flavors beautifully.
Why is it important to let the pie cool before slicing?
Cooling allows the filling to thicken and set properly, which means when you cut your pie, the slices hold together neatly instead of spilling all over the plate.
Can I make the pie crust from scratch?
Definitely! While store-bought crusts are convenient, a homemade crust made with cold butter or shortening will take your Classic Homemade Apple Pie Recipe to the next level with extra flakiness and flavor.
What can I substitute for cornstarch in the filling?
If you don’t have cornstarch on hand, you can use arrowroot powder or increase the all-purpose flour slightly to help thicken the filling.
How do I prevent the crust edges from burning?
To protect the edges, simply cover them with foil halfway through baking. This shields them from direct heat while allowing the center to bake thoroughly.
Final Thoughts
This Classic Homemade Apple Pie Recipe is more than just a dessert—it’s a celebration of autumn’s best flavors wrapped in a buttery crust that brings smiles to the table. Once you try it, you’ll understand why it’s such a beloved tradition. So go ahead, gather those simple ingredients, and make some magic happen in your kitchen. Your perfect slice of home is waiting.
“`
Print
Classic Homemade Apple Pie Recipe
- Prep Time: 25 minutes
- Cook Time: 1 hour
- Total Time: 1 hour 25 minutes plus cooling time
- Yield: 8 servings
- Category: Dessert
- Method: Baking
- Cuisine: American
- Diet: Vegetarian
Description
This classic apple pie recipe features a flaky, buttery double crust filled with a perfectly spiced, tender apple filling. Made with a mix of tart and sweet apples, cinnamon, nutmeg, and a hint of vanilla, it is baked to golden perfection and makes a quintessential fall dessert. Serve warm or cooled, optionally topped with vanilla ice cream or whipped cream for a delightful treat.
Ingredients
Crust
- 1 double pie crust for a 9 inch pie
Apple Filling
- 6 cups thinly sliced peeled apples (such as Granny Smith or Honeycrisp)
- 3/4 cup granulated sugar
- 1/4 cup packed brown sugar
- 2 tablespoons all purpose flour
- 1 tablespoon cornstarch
- 1 teaspoon ground cinnamon
- 1/4 teaspoon ground nutmeg
- 1/4 teaspoon salt
- 1 tablespoon lemon juice
- 1 teaspoon vanilla extract
- 2 tablespoons unsalted butter, cut into small pieces
Toppings
- 1 tablespoon milk (for brushing)
- 1 tablespoon coarse sugar (for sprinkling)
Instructions
- Preheat Oven: Preheat your oven to 425°F (220°C) to ensure it is hot enough to start baking the pie immediately.
- Prepare Bottom Crust: Roll out one pie crust and carefully fit it into a 9-inch pie dish, trimming any excess dough hanging over the edges.
- Mix Apple Filling: In a large bowl, combine the thinly sliced apples with granulated sugar, brown sugar, flour, cornstarch, cinnamon, nutmeg, salt, lemon juice, and vanilla extract. Toss everything together until the apples are evenly coated with the mixture.
- Assemble Pie: Pour the apple mixture evenly into the prepared pie crust. Distribute small pieces of unsalted butter evenly on top of the apples.
- Top Crust: Roll out the second pie crust and place it over the apple filling. Trim the excess dough, seal the edges by pinching, and crimp decoratively to secure the top and bottom crusts together.
- Vent & Finish: Cut several small slits in the top crust to allow steam to escape while baking. Brush the entire top crust with milk and sprinkle coarse sugar evenly over it for a sparkling finish.
- Bake: Place the pie in the preheated oven and bake at 425°F (220°C) for 20 minutes. Then reduce the temperature to 375°F (190°C) and bake for an additional 35 to 40 minutes, until the crust is golden brown and the filling is bubbly. If the edges brown too quickly, cover them loosely with aluminum foil to prevent burning.
- Cool: Remove the pie from the oven and allow it to cool on a wire rack for at least 2 hours to let the filling set properly before slicing.
Notes
- Use a mix of tart and sweet apples for a more complex and balanced flavor.
- Allowing the pie to cool completely results in cleaner, more beautiful slices.
- Serve warm or at room temperature with vanilla ice cream or whipped cream for a classic pairing.


