
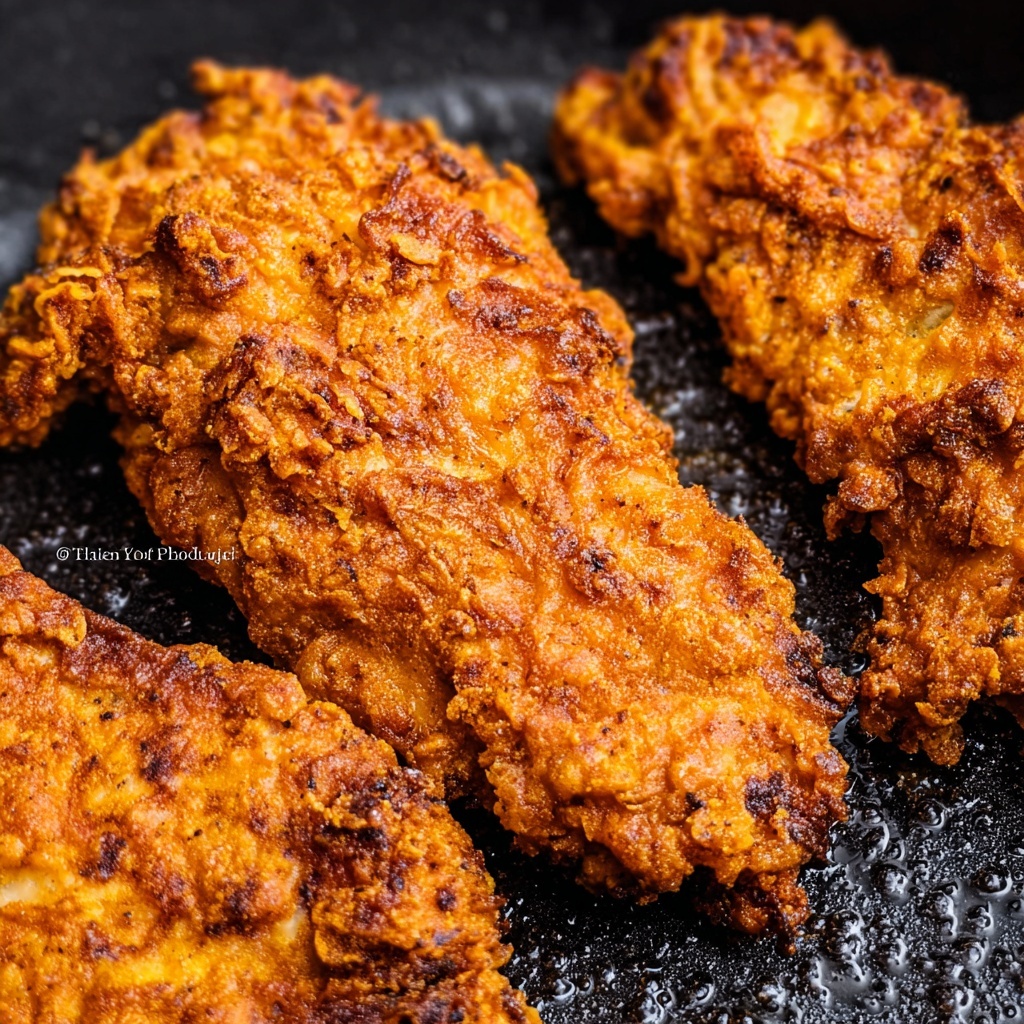
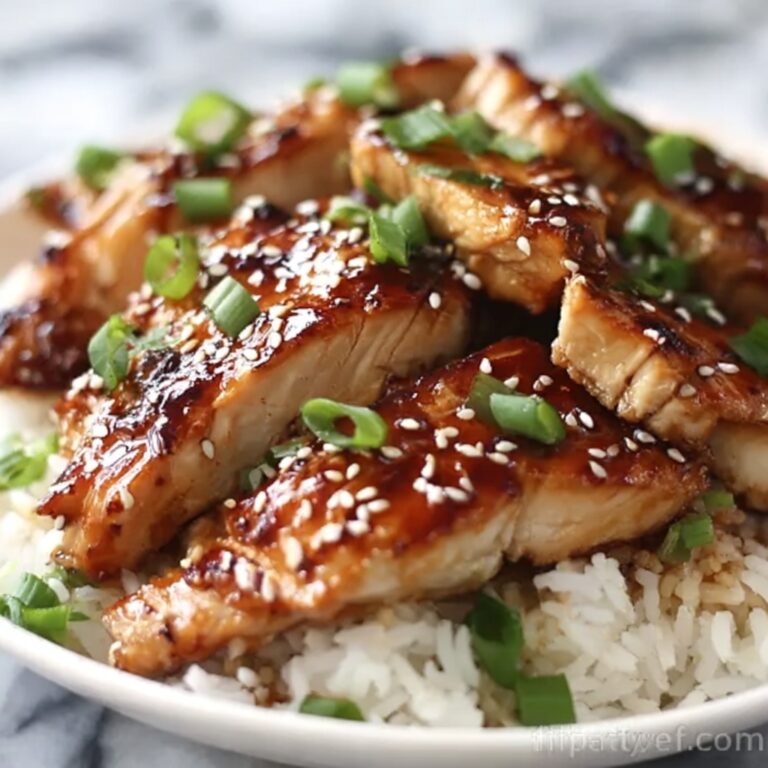
If you’ve ever craved that perfect balance of crunch and juiciness without the guilt of deep frying, this Crispy Oven Fried Chicken Recipe is about to become your new best friend. It delivers that golden, crackly coating you love, with tender, flavorful chicken inside, all achieved effortlessly in your oven. With simple pantry staples and straightforward steps, this recipe is a game changer for busy weeknights or casual get-togethers, giving you all the satisfaction of fried chicken with less mess and fuss.
Ingredients You’ll Need
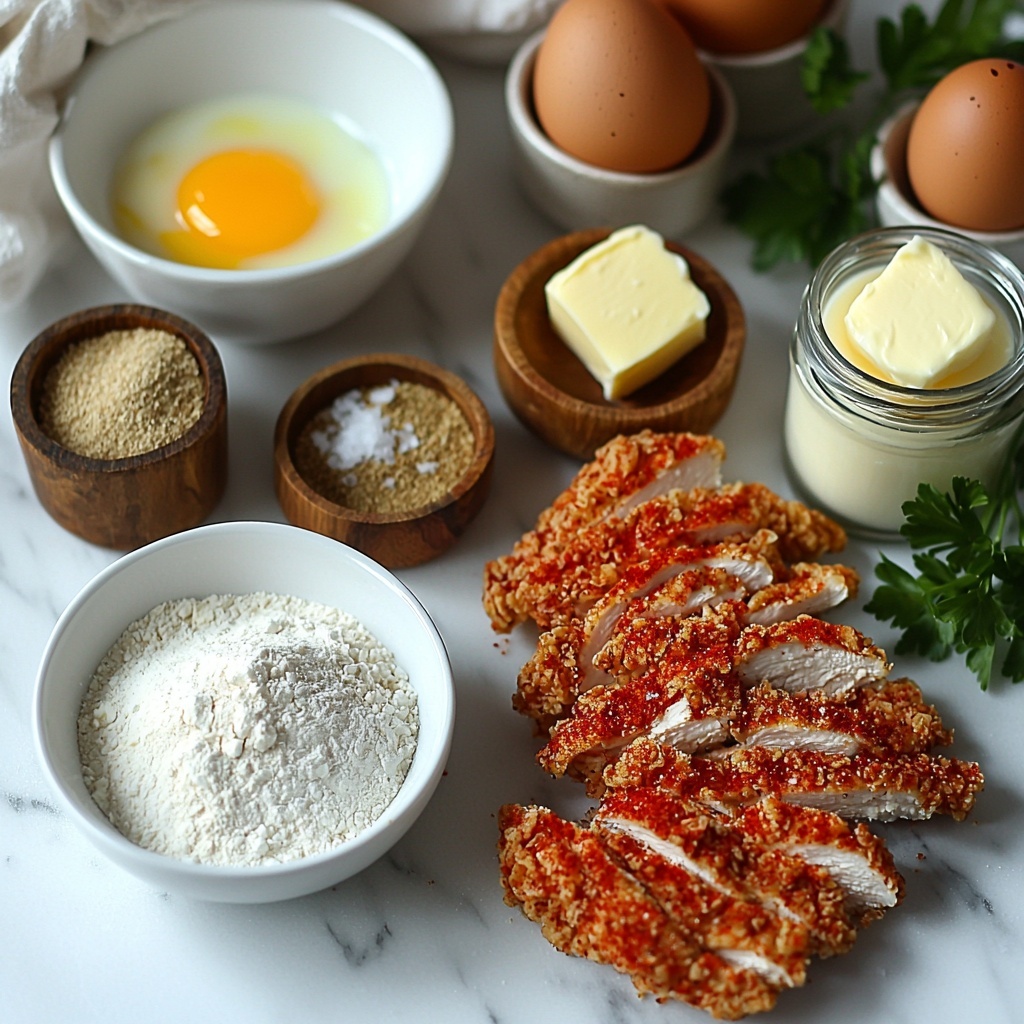
The magic of this Crispy Oven Fried Chicken Recipe lies in its simple yet crucial ingredients. Each component plays a vital role in creating the perfect crunchy crust and moist, flavorful chicken inside, ensuring every bite is a delight.
- 1 large egg: Acts as a binding agent to help the breading stick beautifully to each chicken strip.
- 1/3 cup buttermilk (or regular milk): Tenderizes the chicken and adds a subtle tang that enhances overall flavor.
- 1 cup all-purpose flour: Provides the base for the crispy coating that golden-browns in the oven.
- 4 tablespoons breadcrumbs (Panko or Italian seasoned): Adds extra crunch and texture to the crust for that irresistible crispiness.
- 1 teaspoon baking powder: Lightens the breading for an airy, crisp bite instead of a dense crust.
- 1.5 teaspoons salt: Balances and elevates all the flavors in the seasoning mix.
- 2 teaspoons ground paprika: Gives a warm color and smoky flavor that’s signature to great fried chicken.
- 1 teaspoon garlic powder: Adds a wonderful savory depth without overpowering.
- 1 teaspoon onion powder: Brings a subtle sweetness and complexity to the seasoning.
- 1/2 teaspoon ground pepper: Delivers a gentle spicy kick to round out the taste.
- 2 pounds boneless, skinless chicken breast (cut into strips): Perfect size for even cooking and satisfying bites.
- 1/4 cup butter (or more as needed): Adds richness and helps develop that beautifully browned crust in the oven.
How to Make Crispy Oven Fried Chicken Recipe
Step 1: Prep the Oven and Pan
Start by heating your oven to 410°F, which is just the right temperature to give your chicken a crisp, golden finish without drying it out. Place a dark-colored or cast iron pan in the oven to heat up while you prepare the chicken, since using a hot pan helps the butter sizzle and create that luscious crust right off the bat.
Step 2: Prepare the Breading Mixtures
Whisk the egg with the buttermilk in one bowl to create a smooth coating base that moistens the chicken strips wonderfully. In another bowl, combine the flour, breadcrumbs, baking powder, and all the seasonings—this dry mixture is where the flavor and texture magic happens, so make sure everything is well mixed for an even taste.
Step 3: Bread the Chicken
First, toss the chicken strips in the flour mixture, coating them lightly and shaking off the excess. Next, dip each piece into the egg and buttermilk to make sure the breading will stick. Finally, dip the chicken back into the flour mixture, pressing the coating on firmly so it clings really well—this double-dip method ensures every bite is perfectly crispy.
Step 4: Cook the Chicken in the Hot Pan
Carefully remove the hot pan from the oven and melt the butter in it—listen for that satisfying sizzle, which is a good sign your chicken will crisp up beautifully. Place the coated chicken strips on the pan, spacing them out so they’re not crowded; overcrowding can lead to steaming instead of crisping. If needed, you can bake the chicken in two batches to keep the texture spot-on.
Step 5: Oven Fry to Golden Perfection
Bake the chicken for 10-12 minutes before carefully flipping each piece. Continue baking for another 5-10 minutes, depending on the thickness of your strips, and add more butter to the pan if it’s looking dry. Finish things off by broiling the chicken for 1-2 minutes until the crust turns an irresistible golden brown and crisp, giving you that authentic fried chicken crunch with much less oil.
Step 6: Rest and Serve
Once out of the oven, let the chicken rest for 2-3 minutes to lock in those juicy flavors before diving in. This short wait helps the chicken stay tender and the breading stay perfectly crisp—a simple step that really makes a difference.
How to Serve Crispy Oven Fried Chicken Recipe
Garnishes
Fresh herbs like chopped parsley or chives add a lovely color contrast and a hint of freshness that lightens up each bite. A dusting of smoked paprika or a few lemon wedges on the side can also brighten the flavors and make the presentation pop.
Side Dishes
This Crispy Oven Fried Chicken Recipe pairs beautifully with classic comfort sides like creamy mashed potatoes, tangy coleslaw, or roasted vegetables. For a lighter option, a crisp green salad or steamed asparagus is refreshing and balances the richness of the chicken perfectly.
Creative Ways to Present
Try serving this chicken on top of buttery biscuits with a drizzle of honey or hot sauce for a Southern-inspired treat. You can also pile it into a wrap with crunchy slaw and your favorite sauce for an easy handheld meal that’s bursting with texture and flavor.
Make Ahead and Storage
Storing Leftovers
Cool any leftover chicken to room temperature, then store it in an airtight container in the refrigerator. It will keep its flavor and texture best when eaten within 3-4 days.
Freezing
If you want to save leftovers for longer, freeze the cooked chicken strips in a single layer on a baking sheet first, then transfer them to a freezer-safe bag or container. This prevents pieces from sticking together and allows you to defrost just what you need later.
Reheating
To bring back the crispiness, reheat your chicken in a hot oven or toaster oven at around 375°F for 10-15 minutes rather than using a microwave. This method keeps the coating crunchy and the chicken juicy, just like freshly made.
FAQs
Can I use chicken thighs instead of breasts?
Absolutely! Chicken thighs are juicier and can add more flavor, but keep in mind they may need a slightly longer baking time to cook through fully.
Is buttermilk necessary for this recipe?
While buttermilk gives the best tenderizing effect and flavor, regular milk works fine in a pinch. The acidity in buttermilk helps the chicken stay moist and adds tanginess to the breading.
Can I use gluten-free flour and breadcrumbs?
Yes, you can substitute gluten-free flour and breadcrumbs to accommodate dietary needs. Just make sure to choose options that bake well and maintain texture for a satisfying crust.
Why is the pan recommended to be dark or cast iron?
Dark or cast iron pans absorb and retain heat better, which helps in forming a crisp crust on the chicken. Silver pans don’t get as hot and might not brown the chicken as effectively.
What makes this Crispy Oven Fried Chicken Recipe different from traditional fried chicken?
This recipe uses the oven and a hot pan with butter to create a crispy crust without deep frying, resulting in a lighter dish that’s easier to make with less cleanup but still delivers incredible crunch and flavor.
Final Thoughts
There’s something truly satisfying about biting into crispy, juicy chicken that feels indulgent but is actually quite simple to create. I hope this Crispy Oven Fried Chicken Recipe becomes a staple in your kitchen as it has in mine. It’s perfect for any occasion and shows that you don’t need oil baths or complicated steps to achieve that crave-worthy fried chicken experience. Give it a try and watch your family and friends come back for seconds!
Print
Crispy Oven Fried Chicken Recipe
- Prep Time: 15 minutes
- Cook Time: 25 minutes
- Total Time: 40 minutes
- Yield: 6 servings
- Category: Main Dish
- Method: Baking
- Cuisine: American
Description
This Crispy Oven Fried Chicken recipe delivers perfectly golden and crunchy chicken strips using a simple oven-baking method that mimics traditional frying without the excess oil. Coated in a seasoned flour and breadcrumb mixture and baked in a buttered hot pan, this dish offers a deliciously crispy texture and juicy interior. Ideal for a quick weeknight dinner or a tasty crowd-pleaser, it requires only common pantry ingredients and about 40 minutes from start to finish.
Ingredients
Wet Ingredients
- 1 large egg
- 1/3 cup buttermilk (or regular milk as a substitute)
- 1/4 cup butter (or more as needed)
Dry Ingredients
- 1 cup all purpose flour
- 4 tablespoons breadcrumbs (Panko or Italian seasoned)
- 1 teaspoon baking powder
- 1.5 teaspoons salt (adjust to taste)
- 2 teaspoons ground paprika
- 1 teaspoon garlic powder
- 1 teaspoon onion powder
- 1/2 teaspoon ground pepper
Main Ingredient
- 2 pounds boneless, skinless chicken breast (cut into 2–3 strips per breast)
Instructions
- Preheat Oven and Pan: Heat your oven to 410°F (210°C). Place a dark-colored, cast iron, or metal pan inside the oven to heat thoroughly while you prepare the chicken. This hot pan will help achieve a crispy crust when baking.
- Prepare Breading Mixtures: In a medium bowl, whisk together the egg and buttermilk until smooth. In a separate large bowl, combine the flour, breadcrumbs, baking powder, salt, paprika, garlic powder, onion powder, and ground pepper thoroughly to make the seasoned flour mixture.
- Bread the Chicken: Toss the chicken strips in the flour mixture first, ensuring each piece is evenly coated and shake off any excess. Then dip each piece into the egg and buttermilk mixture, coating well. Finally, dip the chicken back into the flour mixture once more, pressing the coating firmly onto the chicken strips to ensure it sticks well, creating a double coating for maximum crunch.
- Prepare Hot Pan and Arrange Chicken: Carefully remove the heated pan from the oven and melt the butter in it. Place the breaded chicken strips onto the hot buttered pan, making sure to leave space between pieces for even cooking. You may need to bake in two batches depending on the size of your pan.
- Bake the Chicken: Bake the chicken strips for 10-12 minutes on one side, then carefully flip them over. Continue baking for an additional 5-10 minutes, depending on thickness, until the chicken is cooked through. Add more butter to the pan if needed to keep the chicken moist and promote crisping.
- Broil to Finish: Set your oven to broil and place the chicken under the broiler for 1-2 minutes until the coating is golden brown and crispy. Watch carefully to prevent burning.
- Rest and Serve: Remove the chicken from the oven and let it rest for 2-3 minutes to allow juices to redistribute. Serve immediately for the best crispy texture.
Notes
- You can substitute regular milk for buttermilk, but buttermilk helps tenderize and adds flavor.
- Using a dark or cast iron pan helps achieve a crispier crust compared to a light-colored metal pan.
- Adjust the salt and spices to your taste preferences.
- Baking in batches prevents overcrowding and ensures even crisping.
- Pressing the breading firmly onto the chicken pieces ensures it sticks well and creates a thicker, crunchier coating.
- Keep an eye during broiling to avoid burning due to high heat intensity.
