
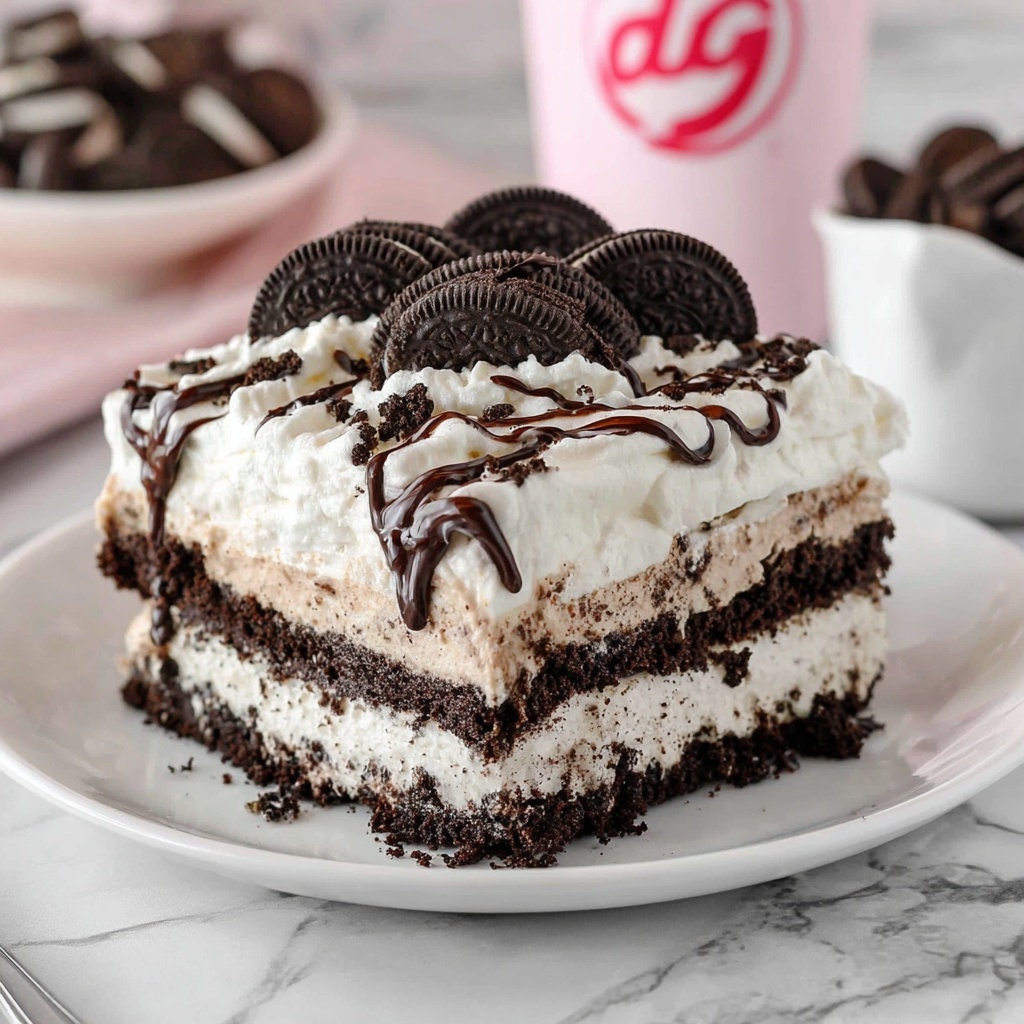
If you have a serious sweet tooth and a love for nostalgic desserts, you are going to adore this Dairy Queen Copycat Oreo Cookie Ice Cream Cake Recipe. It perfectly captures the magic of the classic ice cream cake many of us grew up craving—layers of creamy chocolate and cookies-and-cream ice cream nestled with luscious hot fudge and crunchy Oreo bits. This recipe is like a love letter to frozen treats, combining rich flavors with satisfying textures that will make you feel like you just stepped into your favorite ice cream shop. Whether it’s a birthday celebration or just a spontaneous indulgence, this cake is guaranteed to bring smiles all around.
Ingredients You’ll Need
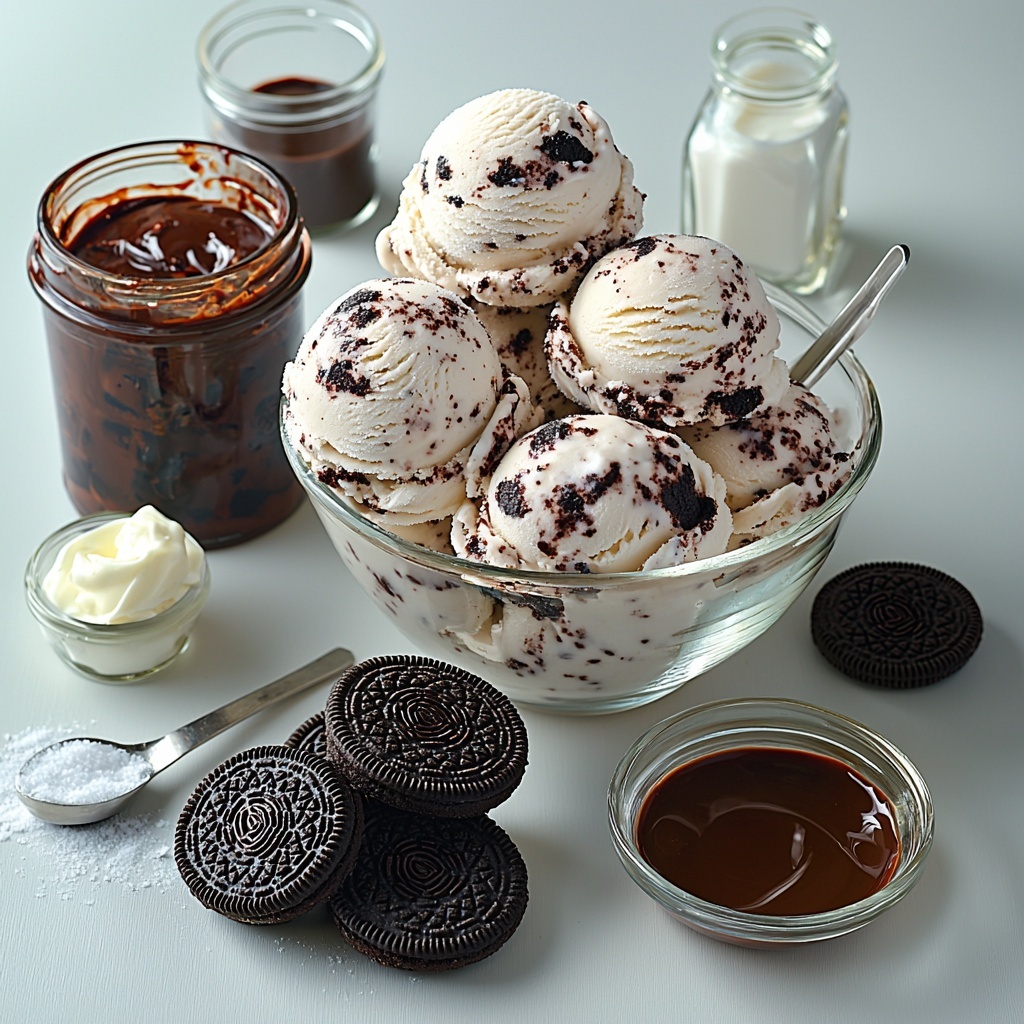
Getting this Dairy Queen Copycat Oreo Cookie Ice Cream Cake Recipe right is all about using simple but impactful ingredients. Each component plays a role in creating the perfect balance of creamy, crunchy, sweet, and rich, making sure every bite is heavenly.
- Chocolate ice cream: The chocolate base adds deep cocoa richness and smooth texture.
- Cookies and cream ice cream: Brings the classic Oreo flavor along with extra creaminess.
- Hot fudge sundae topping: Provides that signature thick, gooey fudgy layer.
- Oreo cookies with filling: Crushed for the crunchy cookie crust and chopped for Oreo bits inside and on top.
- Salted sweet cream butter: Melted to bind the cookie crumbs and add buttery flavor.
- Cold heavy cream: For whipping into light, fluffy frosting to top the cake.
- Powdered sugar: Sweetens and stabilizes the whipped cream frosting.
- Clear vanilla flavoring: Enhances the whipped cream with a subtle vanilla note.
- Chocolate syrup (optional): For an extra drizzle of decadence on top.
How to Make Dairy Queen Copycat Oreo Cookie Ice Cream Cake Recipe
Step 1: Prep the Pan and Cookies
Start by lining a 9-inch springform pan with plastic wrap and freezing it to chill. This helps the cake release easily later. Then crush 25 Oreo cookies into crumbs and stir them with melted butter. Spread this on parchment and bake for about 7-8 minutes to get a subtle toasted cookie crust. Once cooled, break into bite-sized pieces for texture.
Step 2: Soften and Layer Chocolate Ice Cream
Take the chocolate ice cream out to soften so it spreads more easily. Spread half a quart evenly in the springform pan, making sure to cover bottom and sides. Freeze this layer until firm, which helps build the sturdy base for the cake.
Step 3: Add the Hot Fudge Layer
Warm the hot fudge topping slightly in the microwave to soften it just enough for spreading. Layer it evenly over the frozen chocolate ice cream. This fudgy layer adds that gooey, sticky richness that’s absolutely irresistible.
Step 4: Sprinkle Cookie Crumbs and Freeze Again
Sprinkle the baked cookie crumbs over the hot fudge, creating a crunchy contrast to the creamy layers. Freeze the springform pan once more, allowing these layers to set solidly.
Step 5: Mix and Spread Cookies and Cream Ice Cream
As the previous layers chill, take the cookies and cream ice cream out to soften for easier spreading. Fold in 10 chopped Oreo cookies to scatter extra cookie goodness throughout. Spread this mixture over the cookie crumb layer and freeze for several hours or overnight for best results.
Step 6: Whip the Frosting
Chill your mixing bowl to keep the heavy cream cold, then beat it with powdered sugar and clear vanilla until stiff peaks form. This whipped cream frosting will coat the cake with a light, airy finish that balances the dense ice cream layers.
Step 7: Assemble and Frost the Cake
Remove the ice cream cake from the pan carefully using the plastic wrap to lift it out. Frost the top and sides quickly to prevent melting, smoothing with a spatula. Pipe decorative swirls or shells around the edges and add chopped Oreo bits on top for a finishing touch. A drizzle of chocolate syrup seals the deal. Freeze the entire cake until firm before serving.
How to Serve Dairy Queen Copycat Oreo Cookie Ice Cream Cake Recipe
Garnishes
For an extra festive flair, sprinkle crushed Oreos and chocolate shavings on top. You can also add colorful sprinkles or mini chocolate chips. A fresh mint leaf or dollop of extra whipped cream makes each slice look like a masterpiece.
Side Dishes
Pair your ice cream cake with fresh berries for a bright contrast or a small scoop of vanilla bean ice cream to amplify that creamy delight. A hot espresso or a glass of cold milk also complements this dessert beautifully.
Creative Ways to Present
Serve this cake on a chilled plate to keep it firm longer. For parties, slice it into small squares for easy grab-and-go treats, or use clear individual dessert cups with layered cake bits and whipped cream for an elegant twist. Adding colorful napkins or decorative plates makes every serving feel special.
Make Ahead and Storage
Storing Leftovers
Wrap any uneaten ice cream cake tightly in plastic wrap and store it in the coldest part of your freezer. This keeps the flavors fresh and prevents ice crystals from forming.
Freezing
This recipe is perfect for making ahead. After assembling and frosting, keep the cake frozen for up to two weeks without losing texture or taste. Just be sure to wrap it well for protection.
Reheating
While you never want to “reheat” ice cream cake, letting it sit at room temperature for about 10 minutes before slicing softens it just enough to cut cleanly without melting.
FAQs
Can I use different types of ice cream?
Absolutely! While the classic chocolate and cookies-and-cream combo works perfectly, feel free to experiment with flavors like mint chocolate chip or caramel swirl for a fun twist.
What if I don’t have a springform pan?
A regular cake pan lined with parchment paper or plastic wrap can work, just be more careful when removing the cake. Freezing the cake solid helps with easier removal.
How long should I let the ice cream soften before spreading?
Generally, about 15-20 minutes outside the freezer should be enough for spreading easily without melting too much. Keep an eye on the texture to avoid sloppiness.
Can I make this cake without baking the cookie crumbs?
Baking the cookie crumbs adds a toasty flavor and helps bind the crust, but if pressed for time, you can skip this step; the cake will still taste great.
Is there a way to make this recipe dairy-free?
You can try using dairy-free ice creams and whipped toppings, but keep in mind the texture and flavor might vary slightly from the original.
Final Thoughts
There is something so wildly satisfying about this Dairy Queen Copycat Oreo Cookie Ice Cream Cake Recipe that it quickly becomes a household favorite. From the buttery cookie crust to the layers of creamy ice cream and luscious hot fudge, every bite is a celebration. So go ahead, give it a try, and treat yourself and your loved ones to a slice of pure happiness—you deserve it!
Print
Dairy Queen Copycat Oreo Cookie Ice Cream Cake Recipe
- Prep Time: 1 hour
- Cook Time: 8 minutes
- Total Time: 8 hours 30 minutes
- Yield: 12 servings
- Category: Dessert
- Method: Freezing
- Cuisine: American
Description
This Dairy Queen Copycat Oreo Cookie Ice Cream Cake features layers of chocolate and cookies and cream ice cream, a buttery baked Oreo crumb crust, a gooey hot fudge middle, and a luscious whipped cream frosting topped with chopped Oreo cookies and a chocolate syrup drizzle. Perfect for celebrations or indulgent treats, this homemade no-bake ice cream cake combines crunchy textures with creamy ice cream for a delightful dessert experience.
Ingredients
Base and Cookie Layer
- 25 Oreo cookies (crushed)
- ½ cup salted sweet cream butter (melted and cooled)
Ice Cream Layers
- ½ quart chocolate ice cream
- ½ quart cookies and cream ice cream
- 10 Oreo cookies (chopped, divided)
Fudge Layer
- 11.75 ounces hot fudge sundae topping
Whipped Cream Frosting
- 2½ cups cold heavy cream
- 1½ cups powdered sugar
- 2 teaspoons clear vanilla flavoring
Additional
- Chocolate syrup (optional drizzle)
Instructions
- Prepare Pan and Cookie Crust: Line a 9-inch springform pan with plastic wrap and place it in the freezer to chill. Preheat the oven to 350°F and line a baking sheet with parchment paper. In a small bowl, mix the 25 crushed Oreo cookies with melted and cooled butter until fully coated. Spread evenly on the baking sheet and bake for 7-8 minutes. Cool completely, then break into bite-sized pieces.
- Soften Chocolate Ice Cream: Remove chocolate ice cream from the freezer and let it thaw slightly, about 15-20 minutes, to soften for easier spreading.
- Form Chocolate Ice Cream Layer: Spread the softened chocolate ice cream evenly along the bottom and up the sides of the prepared springform pan. Return the pan to the freezer for 30 minutes to 1 hour to firm up.
- Prepare Hot Fudge Layer: Warm the hot fudge in the microwave for 20-25 seconds to soften. Spread it evenly over the chilled chocolate ice cream layer using a spatula.
- Add Cookie Crumble Layer: Sprinkle the baked cookie crumbs over the hot fudge layer evenly. Place the pan back in the freezer for 1 hour.
- Prepare Cookies and Cream Ice Cream Layer: Remove cookies and cream ice cream from the freezer 15-20 minutes before use to soften. Stir in 10 chopped Oreo cookies. Spread this mixture over the cookie crumb layer in the springform pan. Freeze the assembled layers for 4-6 hours or overnight.
- Prepare Whipped Cream Frosting: Chill your mixing bowl in the freezer for 30 minutes before whipping. Beat cold heavy cream, powdered sugar, and clear vanilla flavoring on medium speed until sugar is incorporated, then on high speed until stiff peaks form (about 3-4 minutes). Reserve 1 cup of whipped cream in a piping bag fitted with a star tip for decoration.
- Assemble and Frost Cake: Remove the ice cream cake from the freezer and release the springform pan. Lift the cake out using a cake lifter or sturdy spatula, removing the plastic wrap. Quickly frost the sides and top with the whipped cream using a spatula, refrigerating in 30-minute intervals if needed to keep cool.
- Decorate: Pipe a decorative border around the top edge of the cake with the reserved whipped cream using the piping bag. Sprinkle remaining chopped Oreo cookies on top and drizzle with chocolate syrup, if desired.
- Freeze Before Serving: Return the finished cake to the freezer until ready to slice and serve.
Notes
- Thawing times for ice cream can vary depending on your freezer—adjust as needed to get a spreadable consistency.
- Use a metal mixing bowl for best results when whipping cream, keeping it very cold helps achieve stiff peaks faster.
- Work quickly when frosting to prevent the ice cream cake from melting, use freezer intervals to maintain firmness.
- Springform pan makes cake removal easier—ensure plastic wrap fully lines the pan to avoid sticking.
- The hot fudge layer can be substituted with homemade fudge sauce if preferred.
- Store any leftovers tightly covered in the freezer for up to 5 days for best freshness.


