
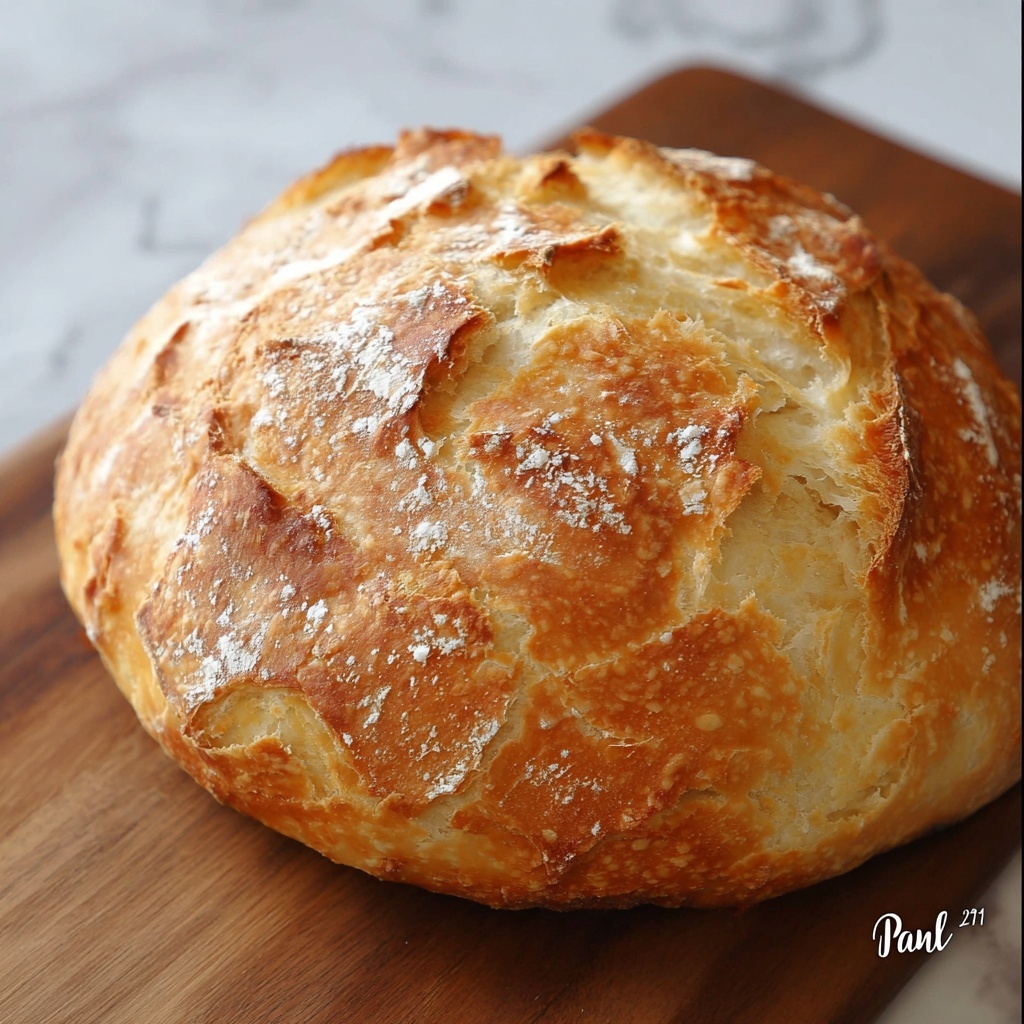
There is something truly magical about baking your own bread, especially when it is as simple and rewarding as this Easy No-Knead Artisan Bread Recipe. Imagine a crusty, golden loaf with a tender, airy crumb that requires barely any hands-on work. This recipe is perfect for anyone who craves the rustic charm and flavor of artisan bread but prefers to skip the kneading hassle. With just a handful of everyday ingredients and a bit of patience, you’ll create bread that tastes like it came straight from a bakery, filling your home with an irresistible aroma and warmth.
Ingredients You’ll Need
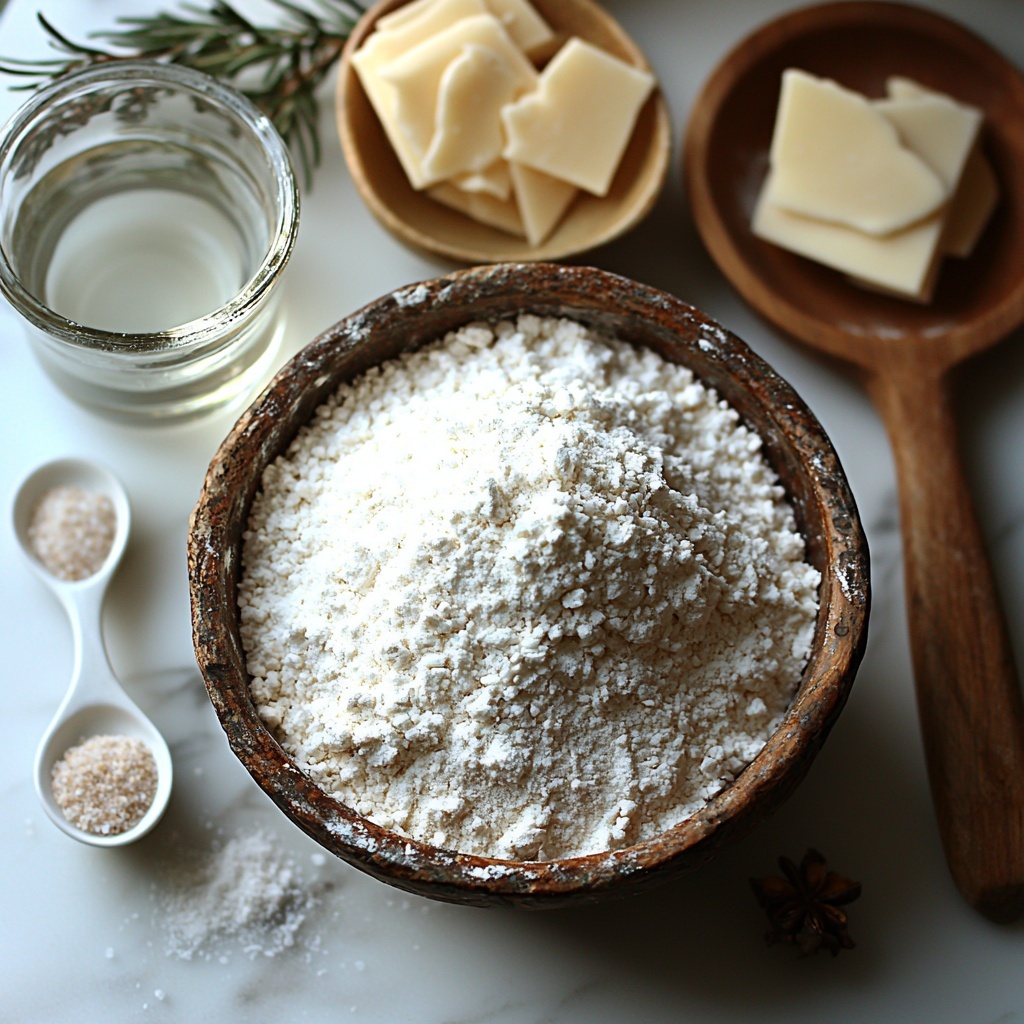
Getting started with this Easy No-Knead Artisan Bread Recipe is a breeze because it calls for a few simple ingredients you likely already have in your pantry. Each element plays a vital role in building the bread’s distinctive flavor and texture, from the tender crumb to the crisp crust.
- 3 cups all-purpose flour: The foundation of the bread that provides structure and a soft crumb.
- 2 teaspoons kosher salt: Enhances flavor and controls yeast activity for a well-balanced taste.
- ½ teaspoon instant yeast (or active dry yeast): Leavens the dough slowly for a light texture without the need for kneading.
- 1 ⅓ cups warm water (about 110 degrees F): Activates the yeast and hydrates the flour to develop the dough’s characteristic stickiness.
How to Make Easy No-Knead Artisan Bread Recipe
Step 1: Mix the Dough
Start by whisking together the flour, kosher salt, and yeast in a large mixing bowl. The even distribution of salt and yeast ensures that your bread rises perfectly and flavors meld beautifully. Then add the warm water and stir everything with a rubber spatula or wooden spoon until you have a sticky dough. This stage is all about combining ingredients—no kneading needed, which is why it’s so perfect for busy days or beginners.
Step 2: Let It Rise
Cover the bowl with plastic wrap or a clean kitchen towel and let the dough rise at room temperature for 4 hours. During this time, the yeast quietly works its magic, creating air pockets that give the bread its airy texture. If you want to slow things down, refrigerate the dough for up to 14 hours—the flexibility makes this Easy No-Knead Artisan Bread Recipe even more convenient.
Step 3: Shape and Rest
Once the dough has risen, gently turn it out onto a floured surface. Shape it delicately into a loose ball so as not to deflate the air bubbles. Dust the top lightly with flour and place it on parchment paper. Cover it with a kitchen towel, allowing it to rest for 30 minutes. This step helps the dough relax and rise just a bit more before baking, improving the final texture.
Step 4: Preheat Your Dutch Oven
While the dough is resting, put a Dutch oven or heavy cast-iron pot with its lid inside your oven and preheat it to 440°F. This preheating step is crucial because baking the dough inside the hot pot mimics a professional steam oven environment, leading to that signature crispy crust.
Step 5: Bake to Perfection
Carefully lift the parchment paper holding the dough and lower it into the hot pot. Cover with the lid and bake for 30 minutes to trap steam and allow the bread to rise fully while forming its crust. Then remove the lid and bake for a few more minutes until golden brown and irresistible. Finally, transfer the loaf to a wire rack to cool. Waiting at least 30 minutes before slicing is worth it—it lets the crumb set beautifully.
How to Serve Easy No-Knead Artisan Bread Recipe
Garnishes
This bread’s rustic character shines without elaborate toppings, but feel free to sprinkle coarse sea salt, fresh herbs like rosemary, or even a drizzle of olive oil over warm slices for an extra burst of flavor. A little garlic butter spread over toasted edges can elevate every bite.
Side Dishes
Easy No-Knead Artisan Bread is a perfect companion to warm soups, vibrant salads, or cheesy dips. Its chewy crust and tender inside stand up wonderfully to robust vegetable stews, creamy butternut squash soup, or a classic tomato basil soup. It’s also fantastic alongside charcuterie boards featuring cured meats and fine cheeses.
Creative Ways to Present
Serve this bread sliced thick alongside shared plates for a casual gathering, or use it as a base for bruschetta topped with fresh tomatoes and basil. For brunch, toast thick slices and top with smashed avocado, a sprinkle of chili flakes, and a squeeze of lemon for a deliciously simple treat. The possibilities are endless with such a versatile loaf.
Make Ahead and Storage
Storing Leftovers
Keep your leftover bread fresh by wrapping it loosely in a clean kitchen towel or storing it in a paper bag at room temperature. This helps maintain the crust’s crispness while preventing the crumb from drying out. Avoid plastic wraps as they trap moisture and can make the crust soggy.
Freezing
To enjoy this Easy No-Knead Artisan Bread Recipe later, slice the cooled loaf and freeze the pieces in a zip-top bag. This way, individual slices can be taken out and thawed or toasted as needed without wasting the entire loaf. Properly frozen, the bread maintains flavor and texture for up to three months.
Reheating
Revive your bread’s fresh-baked charm by warming slices in a toaster or oven. A quick toast or 5-7 minutes at 350°F wrapped loosely in foil will bring back that delightful crust and soft interior, almost like it just came out of the oven again.
FAQs
Do I have to use a Dutch oven for this Easy No-Knead Artisan Bread Recipe?
While a Dutch oven is ideal because it creates steam and an even heat environment, you can bake the bread on a baking stone or heavy baking sheet. Adding a pan of water to the oven will help mimic steam, but the crust and rise may vary slightly.
Can I use whole wheat flour instead of all-purpose flour?
You can substitute part or all of the all-purpose flour with whole wheat flour, but expect a denser loaf. Whole wheat absorbs more water, so you may need to adjust the hydration slightly. The flavor will be heartier and slightly nutty, a lovely variation on this Easy No-Knead Artisan Bread Recipe.
Why does the dough need to rise for so long?
The long rise time allows the yeast to slowly ferment, which develops flavor and creates the bread’s light, airy texture without the need for kneading. It’s a low-effort process that results in a complex, artisan-quality loaf.
Can I add mix-ins like olives or herbs?
Absolutely! Fold in a handful of olives, fresh herbs, or even sun-dried tomatoes during the initial mixing step to customize the bread. Just be mindful to keep the dough sticky but manageable.
What’s the best way to slice this bread?
Use a serrated bread knife and wait until the loaf has cooled completely. Cutting too soon can squash the crumb and result in a gummy texture. A gentle sawing motion will give you clean slices and preserve the bread’s beautiful interior.
Final Thoughts
If you have been hesitant to try your hand at bread baking, this Easy No-Knead Artisan Bread Recipe is your perfect gateway. It combines simplicity with incredible results, delivering bakery-worthy bread without the fuss. Once you taste the crunchy crust and soft crumb, you’ll understand why this recipe quickly becomes a beloved staple. Give it a try—you might just surprise yourself!
Print
Easy No-Knead Artisan Bread Recipe
- Prep Time: 10 minutes
- Cook Time: 30-35 minutes
- Total Time: 4 hours 40 minutes
- Yield: 1 loaf (about 1 pound)
- Category: Bread
- Method: Baking
- Cuisine: American
- Diet: Vegetarian
Description
This Easy No-Knead Artisan Bread recipe offers a simple, hands-off approach to baking a crusty, flavorful loaf with minimal effort. Using basic pantry ingredients and a long, slow rise, it produces an irresistible homemade loaf ideal for sandwiches, toast, or enjoying on its own with butter.
Ingredients
Ingredients
- 3 cups all-purpose flour
- 2 teaspoons kosher salt
- ½ teaspoon instant yeast (or active dry yeast)
- 1 ⅓ cups warm water (about 110°F)
Instructions
- Mix Ingredients: Whisk the flour, salt, and yeast together in a large mixing bowl. Add the warm water and stir with a rubber spatula or wooden spoon until the mixture forms a sticky dough. Cover the bowl and let the dough rise at room temperature for 4 hours. (Alternatively, refrigerate the dough for up to 14 hours.)
- Shape Dough: Turn the dough out onto a floured surface and gently shape it into a ball. Lightly dust the top with flour and place it on a sheet of parchment paper. Cover loosely with a kitchen towel and allow it to rest for 30 minutes.
- Preheat Dutch Oven: While the dough is resting, place a Dutch oven or cast-iron pot with its lid on in the oven and preheat to 440°F.
- Bake with Lid: After the 30-minute rest, uncover the dough and carefully transfer the parchment paper and dough into the preheated pot. Cover with the lid and bake for 30 minutes.
- Bake without Lid: Remove the hot lid carefully and continue baking for another few minutes until the crust turns golden brown. Transfer the bread to a wire rack to cool.
- Cool and Serve: Allow the bread to cool for at least 30 minutes before slicing. Serve fresh and enjoy your homemade artisan bread!
Notes
- You can refrigerate the dough for a slower fermentation, which enhances flavor, for up to 14 hours before baking.
- Use parchment paper to easily transfer the dough into the hot pot without disturbing its shape.
- Be careful when removing the lid from the Dutch oven to avoid steam burns.
- Cooling the bread fully before slicing helps maintain its crumb texture.


