

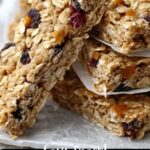
If you’re on the hunt for a wholesome and delicious snack that’s both satisfying and easy to whip up, this Homemade Granola Bars Recipe is exactly what you need. Combining the comforting crunch of toasted oats and nuts with the natural sweetness of honey or maple syrup, these bars are simply irresistible. They offer that perfect blend of chewy and crunchy textures with a rich depth of flavor, making them ideal for breakfast on the go, a midday energy boost, or a cozy treat anytime you crave something homemade and heartwarming.
Ingredients You’ll Need
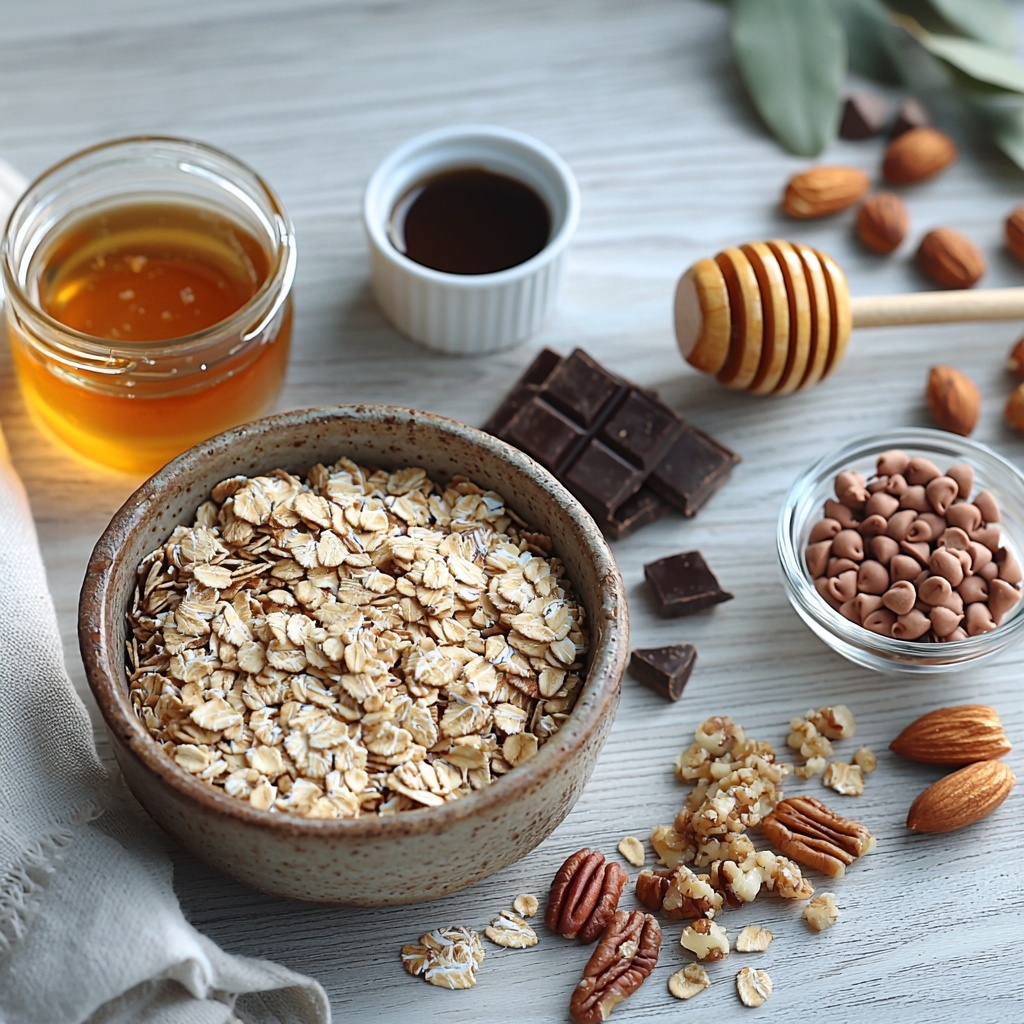
The magic behind these Homemade Granola Bars Recipe lies in its simple but thoughtfully chosen ingredients. Each one plays a vital role in creating that perfect texture and flavor balance—whether it’s the oats for chew, the nuts for crunch, or the sweeteners to bind it all together with delight.
- 2 cups old-fashioned rolled oats: These give your bars their classic chewy texture and wholesome base.
- 1/2 cup chopped nuts: Almonds, pecans, or walnuts add a satisfying crunch and nutty flavor.
- 1/2 cup honey or maple syrup: Natural sweeteners that bring moisture and a touch of caramel-like warmth.
- 1/4 cup unsalted butter, melted: Adds richness and helps bind the ingredients together.
- 1/4 cup brown sugar, packed: Enhances sweetness with a deep, molasses undertone.
- 1 teaspoon vanilla extract: Gives a subtle aromatic lift to the mix.
- 1/4 teaspoon salt: Balances sweetness and enhances overall flavors.
- 1/2 cup chocolate chips (optional): For an indulgent twist that melts into little pockets of joy.
How to Make Homemade Granola Bars Recipe
Step 1: Prepare Your Oven and Pan
Start by preheating your oven to 350°F (175°C). This ensures the cooking environment is just right for toasting and baking. Line a 9×9-inch baking pan with parchment paper, making sure the paper extends over the edges. This clever step makes it easy to lift out your bars without any sticking or crumbling later on.
Step 2: Toast the Oats and Nuts
Spread the oats and chopped nuts evenly over a baking sheet and toast them in your hot oven for about 8-10 minutes. Stir about halfway through so everything browns evenly and releases those inviting nutty aromas. This step is key for enhancing the depth of flavor and adding a delightful crunch to your granola bars.
Step 3: Make the Sweet Binder
While your oats and nuts are toasting, combine the honey or maple syrup, melted butter, brown sugar, vanilla extract, and salt in a small saucepan over medium heat. Heat the mixture until it just starts to bubble, then take it off the heat immediately. This sweet syrup is what brings all the elements together and gives your bars that perfect sticky yet firm texture.
Step 4: Combine and Add Chocolate Chips
Pour the warm honey mixture over the toasted oats and nuts in a large bowl. Add in chocolate chips if you’re using them, then stir until every bit is fully coated. This step ensures each bite is bursting with flavor and that everything sticks together without falling apart.
Step 5: Press the Mixture Into the Pan
Transfer your granola mixture to the parchment-lined pan and press it down firmly and evenly. The more compact you press, the better your bars will hold together once baked. Don’t be shy here—this is what will give you those perfect cuttable bars!
Step 6: Bake Until Golden
Bake your granola bars for 20-25 minutes, keeping an eye on them as the edges turn a gorgeous golden brown. This caramelizes the sugars further and adds that irresistible toasted aroma that will fill your kitchen and have everyone eager to try a piece.
Step 7: Cool and Cut Into Bars
Allow the bars to cool completely in the pan on a wire rack before lifting them out using the parchment paper edges. Cooling is important because it helps the bars set properly, so they don’t crumble when cutting. Once cool, slice them into bars or squares that are perfect for sharing or packing up for later.
How to Serve Homemade Granola Bars Recipe
Garnishes
While these granola bars are perfect on their own, a light drizzle of melted dark chocolate or a sprinkle of sea salt just before serving can elevate them beautifully. You can also sprinkle with chia seeds or flaxseeds for an extra nutritional boost and that added texture pop.
Side Dishes
Pairing your Homemade Granola Bars Recipe with a cup of homemade yogurt topped with fresh berries or a glass of cold almond milk makes for a wholesome snack or light breakfast. The creamy elements complement the chewy bars wonderfully and keep you energized.
Creative Ways to Present
Want to impress friends or just treat yourself? Wrap individual granola bars in parchment paper tied with rustic twine for a charming, homemade gift. Or serve them stacked on a pretty plate alongside fruit skewers for a colorful, nutritious party platter.
Make Ahead and Storage
Storing Leftovers
Once cooled and cut, store your Homemade Granola Bars Recipe in an airtight container at room temperature. They’ll stay fresh for about a week, maintaining that delightful texture and flavor—perfect for quick snacks throughout the week.
Freezing
To keep your bars fresh for longer, you can freeze them. Wrap each bar individually in plastic wrap and place them in a freezer-safe bag or container. They’ll keep for up to three months, making them a fantastic make-ahead option for busy days.
Reheating
If you like your granola bars with a slight warm softness, pop a frozen or refrigerated bar into the microwave for about 15 seconds. It’s a lovely way to enjoy them fresh and soft as if just baked, especially when you add a little spread of nut butter on top.
FAQs
Can I use different nuts in the Homemade Granola Bars Recipe?
Absolutely! Feel free to mix and match your favorite nuts like cashews, pistachios, or hazelnuts. They’ll each bring a unique flavor and texture, so it’s a fun way to customize your bars.
What if I want to make these granola bars vegan?
Simply use maple syrup instead of honey and replace butter with a plant-based margarine or coconut oil. Your bars will still come out deliciously sticky and flavorful.
Can I add dried fruits to the recipe?
Yes, adding chopped dried fruits like cranberries, apricots, or raisins can add a lovely chew and bursts of natural sweetness. Just mix them in after stirring with the honey mixture to keep the texture balanced.
How do I prevent granola bars from falling apart?
Pressing the mixture firmly into the pan before baking and allowing the bars to cool completely before cutting are the keys. Also, make sure to toast the oats and nuts well to develop natural binding qualities.
Is it possible to make this recipe nut-free?
Certainly! Simply omit the nuts and add extra seeds such as pumpkin seeds or sunflower seeds for crunch. This nut-free version remains just as tasty and safe for those with allergies.
Final Thoughts
Making these Homemade Granola Bars Recipe is a rewarding experience that fills your kitchen with wonderful smells and your heart with joy. They are simple to prepare, customizable to your taste, and perfect for anytime snacking. So grab your ingredients and give this recipe a try—you might just find your new favorite go-to treat!
Print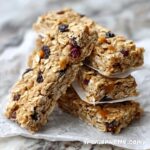
Homemade Granola Bars Recipe
- Prep Time: 10 minutes
- Cook Time: 25 minutes
- Total Time: 35 minutes
- Yield: 12 servings
- Category: Snack
- Method: Baking
- Cuisine: American
- Diet: Vegetarian
Description
These Homemade Granola Bars are an easy-to-make, delightful snack combining toasted oats, nuts, and a sweet honey-butter mixture, with an optional touch of chocolate chips for extra flavor. Perfectly chewy and crunchy, they are great for on-the-go energy or a healthy treat.
Ingredients
Main Ingredients
- 2 cups old-fashioned rolled oats
- 1/2 cup chopped nuts (such as almonds, pecans, or walnuts)
- 1/2 cup honey or maple syrup
- 1/4 cup unsalted butter, melted
- 1/4 cup brown sugar, packed
- 1 teaspoon vanilla extract
- 1/4 teaspoon salt
- 1/2 cup chocolate chips (optional)
Instructions
- Preheat and Prepare Pan: Preheat your oven to 350°F (175°C). Line a 9×9-inch baking pan with parchment paper, leaving an overhang on the sides for easy removal of the granola bars.
- Toast Oats and Nuts: Spread the oats and chopped nuts evenly on a baking sheet. Bake them for 8 to 10 minutes, stirring halfway through to ensure even toasting, until they are lightly golden and fragrant. Remove from oven and transfer to a large mixing bowl.
- Make Honey Mixture: In a small saucepan, combine honey or maple syrup, melted butter, brown sugar, vanilla extract, and salt. Heat the mixture over medium heat until it starts to bubble, then immediately remove it from the heat.
- Combine Ingredients: Pour the warm honey mixture over the toasted oats and nuts. Add chocolate chips if desired, and stir everything together until all ingredients are well coated with the sticky mixture.
- Press Into Pan: Transfer the mixture into the prepared baking pan. Using a spatula or your hands, press the mixture firmly and evenly into the pan to ensure the bars hold together once baked.
- Bake Bars: Bake the mixture for 20 to 25 minutes in the preheated oven, or until the edges turn a golden brown color.
- Cool and Cut: Remove the pan from the oven and allow the granola bars to cool completely on a wire rack. Once cool, lift the bars out using the parchment paper overhang and cut them into bars or squares as desired.
Notes
- Use parchment paper with overhang for easy removal of granola bars from the pan.
- Mix in your favorite nuts or seeds for added texture and flavor.
- For a vegan version, substitute butter with coconut oil and use maple syrup instead of honey.
- Store granola bars in an airtight container at room temperature for up to one week, or freeze for longer storage.
- Ensure bars are completely cooled before cutting to prevent crumbling.
