

“`html
If you’re craving a snack or appetizer that brings irresistible crispiness, rich flavors, and that perfect melty cheese pull, this Loaded Potato Skins Recipe is exactly what you need. Each golden potato skin is packed with sharp cheddar, smoky bacon, and fresh green onions, then finished with a cool dollop of sour cream that makes every bite sing. It’s a classic crowd-pleaser that’s surprisingly simple to prepare yet always leaves everyone asking for more.
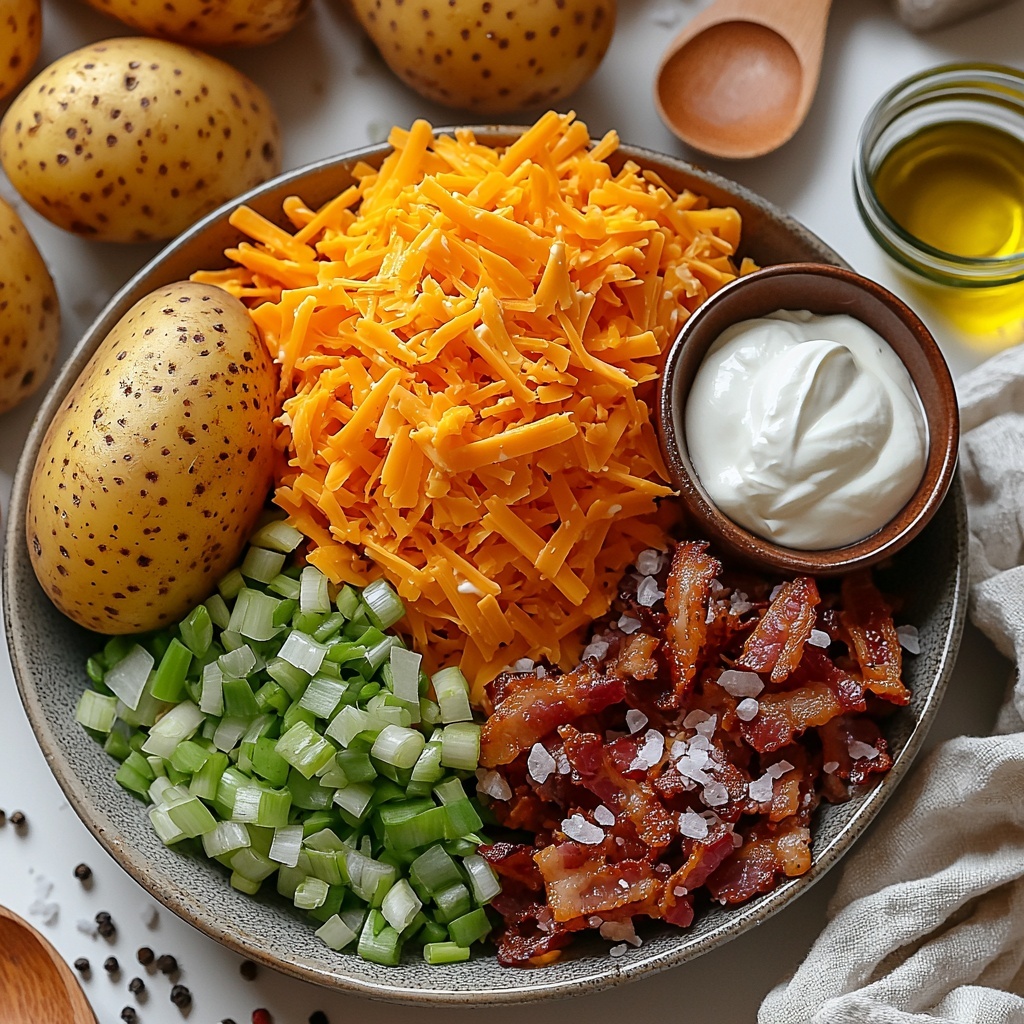
Ingredients You’ll Need
Gathering the right ingredients is key to making the perfect loaded potato skins. Each one plays an important role: the crispy potato skins give texture, sharp cheddar adds intense flavor, and bacon brings smoky goodness to every bite.
- Russet potatoes: Large and starchy, ideal for fluffy interiors and sturdy skins that crisp up beautifully.
- Sharp cheddar cheese: Melts perfectly with a bold, tangy flavor that complements the other toppings.
- Bacon slices: Cooked to crisp perfection, they contribute a smoky crunch that’s essential here.
- Green onions: Chopped fresh to add a burst of color and mild onion flavor.
- Sour cream: A creamy contrast that cools down the richness of cheese and bacon.
- Olive oil: Used to rub on the potatoes and brush the skins for extra crispiness.
- Salt and black pepper: Seasonings that bring out the natural flavors in every part of the dish.
How to Make Loaded Potato Skins Recipe
Step 1: Bake the Potatoes
Start by scrubbing your Russet potatoes clean and poking them a few times with a fork to let steam escape during baking. Rub each potato with olive oil and sprinkle salt generously over the skins to ensure they come out flavorful and crispy. Bake them in a 400°F oven for 45 to 60 minutes until a fork slides easily through and the skins turn golden and inviting.
Step 2: Prepare the Skins
Once the potatoes are cool enough to handle, slice each one lengthwise. Using a spoon, gently scoop out the soft inside flesh while keeping about a quarter-inch layer of potato attached to the skin. This layer is crucial because it lets the skins hold their shape while offering a nice fluffy base for the toppings. Don’t toss the scooped potato—you can save it for mashed potatoes or another recipe!
Step 3: Crisp the Potato Shells
Brush both sides of the hollowed-out potato skins with olive oil to help them crisp up even more. Arrange them skin side up on a baking sheet and pop them into a 450°F oven for 10 minutes. After that, flip them over and bake for another 5 minutes. This extra baking step is what turns the skins irresistibly crunchy and ready to hold your loaded toppings.
Step 4: Add Toppings and Bake
Now comes the fun part—filling each crispy potato skin with shredded sharp cheddar cheese, crumbled crispy bacon, and chopped green onions. Return them to the oven and bake for 5 to 7 minutes until the cheese has melted into gooey perfection, bubbling slightly around the edges. Your Loaded Potato Skins Recipe is almost ready to be devoured!
Step 5: Serve and Garnish
Once they’re out of the oven, top each potato skin with a generous dollop of cool sour cream and a sprinkle of extra green onions or chives for a fresh burst of flavor. Serve these warm to enjoy each bite at its absolute best—crispy, cheesy, smoky, and creamy all at once.
How to Serve Loaded Potato Skins Recipe
Garnishes
Garnishing is more than just decoration—it enhances flavor and adds that extra wow factor when serving. Besides the classic sour cream and green onions, try scattering finely chopped fresh chives, a dusting of smoked paprika, or a few slices of jalapeño for a subtle kick. Even a drizzle of ranch dressing or hot sauce can personalize this dish to your liking.
Side Dishes
While loaded potato skins are quite filling on their own, pairing them with a fresh side can balance the richness. Crisp garden salads, tangy coleslaw, or even a light vegetable soup make wonderful companions. For a party, offer a variety of dipping sauces like spicy ketchup, ranch, or a creamy avocado dip to keep everyone happy.
Creative Ways to Present
You can serve your Loaded Potato Skins Recipe in more than just a simple platter. For a playful twist, place them upright in a muffin tin to keep toppings inside and create a neat presentation. Alternatively, serve them on a rustic wooden board with small bowls of garnishes nearby so guests can customize each bite. Presentation elevates the experience and makes this classic dish feel extra special.
Make Ahead and Storage
Storing Leftovers
If you have any leftover loaded potato skins, store them in an airtight container in the refrigerator for up to 3 days. To maintain the skin’s crispiness, place a paper towel inside the container to absorb moisture. Be sure to let them cool completely before storing to avoid sogginess.
Freezing
To freeze, arrange the potato skins in a single layer on a baking sheet and flash freeze until solid. Then transfer them to a freezer-safe bag or container. Frozen loaded potato skins can be kept for up to 2 months. When ready to enjoy, bake them straight from frozen to preserve the crispy texture and melty toppings.
Reheating
Reheat leftover loaded potato skins in a 375°F oven for about 10 to 15 minutes or until heated through and the skins regain their crispiness. Avoid microwaving as this tends to make the skins soggy and less appetizing. A toaster oven works beautifully too for smaller batches or quick reheating.
FAQs
Can I use other types of potatoes for this recipe?
While Russet potatoes are ideal because of their thick skins and starchy interiors, you can experiment with Yukon Gold or red potatoes. Just keep in mind that skins may be thinner and less crispy, and roasting times might vary slightly.
How do I make loaded potato skins vegetarian?
Simply omit the bacon or swap it for crispy sautéed mushrooms, smoked tempeh, or vegetarian bacon alternatives. The sharp cheddar and green onions still provide bold flavor, so you won’t miss the meat at all.
Can I prepare parts of this recipe in advance?
Absolutely! You can bake and scoop your potato skins ahead of time. Keep them refrigerated, then crisp them up again in the oven just before adding toppings and finishing the bake. This makes entertaining much easier and less stressful.
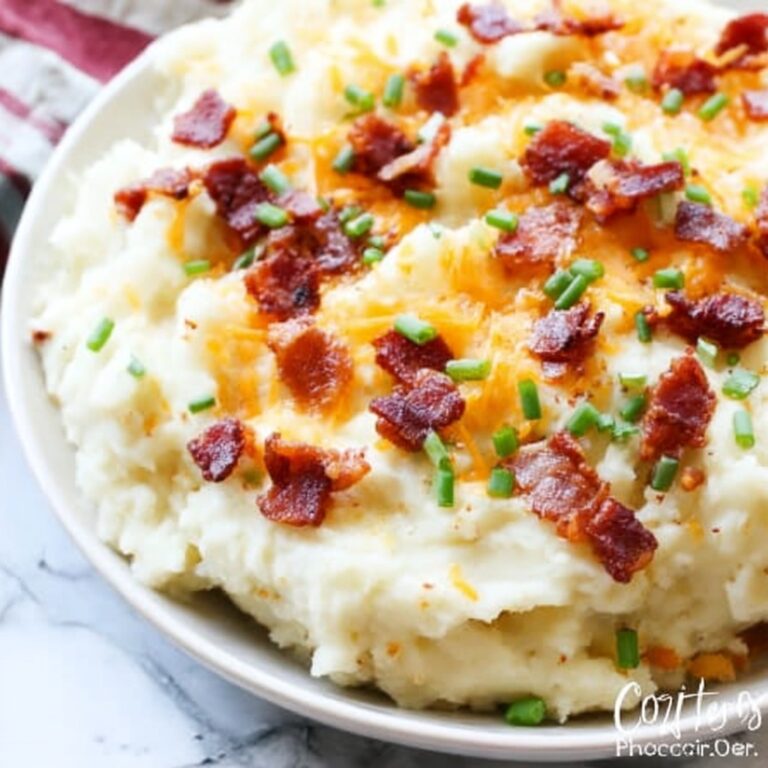
What can I do with the scooped-out potato pulp?
The scooped potato pulp is perfect for mashed potatoes, potato pancakes, or even adding to soups for extra body. It’s a great way to minimize waste and create additional delicious dishes from the same ingredients.
What cheese can I use if I don’t have sharp cheddar?
Cheddar is classic, but feel free to use mozzarella for a milder melt, pepper jack for some spice, or even a combination of cheeses. Just be sure to choose one that melts well and complements the bacon and sour cream toppings.
Final Thoughts
This Loaded Potato Skins Recipe is a total winner for satisfying snack cravings, impressing guests, or simply indulging in something wonderfully comforting. I promise once you try this recipe, it will become one of your favorite go-to dishes to serve anytime you want something crispy, cheesy, and downright delicious. Give it a try—you won’t regret a single bite!
“`
Print
Loaded Potato Skins Recipe
- Prep Time: 10 minutes
- Cook Time: 1 hour 20 minutes
- Total Time: 1 hour 30 minutes
- Yield: 8 servings
- Category: Appetizer
- Method: Baking
- Cuisine: American
Description
Delicious Loaded Potato Skins featuring crispy baked Russet potato shells filled with sharp cheddar cheese, savory bacon, and fresh green onions. Perfectly baked and topped with sour cream, these potato skins make a great appetizer or party snack.
Ingredients
Potatoes
- 4 large Russet potatoes
- 2 tablespoons olive oil
- Salt, to taste
- Black pepper, to taste
Toppings
- 1 1/2 cups shredded sharp cheddar cheese
- 6 slices bacon, cooked and crumbled
- 3 green onions, chopped
- 1/2 cup sour cream, for serving
Instructions
- Bake the Potatoes: Scrub the potatoes clean and pierce them several times with a fork. Rub each potato with olive oil and sprinkle with salt to taste. Place them directly on the oven rack and bake at 400°F (200°C) for 45-60 minutes, or until the potatoes are tender inside and the skins develop a crispy, golden texture.
- Prepare the Skins: When the potatoes are cool enough to handle, slice each one lengthwise. Using a spoon, carefully scoop out the inside flesh, leaving about 1/4 inch of potato to maintain the structure of the skins. Set the scooped potato pulp aside for another use.
- Crisp the Potato Shells: Brush the hollowed potato skins with olive oil on both sides. Arrange them skin side up on a baking sheet. Bake at 450°F (230°C) for 10 minutes, then turn them over and bake for an additional 5 minutes until the skins are extra crispy and golden brown.
- Add Toppings: Fill each crispy potato skin with shredded sharp cheddar cheese, crumbled bacon, and chopped green onions. Return the baking sheet to the oven and bake for 5 to 7 minutes, until the cheese melts thoroughly and becomes bubbly.
- Serve and Garnish: Remove the fully loaded potato skins from the oven. Top each with a dollop of sour cream and garnish with additional chopped green onions or chives if desired. Serve warm and enjoy this flavorful appetizer.
Notes
- For extra flavor, sprinkle a little black pepper or smoked paprika over the cheese before baking.
- The potato pulp can be mashed with butter and herbs for a side dish or added to soups.
- Bacon can be substituted with vegetarian bacon or omitted for a vegetarian version.
- Make sure to leave enough potato flesh on the skins to hold toppings without breaking.
- If you prefer, use a wire rack on the baking sheet when crisping skins to allow even airflow and crispiness.


