
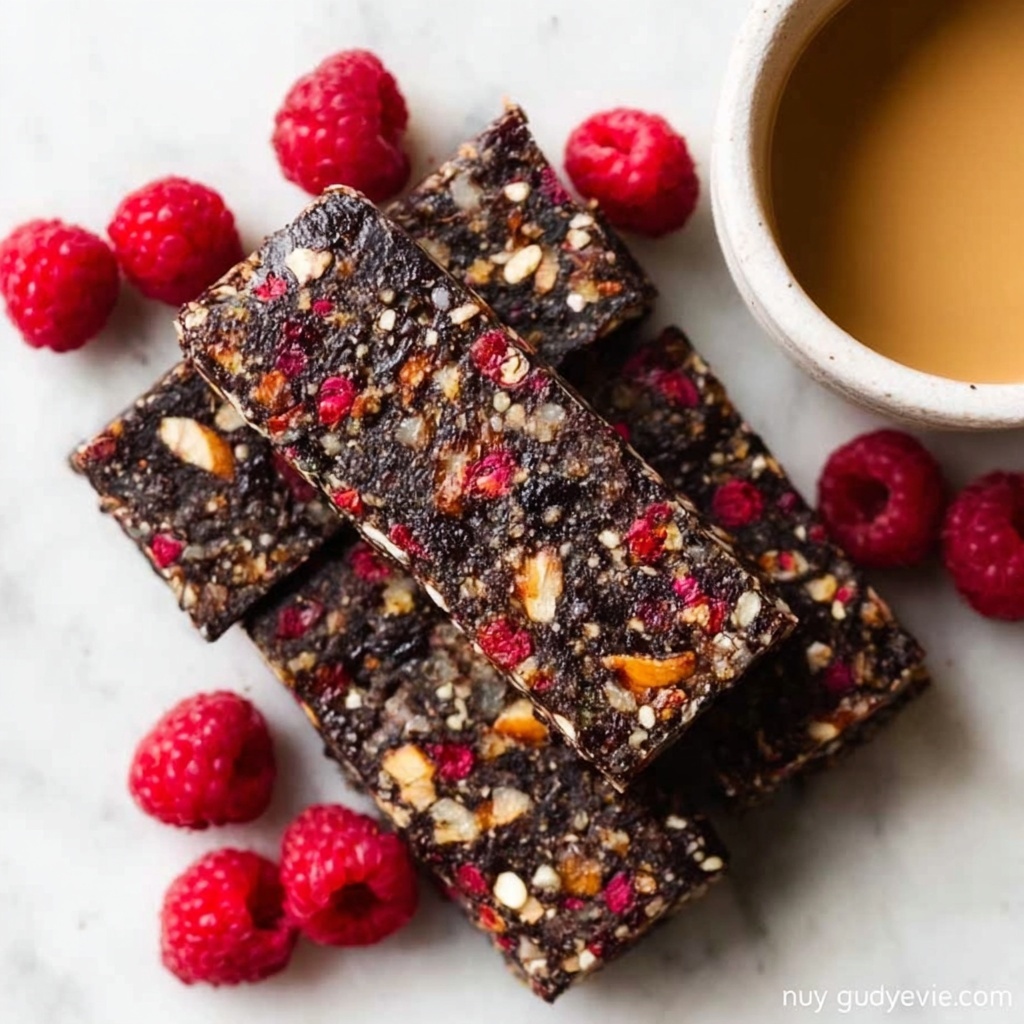
If you’ve ever found yourself craving a quick, healthy snack that fuels your day without needing to turn on the oven, then this No-Bake Chia Seed Energy Bars Recipe is about to become your new best friend. Packed with the perfect balance of wholesome oats, crunchy nuts, and nutrient-rich chia seeds, these bars blend sweetness and texture in a way that makes snacking feel both indulgent and nourishing. They’re effortless to assemble, need zero baking, and come together in just a few simple steps—ideal for busy mornings, afternoon pick-me-ups, or post-workout refueling. Let me take you through every exciting detail of this recipe so you’re ready to whip up these tasty bars whenever the craving strikes!
Ingredients You’ll Need
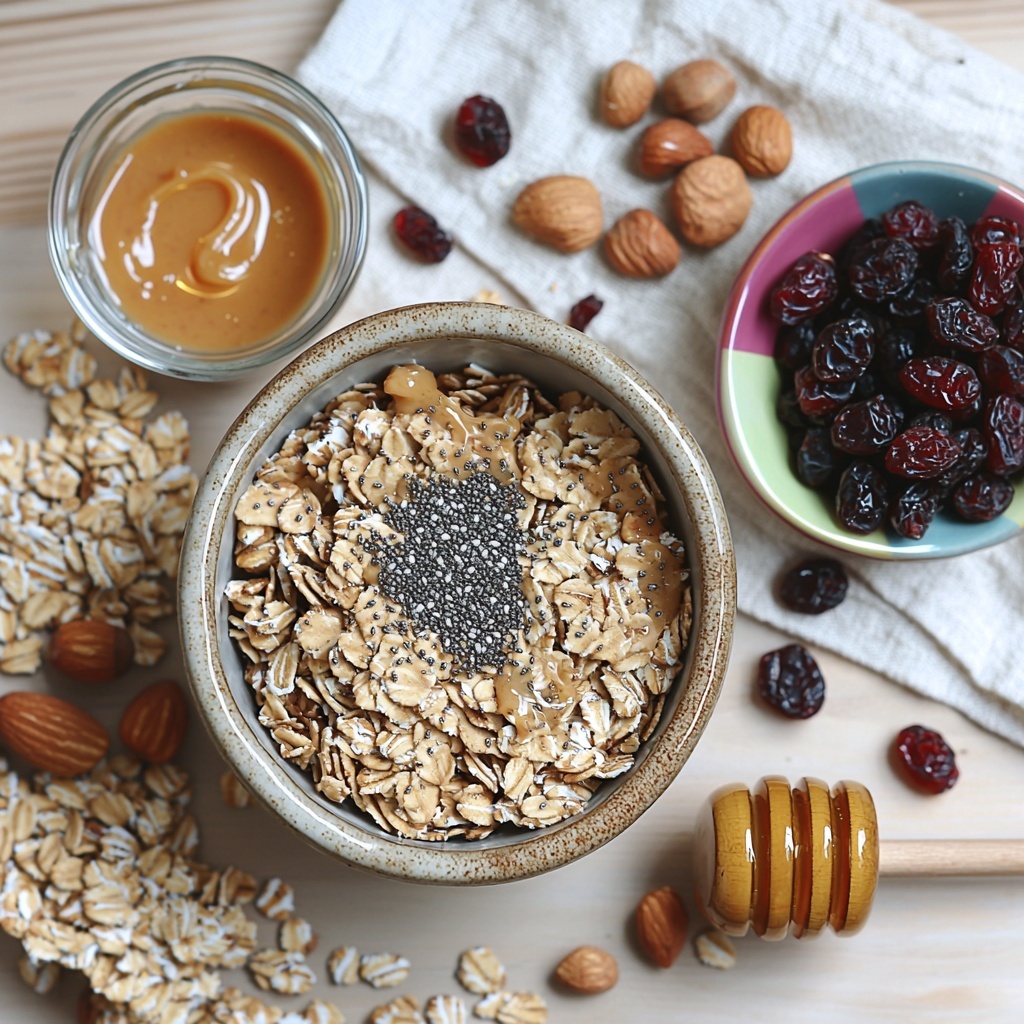
This No-Bake Chia Seed Energy Bars Recipe relies on simple, wholesome ingredients you probably already have at home. Each one plays a key role: some add texture, others bring sweetness or that satisfying chewiness, and together they create a perfect harmony in every bite.
- Rolled oats: The hearty base that provides chewiness and a mild, comforting flavor.
- Chia seeds: Tiny nutritional powerhouses that add crunch and a boost of fiber and omega-3s.
- Peanut butter: Creamy and rich, it binds everything together while adding protein and healthy fats.
- Honey or maple syrup: Natural sweeteners that bring just the right touch of sweetness and help the bars hold their shape.
- Chopped nuts (like almonds or walnuts): Adding a satisfying crunch and earthy flavor that contrasts beautifully with the soft elements.
- Dried fruit (raisins, cranberries, etc.): Little bursts of natural sweetness that make every bite interesting and colorful.
How to Make No-Bake Chia Seed Energy Bars Recipe
Step 1: Mix It All Together
Start by grabbing a large bowl and combining all the ingredients. This is where the magic begins as the rolled oats, chia seeds, nut butter, sweetener, nuts, and dried fruit come together in a lovely sticky, textured mixture. Don’t rush this part—making sure everything is evenly mixed means each energy bar will have that perfect balance of flavors and textures.
Step 2: Press Into a Dish
Once your mixture is ready, line a baking dish with parchment paper to prevent sticking and press the mixture firmly and evenly into the pan. Pressing tightly is key here because it helps the bars hold their shape after chilling. You want them compact without being too dense, so a solid, even pack is best.
Step 3: Chill Until Firm
This part requires a little patience! Pop the dish into the refrigerator and let it chill for at least two hours. As the bars cool, the chia seeds and peanut butter work together to solidify the mixture into a firm, sliceable block. This hands-off step is one of my favorite things about this recipe—minimal effort, maximum payoff.
Step 4: Slice and Enjoy
After chilling, lift the block from the dish using the edges of the parchment paper and place it on a cutting board. Slice it into 12 equal bars or squares, whatever shape suits your snacking style. And there you have it—your homemade energy bars are ready to fuel your day!
How to Serve No-Bake Chia Seed Energy Bars Recipe
Garnishes
While these bars are delicious all on their own, a sprinkle of extra chia seeds or a drizzle of melted dark chocolate can elevate their appeal for special occasions or when you want to treat yourself. A light dusting of cinnamon or a few flakes of shredded coconut on top add a hint of warmth and tropical flair that’s just irresistible.
Side Dishes
Pair your No-Bake Chia Seed Energy Bars with a refreshing smoothie or a warm cup of herbal tea for a balanced snack duo. Fresh fruit slices like apple or banana complement the bars’ nutty sweetness beautifully, making your snack time feel thoughtful and nourishing.
Creative Ways to Present
If you’re packing these bars for a picnic or gifting them to friends, wrap each one individually in parchment paper tied with twine for a charming, rustic look. Alternatively, stack them in a pretty jar or tin layered with wax paper—it’s an eye-catching way to keep them fresh and share your favorite No-Bake Chia Seed Energy Bars Recipe love.
Make Ahead and Storage
Storing Leftovers
These energy bars keep wonderfully in an airtight container at room temperature for up to a week, though I prefer storing them in the fridge to maintain firmness and freshness, especially in warmer climates. Just make sure they’re sealed well so they don’t absorb any stray fridge odors.
Freezing
If you want to prepare a bigger batch, these bars freeze like a dream. Wrap individual bars tightly in plastic wrap and place them in a freezer-safe bag or container. They’ll keep for up to 3 months and can be thawed overnight in the fridge or brought to room temperature before enjoying.
Reheating
Since these bars are meant to be enjoyed chilled or at room temperature, reheating isn’t necessary. If you like them softer, a few seconds in the microwave can help, but be careful—the bars may become too sticky if overheated.
FAQs
Can I use other nut butters instead of peanut butter?
Absolutely! Almond butter, cashew butter, or even sunflower seed butter work beautifully and add their unique flavors, making your bars just as delicious and nutty.
What if I don’t have dried fruit on hand?
If you’re fresh out of dried fruit, try mixing in chocolate chips, seeds like pumpkin or sunflower, or even shredded coconut for added texture and flavor. The bars will still turn out great with those swaps.
Are these bars suitable for vegans?
Yes, they can be vegan if you use maple syrup instead of honey. This swap still keeps the bars perfectly sweet and sticky without compromising taste or texture.
How do chia seeds benefit these energy bars?
Chia seeds add a subtle crunch and are rich in fiber, protein, and omega-3 fatty acids, making these bars more nutritious and helping to keep you full longer. Plus, they absorb moisture and help bind the ingredients together naturally.
Can I add protein powder to these bars?
Definitely! Mixing in a scoop of your favorite protein powder is a great way to boost the bars’ protein content, especially if you’re using them as a post-workout snack. Adjust the wet ingredients slightly if the mixture feels too dry.
Final Thoughts
This No-Bake Chia Seed Energy Bars Recipe has quickly become one of my go-to snacks whenever I need something delicious, wholesome, and fuss-free. It feels so good knowing you’re fueling your body with real ingredients that taste amazing together. I can’t wait for you to try making these bars yourself—they’re genuinely a little gift you can prepare ahead and enjoy anytime you need a quick energy boost. Happy snacking!
Print
No-Bake Chia Seed Energy Bars Recipe
- Prep Time: 10 minutes
- Cook Time: 0 minutes
- Total Time: 2 hours 10 minutes
- Yield: 12 servings
- Category: Snack
- Method: No-Cook
- Cuisine: American
- Diet: Vegetarian
Description
These No-Bake Chia Seed Energy Bars are a quick and nutritious snack, packed with wholesome ingredients like oats, chia seeds, peanut butter, and dried fruits. Perfect for a grab-and-go energy boost, they require minimal preparation and no baking, making them an ideal choice for busy days or a healthy treat between meals.
Ingredients
Dry Ingredients
- 1 cup rolled oats
- 1/2 cup chia seeds
- 1/2 cup chopped nuts (almonds, walnuts, etc.)
- 1/2 cup dried fruit (raisins, cranberries, etc.)
Wet Ingredients
- 1/2 cup peanut butter
- 1/4 cup honey or maple syrup
Instructions
- Combine Ingredients: In a large bowl, mix together rolled oats, chia seeds, chopped nuts, dried fruit, peanut butter, and honey or maple syrup until the mixture is well combined and sticky enough to hold together.
- Press Mixture: Transfer the mixture into a lined baking dish and press it down firmly and evenly to ensure the bars will hold their shape once set.
- Refrigerate: Place the baking dish in the refrigerator and chill for at least 2 hours or until the mixture becomes firm and set.
- Cut and Serve: Once firm, remove from the refrigerator, cut into bars of desired size, and enjoy as a healthy snack or energy boost.
Notes
- For a vegan option, use maple syrup instead of honey.
- Chopped nuts can be substituted with seeds like pumpkin or sunflower seeds for variety.
- Store the bars in an airtight container in the refrigerator to keep them fresh for up to one week.
- You can customize the dried fruit based on your preferences, such as apricots, dates, or figs.