Description
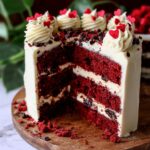
This Red Velvet Chocolate Chip Cake is a decadent and moist layered dessert combining the classic flavors of red velvet and rich chocolate chips, all layered and frosted with creamy homemade cream cheese frosting. Perfect for celebrations, it features three layers of vibrant red velvet cake studded with mini chocolate chips, frosted generously with smooth cream cheese icing and topped with extra chocolate chips for a delightful texture contrast.
Ingredients
Scale
Dry Ingredients
- 3 1/2 cups All-purpose flour
- 1/4 cup Unsweetened cocoa powder (dutch process preferred)
- 2 tsp Baking powder
- 1/2 tsp Baking soda
- 1 tsp Salt
Wet Ingredients
- 1/2 cup Oil (canola or vegetable)
- 1/2 cup Unsalted butter (room temperature)
- 1 3/4 cup White granulated sugar
- 1 tsp Pure vanilla extract
- 1 tsp White vinegar
- 1/3 cup Sour cream (room temperature or Greek yogurt)
- 4 Large eggs (room temperature)
- 1 tsp Red food gel dye (Americolor super red recommended)
- 1 cup Buttermilk (room temperature)
- 1 1/2 cups Mini chocolate chips
Cream Cheese Frosting
- 2 cups Unsalted butter (room temperature)
- 8 oz Cream cheese (room temperature)
- 5 cups Powdered sugar (sifted)
- 1 tsp Pure vanilla extract
- 1/2 cup Mini chocolate chips (for filling and topping)
Instructions
- Preheat and prepare pans: Preheat the oven to 350℉. Spray three 8-inch cake pans with baking nonstick spray. Line the bottoms with parchment paper and spray again to ensure easy removal. Set aside.
- Sift dry ingredients: In a medium bowl, sift together the all-purpose flour, cocoa powder, baking powder, baking soda, and salt. This ensures even mixing and removes lumps. Set aside.
- Beat butter, oil, and sugar: Using a mixer fitted with a large bowl, beat the room temperature butter, oil, and granulated sugar on high speed for 2 minutes. The mixture should lighten in color and become fluffy, which helps create a tender texture in the cake.
- Add wet flavorings and eggs: Add the vanilla extract, white vinegar, sour cream, eggs, and red food gel dye to the butter mixture. Mix on medium speed until all ingredients are well incorporated and the batter is smooth and evenly colored.
- Combine wet and dry ingredients: Add the sifted dry ingredients and buttermilk to the wet mixture. Mix on low speed until just combined; overmixing can toughen the cake. Remove the bowl from the mixer and gently fold in the mini chocolate chips using a spatula for even distribution.
- Divide and bake batter: Evenly divide the batter between the prepared cake pans, smoothing the tops with a spatula to create an even layer. Bake in the preheated oven for 25-30 minutes or until a toothpick inserted into the center comes out clean.
- Cool cakes: Allow the cakes to rest in the pans for 10 minutes after baking. Then, carefully transfer them to a cooling rack and cool completely before frosting.
- Prepare frosting dry ingredients: Sift the powdered sugar in a large bowl to remove lumps and set aside.
- Beat butter and cream cheese: In a separate large bowl, beat the unsalted butter on high speed for 2 minutes until creamy. Scrape down the bowl sides then add the room temperature cream cheese. Beat on high for 1-2 minutes until smooth and lump-free.
- Incorporate powdered sugar and vanilla: Add half of the sifted powdered sugar to the butter and cream cheese mixture, mixing on low until nearly combined. Add the rest of the powdered sugar and mix on low speed again. Then add the vanilla extract and beat on high speed until the frosting is fluffy and creamy.
- Assemble the cake layers: Place a small dollop of frosting on your working surface to secure the first cake layer. Place the first cake layer down, then spread about 1 cup of frosting evenly over its surface. Sprinkle 1/3 cup mini chocolate chips over the frosting for added texture.
- Layer second and third cakes: Repeat the frosting and chocolate chip filling on the second layer. For the third layer, invert it so the bottom faces up for a flat surface on top of the cake.
- Apply crumb coat and chill: Apply a thin layer of frosting over the entire cake to seal in crumbs. Place the cake in the freezer for 15 minutes to allow this crumb coat to set and firm up.
- Final frosting and decoration: Frost the cake fully with the remaining frosting, smoothing the surface. Finish by sprinkling mini chocolate chips all over the top of the cake for decoration and extra chocolate flavor.
Notes
- Ensure all refrigerated ingredients such as eggs, sour cream, and buttermilk are at room temperature to achieve a smooth batter and proper rise.
- Use dutch process cocoa powder for a deeper chocolate flavor and vibrant red color.
- Red food gel dye provides a more intense color than liquid dyes without thinning the batter.
- Chilling the cake after crumb coating helps to create a professional-looking finish when frosting the cake fully.
- The mini chocolate chips add delightful texture and chocolate bursts inside the cake and as decoration.
- Store leftovers covered in the refrigerator for up to 4 days and bring to room temperature before serving.
- For best results, use three 8-inch pans to create even layers; alternatively, bake in batches if fewer pans are available.