
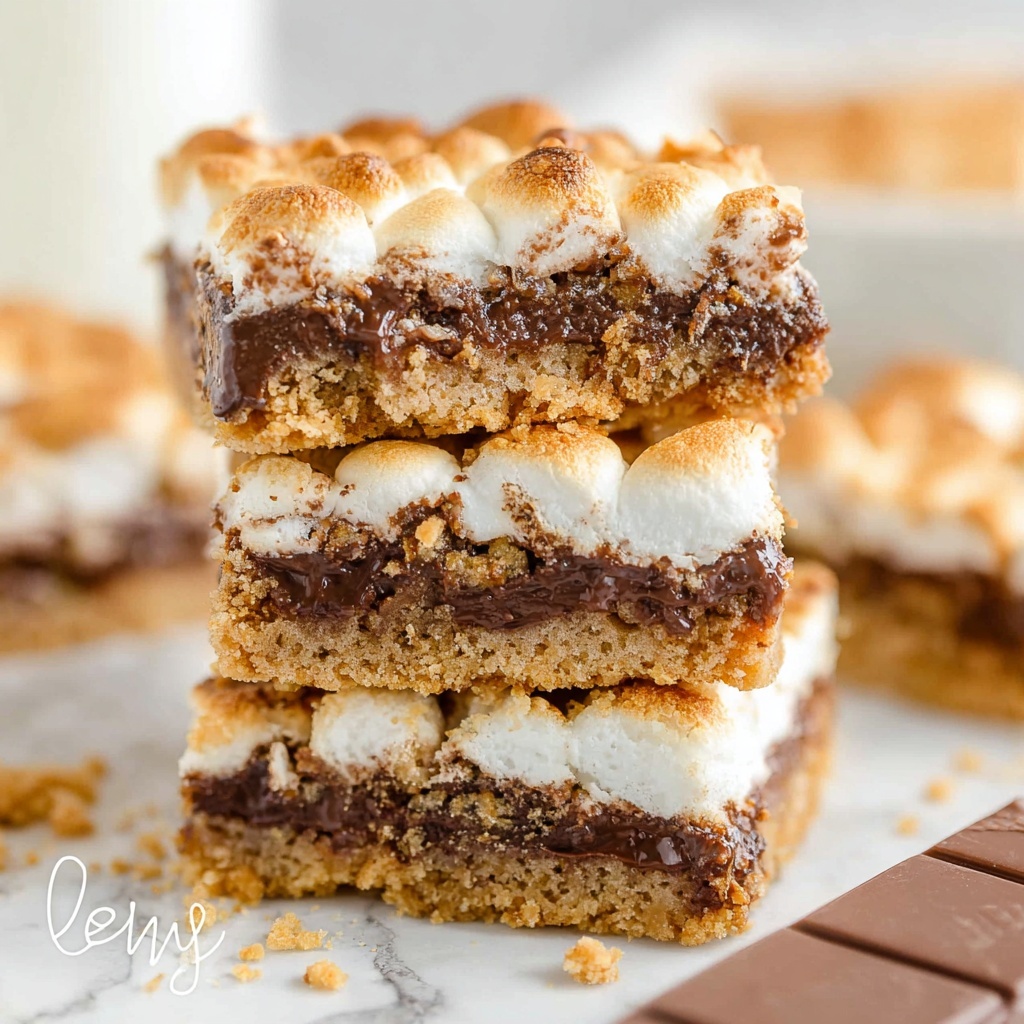
If there’s one dessert that instantly sparks joy and nostalgic smiles, it’s this delightful S’mores Bar Recipe. It’s like capturing the magic of a campfire treat, all baked into a convenient and sharable tray. With a buttery graham cracker crust, melting layers of smooth Hershey’s chocolate, and perfectly toasted mini marshmallows on top, every bite is a heavenly mix of crunchy, gooey, and sweet. Trust me, once you try this, it will quickly become your go-to for cozy nights or gatherings that call for a little indulgence and a lot of smiles.
Ingredients You’ll Need
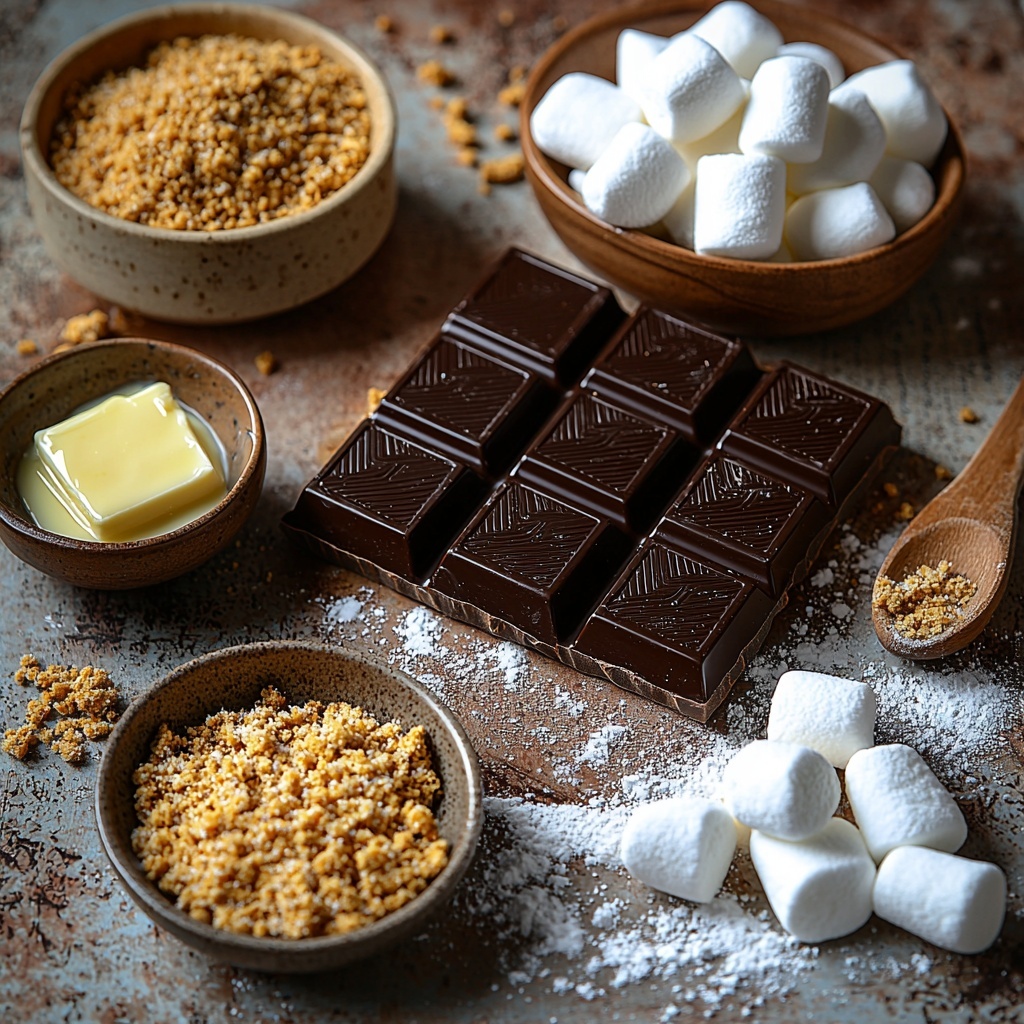
These ingredients are simple staples you might already have in your pantry, but each plays a crucial role in creating that iconic s’mores flavor and texture. The balance between crunchy, creamy, and toasty elements is what makes this recipe shine.
- 2 Cups graham cracker crumbs: This is your base and adds that essential crispy, slightly sweet foundation for the bars.
- 8-12 Tablespoons butter (melted): Melted butter helps bind the graham cracker crumbs and creates a rich, golden crust.
- 1/2 Cup powdered sugar: Adds a subtle sweetness to the crust and helps with texture.
- 4 Hershey Chocolate Bars (4.4 ounce each): The classic milk chocolate that melts perfectly over the crust for creamy, luscious goodness.
- 1 package mini marshmallows: These give that iconic toasted marshmallow top, adding softness, chewiness, and a beautiful golden finish.
How to Make S’mores Bar Recipe
Step 1: Prepare the Crust
Start by preheating your oven to 350 degrees and greasing a 9×13 inch pan with non-stick butter spray for easy removal later. Mix the graham cracker crumbs, powdered sugar, and melted butter in a medium bowl until everything is well combined. This mixture forms the deliciously crunchy base of your s’mores bars. Press the mixture firmly and evenly into the bottom and sides of your prepared pan. This step “packs” the crust tightly, giving you that perfect sturdy yet crumbly texture after baking.
Step 2: Bake the Crust
Pop the crust into the oven for about 5 to 8 minutes or until you notice the edges just starting to turn golden brown. This short bake helps the crust set so it won’t crumble apart when you cut the bars later. Once baked, remove and let it cool a bit – the crust will continue to harden as it cools, which is key to handling the next layers.
Step 3: Add the Chocolate Layer
Lay the Hershey chocolate bars across the warm crust, covering as much surface as you can. Return the pan to the oven for about 3 minutes, just until the chocolate starts to melt and look shiny. This creates a smooth, melty layer too good to resist.
Step 4: Time for the Marshmallows
After letting the chocolate layer cool for a minute or two, it’s time to top it off with mini marshmallows. Pack them closely side-by-side to create a solid cloud of gooey sweetness. Then, switch your oven setting to broil and place the pan inside. Now here’s the tricky part: watch them carefully! The marshmallows need just about 2 minutes to toast golden brown. Don’t walk away or they might burn or even catch fire. Once they’re perfectly toasted, take the pan out.
Step 5: Final Cooling and Cutting
Let the bars cool completely before cutting. For an even better cut, pop the pan in the refrigerator so the marshmallow sets nicely, making it easier to slice through the sticky layers. Use a sharp knife warmed under hot water and dried off before slicing to prevent the goo from sticking to your knife. Repeat warming the knife if needed for clean cuts!
How to Serve S’mores Bar Recipe
Garnishes
Enhance your bars with a sprinkle of crushed graham crackers or a drizzle of chocolate ganache for an extra touch of indulgence. A light dusting of powdered sugar before serving adds a pretty finish that also ups the sweetness just a bit.
Side Dishes
Pairing your s’mores bars with a scoop of vanilla ice cream creates a dreamy combo of warm and cold sensations that everyone will love. Fresh berries or a simple fruit salad can offer a refreshing contrast to the richness of the bars.
Creative Ways to Present
Consider serving your s’mores bars on a rustic wooden board alongside some small bowls of extra marshmallows and chocolate chips for guests to customize their own bites. For parties, cut the bars into bite-sized squares and serve with small dessert forks for easy sharing and no mess.
Make Ahead and Storage
Storing Leftovers
Your s’mores bars can be stored in an airtight container at room temperature for up to 2 days. If your kitchen is warm, it’s best to keep them in the fridge to avoid sticky melting, but allow them to come back to room temperature before serving for the best texture.
Freezing
These bars freeze beautifully! Wrap them well in plastic wrap and then foil for protection, and freeze for up to 2 months. When you’re ready to indulge, thaw them overnight in the refrigerator and let come to room temperature before serving.
Reheating
If your s’mores bars have cooled too much and lost their gooey charm, warm them gently in the oven at 300 degrees for about 5 minutes or until the chocolate and marshmallows soften again. Just keep an eye on them to avoid burning the marshmallows.
FAQs
Can I use dark chocolate instead of Hershey’s milk chocolate bars?
Absolutely! Dark chocolate adds a richer, slightly less sweet flavor that pairs wonderfully with the marshmallows and crust. Just use the same amount and follow the recipe as usual.
What’s the best way to get perfectly toasted marshmallows on top without burning them?
The key is setting your oven to broil and watching the marshmallows closely, as they toast very quickly. It’s best to stay right there in front of the oven to pull them out the moment they turn a golden brown to avoid any burnt spots.
Can I make these bars gluten-free?
Yes! Simply substitute the graham cracker crumbs with gluten-free graham crackers or an alternative gluten-free cookie crumb. The rest of the recipe remains the same.
Is there a vegan way to make this S’mores Bar Recipe?
You can try vegan graham crackers, dairy-free butter, vegan chocolate, and vegan marshmallows, although the taste will be a bit different. There are several excellent vegan marshmallow brands available now that melt nicely for this recipe.
How do I keep my bars from getting too sticky?
Chilling the bars after baking helps the marshmallows set and become less sticky. Also, using a warm knife when slicing prevents the goo from sticking to your blade and makes cutting much easier.
Final Thoughts
This S’mores Bar Recipe captures everything we love about the classic campfire treat but in a hassle-free, oven-baked form that’s ideal for sharing. Whether you’re making it for kids, friends, or just yourself on a cozy night, these bars bring a happy, nostalgic sweetness to any moment. Go ahead and give it a try — I promise it will be a delicious highlight that everyone asks for again and again.
Print
S’mores Bar Recipe
- Prep Time: 10 minutes
- Cook Time: 15 minutes
- Total Time: 25 minutes
- Yield: 16 servings
- Category: Dessert
- Method: Baking
- Cuisine: American
Description
This delightful S’mores Bar Recipe combines a buttery graham cracker crust, melted Hershey’s chocolate bars, and toasted mini marshmallows to replicate the classic campfire treat in an easy-to-make dessert bar. Perfect for sharing, these bars offer a gooey, sweet indulgence that requires minimal preparation and baking time.
Ingredients
Crust Ingredients
- 2 Cups graham cracker crumbs
- 8–12 Tablespoons butter, melted
- 1/2 Cup powdered sugar
Layer Ingredients
- 4 Hershey Chocolate Bars (4.4 ounce each)
- 1 package mini marshmallows
Instructions
- Preheat oven: Preheat your oven to 350 degrees Fahrenheit to prepare for baking the crust.
- Prepare baking pan: Grease a 9×13 inch pan with non-stick butter spray to prevent sticking.
- Mix crust ingredients: In a medium bowl, combine graham cracker crumbs, powdered sugar, and melted butter. Stir with a spoon until evenly mixed to form the crust mixture.
- Press crust into pan: Evenly distribute the crust mixture into the baking pan. Use your fingers to press it firmly and pack it along the bottom and sides to create a solid base.
- Bake crust: Bake the crust in the oven for 5-8 minutes until the edges turn lightly golden brown. Remove and allow it to cool, noting that the crust will harden as it cools.
- Layer chocolate: Lay the Hershey’s chocolate bars on top of the cooled crust, covering the entire surface as much as possible.
- Melt chocolate: Return the pan to the oven at 350°F for about 3 minutes, or until the chocolate just starts to melt and becomes shiny.
- Cool briefly: Let the pan cool for 1-2 minutes to prevent the chocolate from running.
- Add marshmallows: Arrange mini marshmallows closely packed on top of the melted chocolate layer.
- Broil marshmallows: Switch your oven to the broil setting. Place the pan on the top rack and watch carefully for about 2 minutes until the marshmallows begin to brown and toast—do not leave unattended as they can burn quickly.
- Cool completely: Remove from oven and allow the bars to cool completely. For easier cutting, refrigerate the bars after the initial cooling to help them set.
- Serve: Use a sharp knife warmed under hot water and dried to cut the bars. Repeat warming the knife if it becomes sticky. Serve and enjoy your gooey S’mores bars!
Notes
- When mixing the crust, using melted butter is crucial to bind the graham cracker crumbs and powdered sugar together properly for a sturdy crust.
- Watch the marshmallows closely under the broiler to avoid burning; broiling time may vary depending on your oven’s strength.
- Refrigerating the bars after cooling helps the layers set and makes cutting easier.
- Use a sharp knife heated with hot water to cut through sticky layers neatly; clean knife between cuts if needed.


