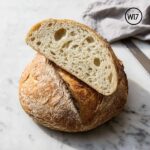
Description
This classic sourdough bread recipe guides you through the process of creating a deliciously tangy, crusty loaf with an airy crumb. Using a natural sourdough starter, the recipe employs techniques like stretches and folds, bulk fermentation, and cold proofing to develop flavor and texture. Baked in a Dutch oven, the bread yields a golden crust and tender inside perfect for sandwiches or enjoying plain.
Ingredients
Scale
Sourdough Starter
- 50 to 100 grams ripe bubbly active starter (¼ cup to ½ cup; typically 100 grams)
Main Dough
- 350 to 375 grams warm water (375 grams preferred; less in humid weather)
- 500 grams bread flour (or all-purpose flour; approx. 4 cups plus 2 tbsp; King Arthur Bread Flour recommended)
- 10 to 12 grams fine sea salt (pink Himalayan sea salt preferred)
Instructions
- Feed Your Starter: If your starter was refrigerated, take it out the night before and feed it. Feed again a few hours before making the dough, ensuring it doubles in size and is bubbly before use.
- Make The Dough: In a large mixing bowl, combine the active starter with warm water and salt, stirring well. Add the bread flour and mix until you have a wet, sticky dough fully combined. Cover with a damp towel and let rest 30 minutes at room temperature.
- Stretches and Folds: Using a wet hand, pull one corner of the dough and fold it toward the center, rotating the bowl around to repeat this 4-5 times, shaping the dough into a ball. Let rest covered for 30 minutes. Repeat this process 3 more times every 30 minutes for a total of 2 hours; twice is acceptable if pressed for time.
- Rest (Bulk Fermentation): Cover the dough and let it rise for 6-7 hours at room temperature (or 8-9 hours in cooler temps) until it increases by 50-70% in volume, jiggles when shaken, with visible bubbles.
- Pre-shape: Turn the dough onto a lightly floured surface. Fold the top of the dough down to the center, rotate, and continue until a round shape forms, creating surface tension by tucking edges under if using a bench scraper.
- Bench Rest: Flip the dough ball over and let it rest 30 minutes. Then, gently pull the edges to tighten the ball, rotating to form a tight, smooth round.
- Shaping: Prepare a proofing basket or bowl by dusting generously with flour or lining with a floured towel. Fold the dough edges down to the center in a circular manner, place dough smooth side down into the basket, and cover with plastic wrap, a shower cap, or towel.
- Cold Fermentation: Refrigerate the dough overnight or up to 24 hours for a lighter crumb. Alternatively, proof at room temperature for 1-2 hours until puffed if baking the same day.
- Baking Preparation: Preheat the oven to 450°F. Cut a piece of parchment paper to fit your Dutch oven.
- Transfer Dough: Carefully turn the dough out onto the parchment paper using a plate or bowl to assist without deflating it.
- Score the Dough: Using a sharp blade or lame, score the top of the dough with a simple ‘X’ or desired pattern to allow for expansion.
- Bake Covered: Transfer the dough with parchment paper into the preheated Dutch oven, cover with the lid, and bake at 450°F for 30 minutes.
- Bake Uncovered: Remove the lid, reduce oven temperature to 400°F, and continue baking uncovered for 20-30 minutes until the crust is deep golden brown and the bread sounds hollow when tapped or reaches an internal temperature of 205–210°F.
- Cool: Remove bread from the Dutch oven, transfer to a wire rack, and cool for at least 1 hour before slicing to allow the crumb to set.
Notes
- The amount of active starter and water can be adjusted slightly depending on humidity and flour type for optimal hydration.
- Stretches and folds build gluten structure without kneading; be gentle but consistent.
- Cold fermentation overnight enhances flavor and creates a lighter crumb.
- Using a Dutch oven traps steam, which develops a crisp crust.
- Ensure the bread is fully cooled before slicing to avoid a gummy texture.
- If you don’t have a proofing basket, a floured bowl with a towel works well.